
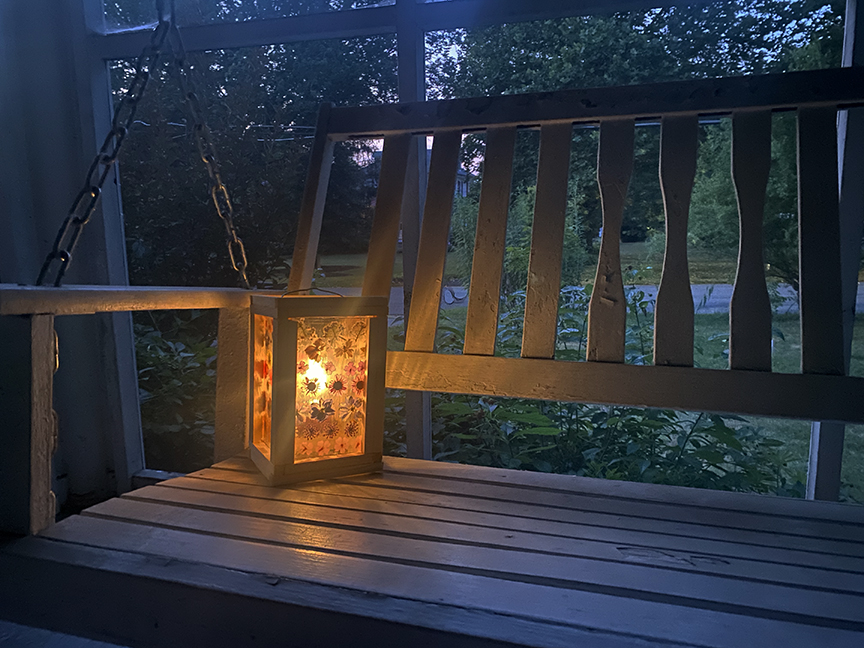
I don’t think it’s any secret that I love making lanterns, I have tons of lantern projects on this site and am constantly trying to think of new and different ways to make them. They have however, all been fall or winter lanterns until now. This hasn’t really been intentional. I just seem to gravitate towards lantern and candle projects in the dark half of the year. But as I was planing my Midsummer’s Eve Party, I knew I wanted to make a summer lantern. Flowers seemed like the obvious choice, and I decided on a wooden frame, but I wanted something that really made it a summer lantern. I found a solar powered light bulb and it all come together. This lantern doesn’t just look summery, it is literally powered by the sun!
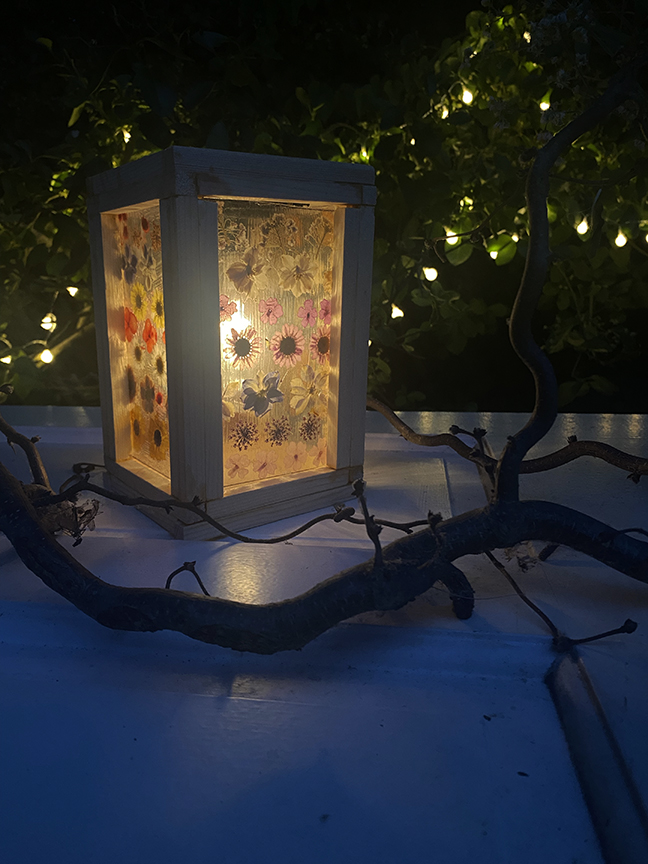
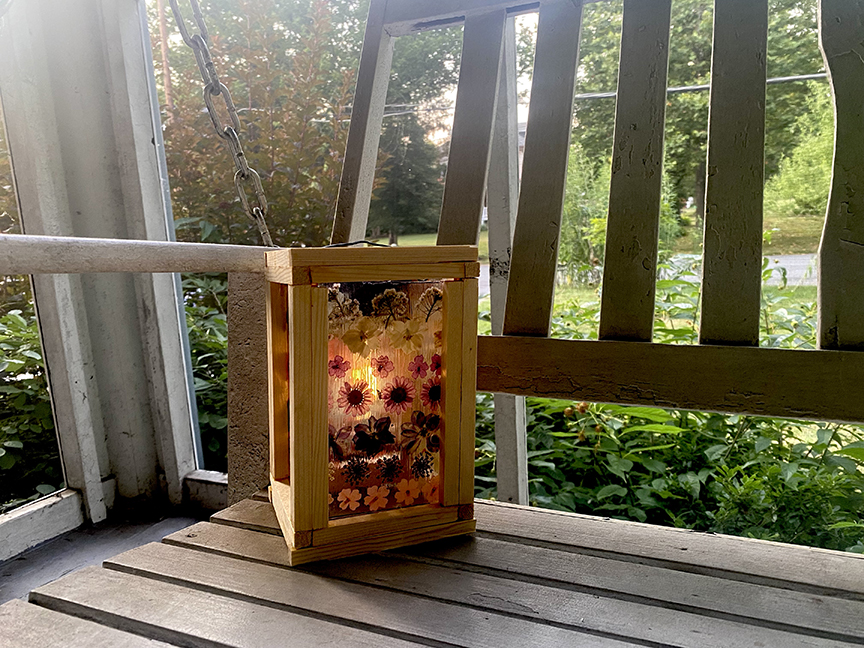
The solar powered light bulb is key for this project, if you are mechanically inclined you could rig one yourself with a small panel, but they are inexpensive and effective so I didn’t mess with it. The panel charges all day and then automatically turns on when it gets dark– I definitely had a moment when I thought they didn’t work, but it just wasn’t dark enough. I constructed these lanterns with recycled plastic panels and a wooden frame, in part because I haven’t made a wooden frame lantern tutorial yet. You could simplify the project somewhat by using a large jar and attaching the flowers directly to the jar. If you go that route secure the bulb with wire over the mouth of the jar. If you are game, the wooden frame is pretty simple and I used soft easy to cut wood. In fact, I cut it all by hand with a branch saw because I wanted to make sure it would work. It does! I was picturing a mosaic when I placed my flowers, but you could also space them out more. Either way you will find yourself with a stunning lantern that harnesses the power of the sun!
Materials:
- 4 large pieces of recycled plastic (like from a greens container or the top of a large fruit clamshell)
- dried flowers
- mod podge or white glue
- solar powered light bulb
- 15-20 12″ 1/4″ or 1/2″ square dowels (pictured is 1/2″ if you prefer a more delicate looking frame go with 1/4″)
- wood glue
- branch saw
- hot glue
- foam brush
- small screw eyes
Method:
Measure and cut all four of your plastic pieces to the same size. Basically make them as large as you are able while making them all the same size and rectangular. I cut my pieces to 7 1/4″ x 4 1/4″. am going to include measurements for that size, but you can adjust for any size. The size of your plastic panels will determine the size you need to cut the wood.
Using the foam brush, paint a thin layer of mod podge or white glue on one of the panels. Arrange the dried flowers face down. (The smooth side will face out on the finished lantern.) Allow to dry and then paint another layer over the top to seal the flowers in. Repeat with all 4 panels.
Now build the frame. I designed this for simplicity of cuts, feel free to improvise. Based on my panel dimensions I cut 8 pieces that were 4 3/8″, 8 pieces that were 5 1/4″ and 12 pieces at 6 1/2″. You want to make sure that your opening size (in this case 3 3/8 x 6 1/2″) is smaller than your panel so it doesn’t fall through.
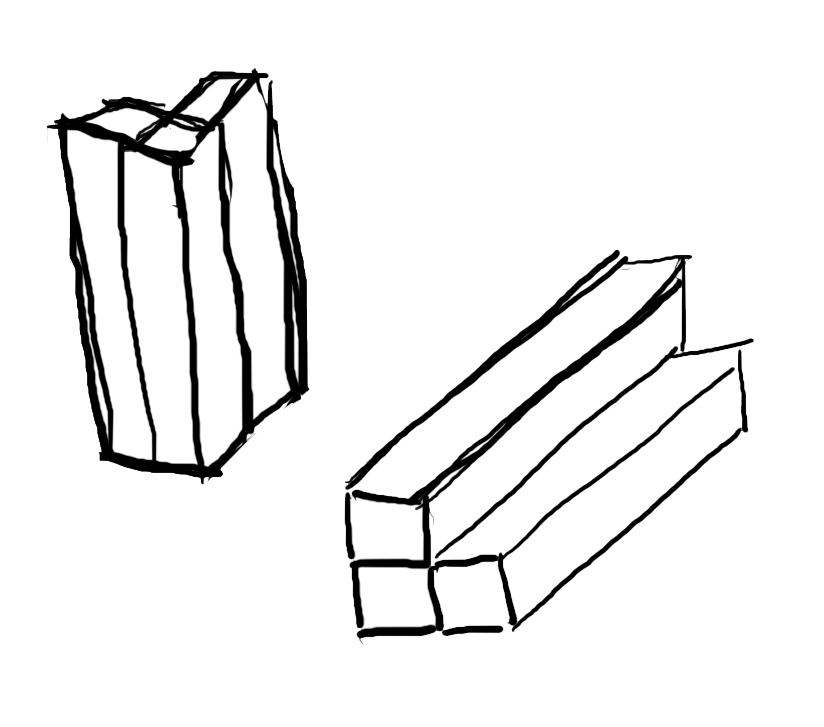
Start with the 6 1/2″ pieces which are the vertical supports. Use the wood glue to arrange them into 4 L shaped pieces, these are the corners. This whole lantern is very lightweight and the wood is quite thin, so we are only using wood glue to hold it together. (Nails or screws would just split the wood) It’s also too small to effectiveky use clamps unless you have some speciality equipment, so just glue it let it set up before moving it again and all will be well.
Next, make two squares for the top and two squares for the base. Each square will have two of the longer pieces and two of teh shorter pieces. glue the top and bottom pieces together. Allow to dry

To finish the top and the base, you will glue the two squares together to make a thicker piece. Glue two squares for teh top and two for the base.
Attach the L shaped corners onto the base and then glue the top in place. press everything into place well and then allow to dry completely.

Once the frame is completely dry, run a thin bead of hot glue around the edge of the first panel and then fir into the frame. (After first doing a dry fit of course!) Repeat with all 4 panels. The last one will be a little tricly to get you hand in– use a stick or something to press the edges down if you can’t reach it safely. Don’t burn yourself!

Last attach two screw eyes into the wood and hook the loops of the light bulb into them. I found I needed to make them slightly off center to get the bulb to hang straight. You can use needle nose pliers to crimp the screw eyes shut if desired. Make sure the bulb is switched to the on position and place in the sun.
Enjoy your lantern!
[…] some Solar Lanterns to light up the […]