Next up in middle grade book buds, is a modern nature school classic– The Wild Robot. I have been reading a ton of middle grade books lately, but would love to hear your suggestions for more book buds! Middle grade books are substantially longer, so I have broken the middle grade book buds into a lesson, a craft or two, and a snack. All are driven by the themes and ideas in the respective book. These could be the jumping off point for a more in depth academic book study, or just a fun project to further immerse yourself in the worlds of your favorite books!
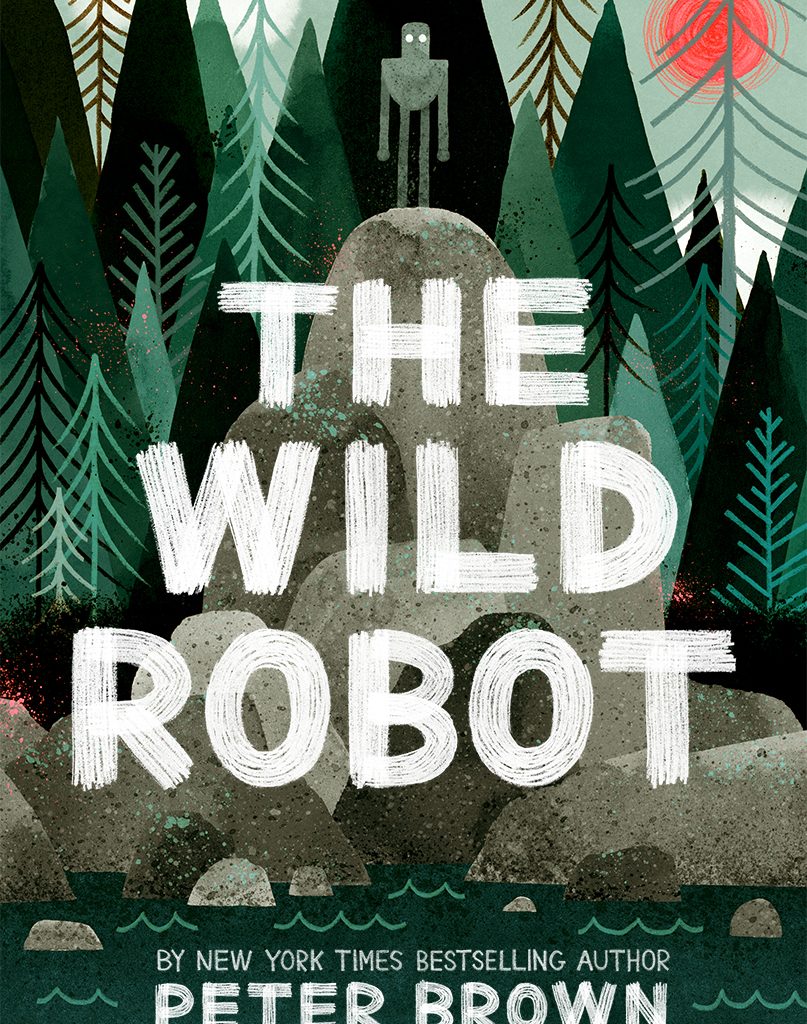
The Wild Robot
Written & Illustrated by: Peter Brown
The Wild Robot has quickly become a classic amongst the nature school crowd. It does make a great read aloud for younger friends, and has very short chapters which is really nice as a tired adult reading aloud, but there are some scary parts and some death so know your audience. There was recently a movie adaption made and while it is super cute, true to my indie hipster roots, I have to say the book is better. It’s also longer and there are three of them so you can stay in the Wild Robot world that much longer. I also need to shout out the illustrations, also done by Brown, because they are stellar which is hard to do in black and white and I think they add a lot to the book. The cover of the first book seems to have been changed to the movie version which is a shame, the boxed set, however still has the original cover. Anyway, if you have been living under a rock, this a book about a robot that gets stranded on a remote island and befriends the animals there. It’s a lovely look into nature and deals with some tough emotions as well. My kids love it, I love it, and it’s worth a read. (I will caution however that I tried to read this to my kids when they were too young and they got scared, so make sure that they are old enough to enjoy it before reading it)
Forest School
“‘I’ve built my fair share of lodges over the years.’ Mr Beaver stood at the water’s edge. ‘But I can’t say I’ve ever built one for a robot and a gosling. So, what exactly do you need?'” pg 30
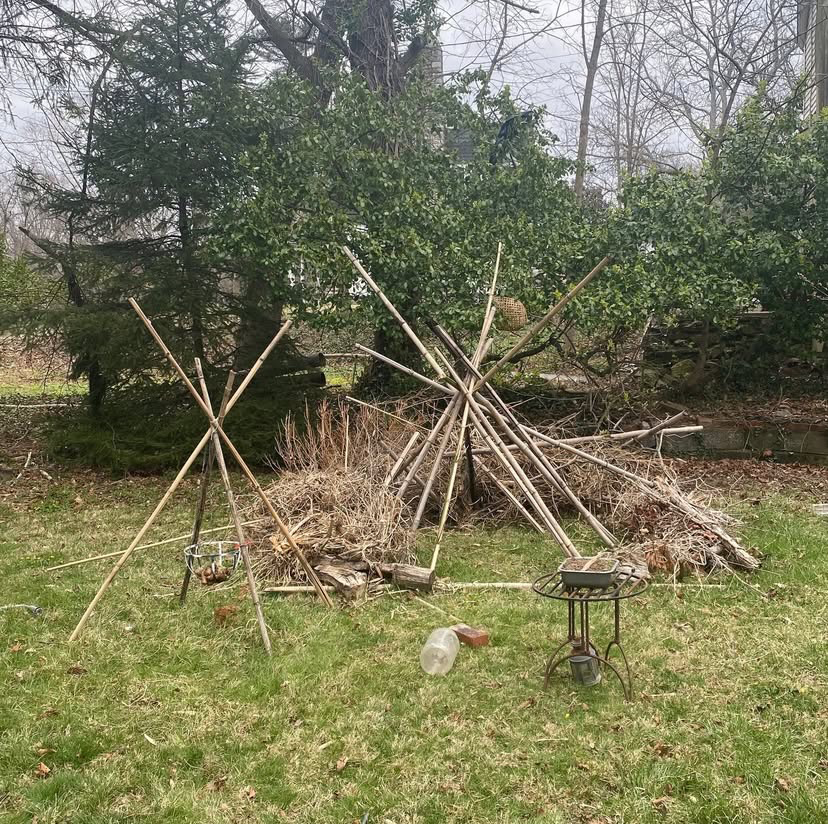
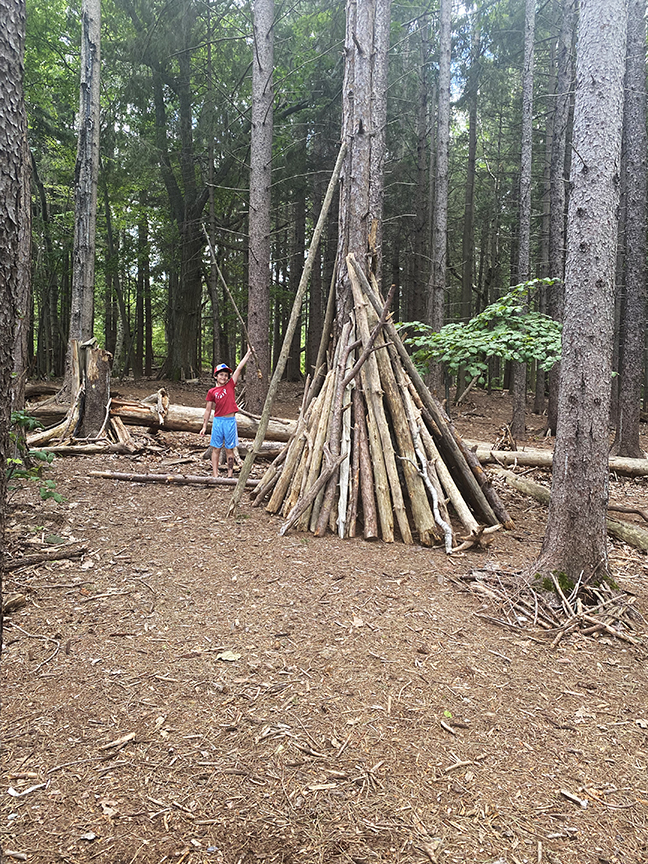
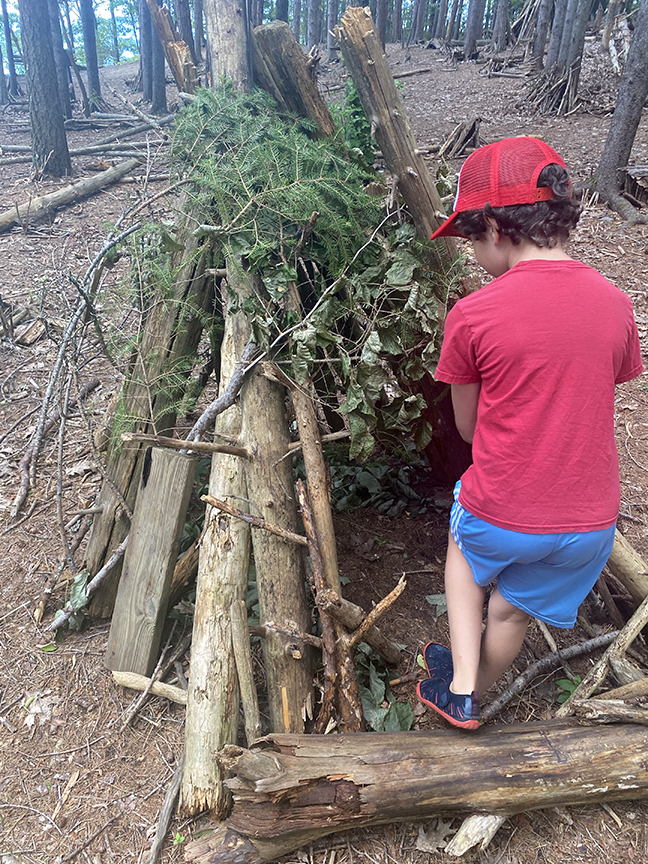
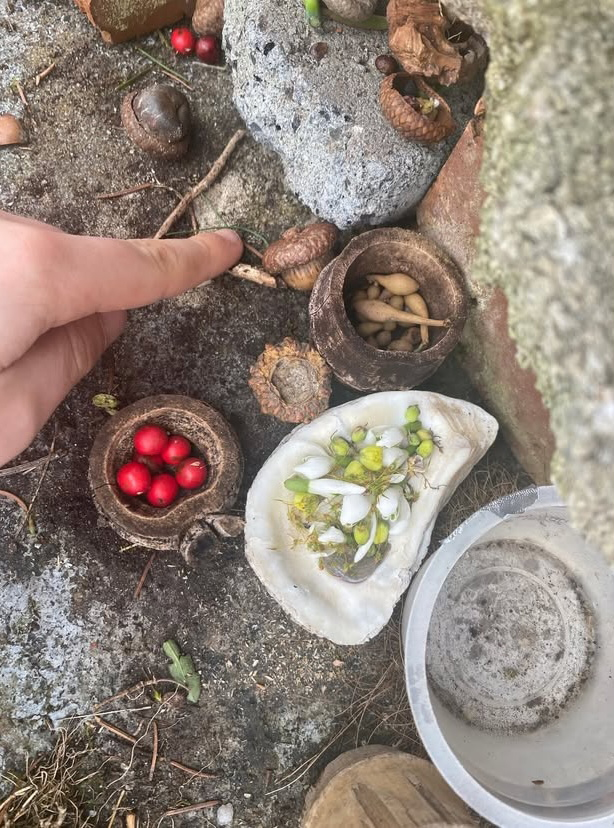
Of course I am going to suggest a lesson about shelters!! What self respecting forest school doesn’t build shelters?? There are a few main ways to incorporate shelter building into learning. The simplest is of course to stick pretty close to the book and the shelters that Roz built. She was, of course inspired by the beavers, and as it turns out a whole lot of human design is in fact inspired by nature, especially various types of shelters. I have taught many weeks long units on this subject and it’s one of my favorites, but I’ll try and and stick to the basics here.
- Don’t prep anything. Go to the woods and see what you find. This isn’t a fancy photo for social. You don’t need to assemble materials. You can bring some twine and clippers if you want.
- Let age group and interest influence what direction you go– young kids or not much time to work on this project? Just build some cool structures of their choosing in the woods and call it a day. Older kids or an experienced group? Lean into the animal inspiration and/or go big.
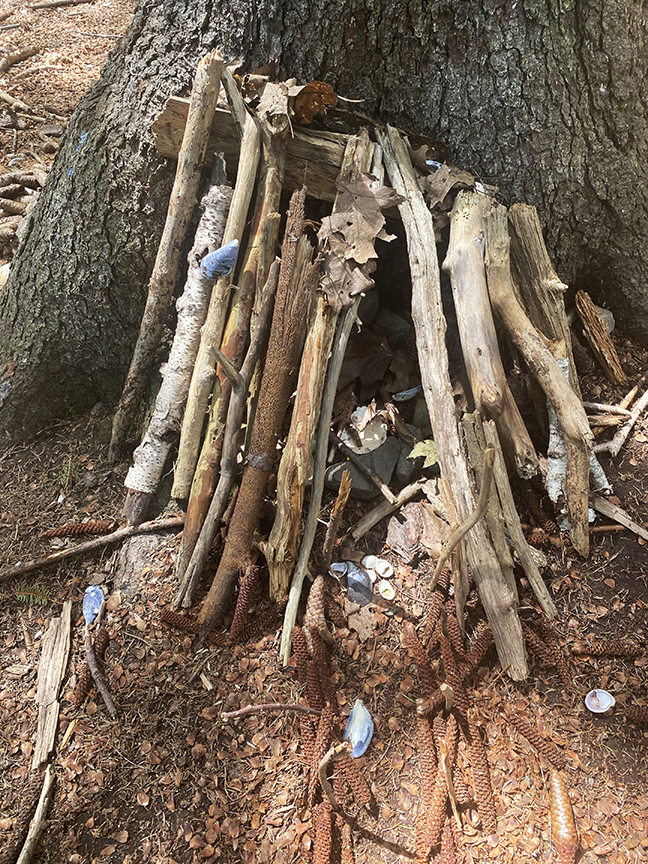
- Scale: you can build human size structures, toy size, or scale shelters for a specific animal at a specific size.
- One fun way to approach this is to choose animals and research their needs ahead of time. Kids can then build a shelter for their “client” based on it’s specific needs and scale.
- Parameters and constraints: this is a great way to keep kids from being overwhelmed with choice. It can also increase or decrease the difficulty as needed. (You can also differentiate this way.) Try challenging them to make a shelter that doesn’t let in rain, or holds x number of people. Restrict the area where materials can be gathered or the type of material. Scale, environmental impact, tools, and animal needs are examples of other possible constraints.
- Animal homes: Instead of building shelters for people or toys, you can also try your hand at building structures meant for animals to actually use, like toad houses or insect hotels.
- When working with younger kids or with less time, I like to build fairy houses or “toy scale” structures. If you have some animal toys you can build for specific animals.
- Don’t rush to help. Stuff is going to collapse and there are going to be problems. Encourage kids to work through issues and think creatively about ways to fix it rather than giving them a solution. They will often surprise you with a better solution than you would have thought of. (The exception here is safety, no one should be inside a structure that isn’t safe.)
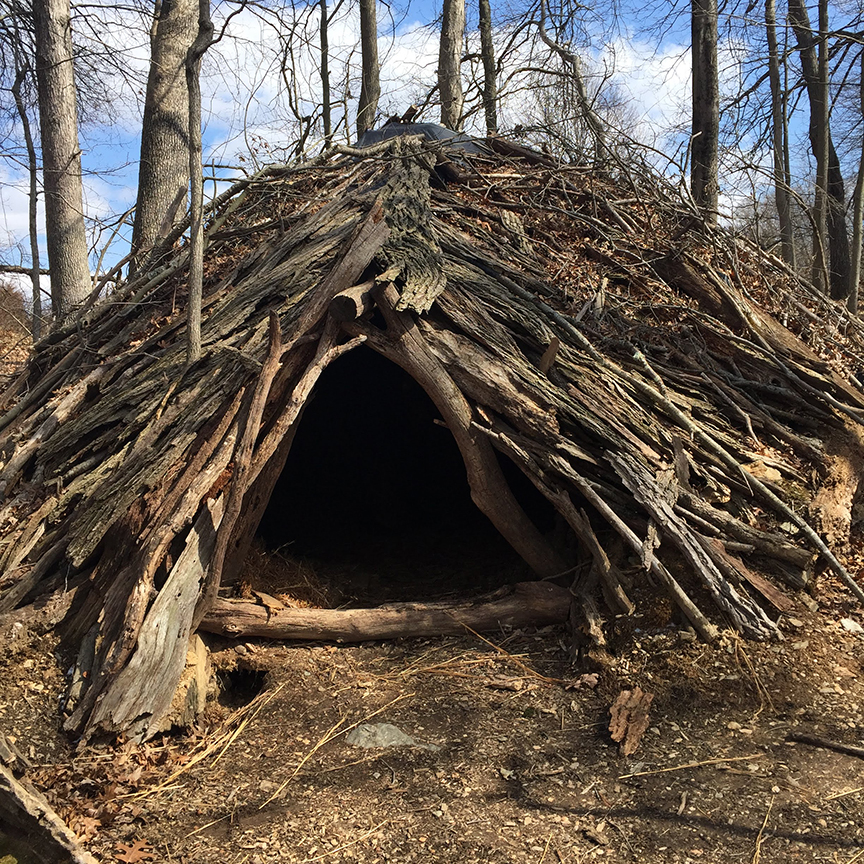
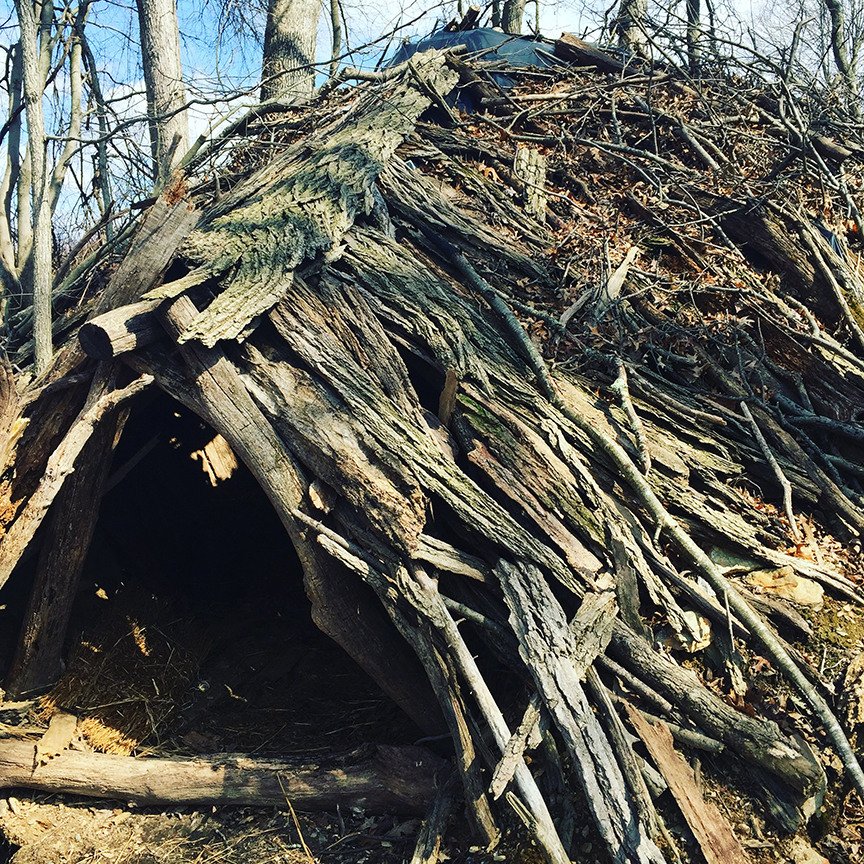
- My header image is a structure I like to do with less experienced groups– there is a folding table under the sticks so that there is no worry of collapse when kids are inside. It’s a good human scale beginner project.
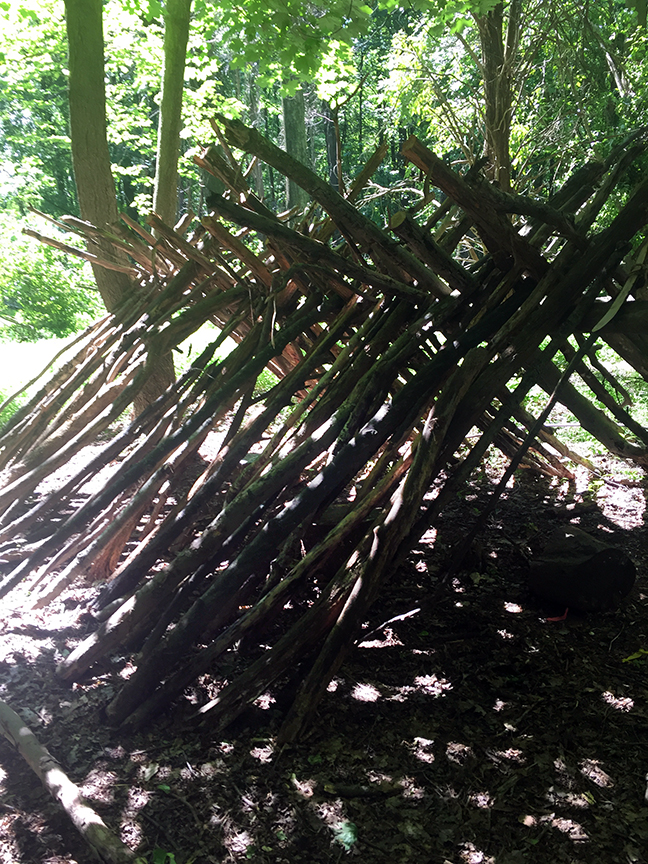
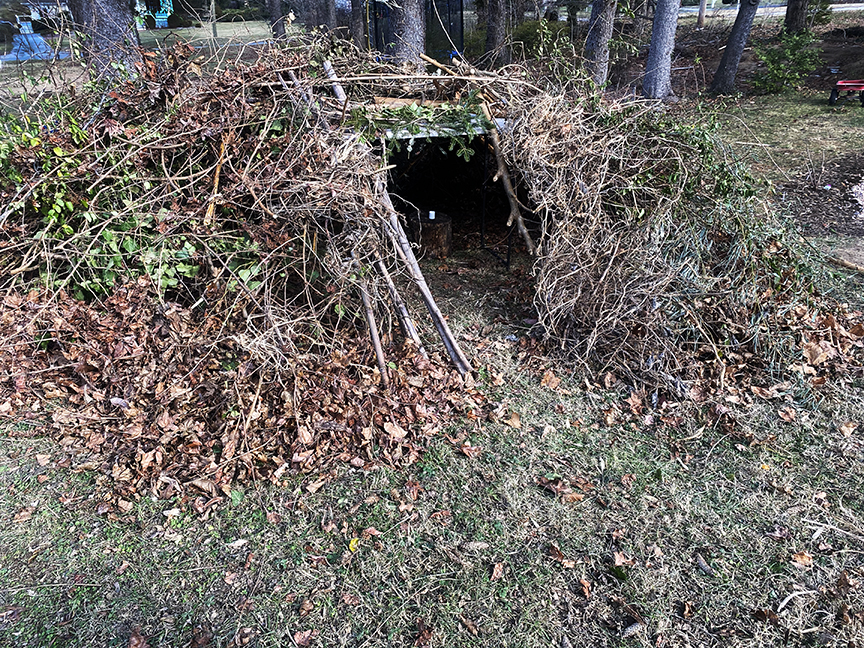
Another interesting angle to take with this project is to look at human made survival shelters. This is a big part of bushcraft and survival skills training which I always find play well with the tween and middle grade set. The image below is an incredible debris hut built with students. These structures are designed to keep human bodies warm in survival situations. Interestingly they are modeled after squirrel dreys.
Last, but not least, human architecture and design in frequently inspired by nature. There are ton of great books about this subject and this is a great way to extend the learning. It’s really fascinating stuff and a more direct connection to engineering and design.
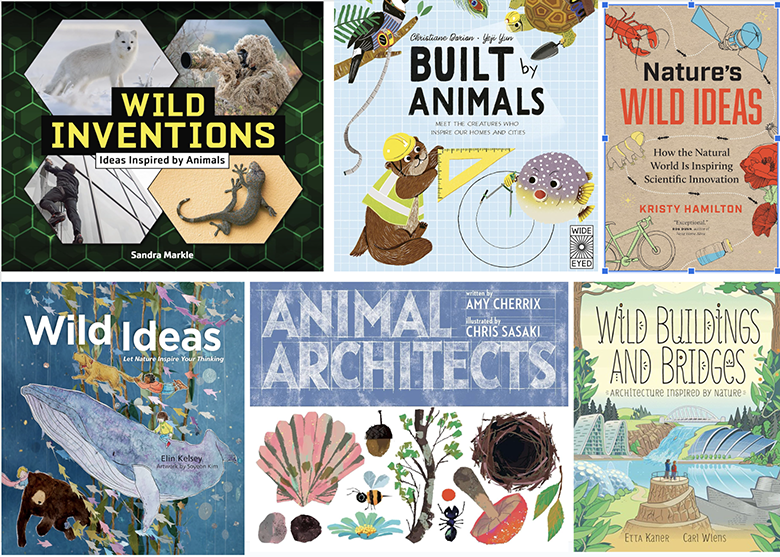
- Wild Buildings and Bridges: Architecture Inspired by Nature by Etta Kaner (Author), Carl Wiens (Illustrator)
- Animal Architects by Amy Cherrix (Author), Chris Sasaki (Illustrator)
- Wild Inventions: Ideas Inspired by Animals by Sandra Markle (Author)
- Wild Ideas: Let Nature Inspire Your Thinking by Elin Kelsey (Author), Soyeon Kim (Illustrator)
- Built by Animals: Meet the creatures who inspire our homes and cities (Designed by Nature) by Christiane Dorion (Author), Yeji Yun (Illustrator)
- Nature’s Wild Ideas: How the Natural World is Inspiring Scientific Innovation by Kristy Hamilton (Author)
Crafts
DIY Pine Tar Glue
“Mr Beaver scooped up handfuls of the resin and smeared it all over the wooden foot and vines until everything was glistening with stickiness. And when the resin dried a short time later, Roz’s .” pg 49
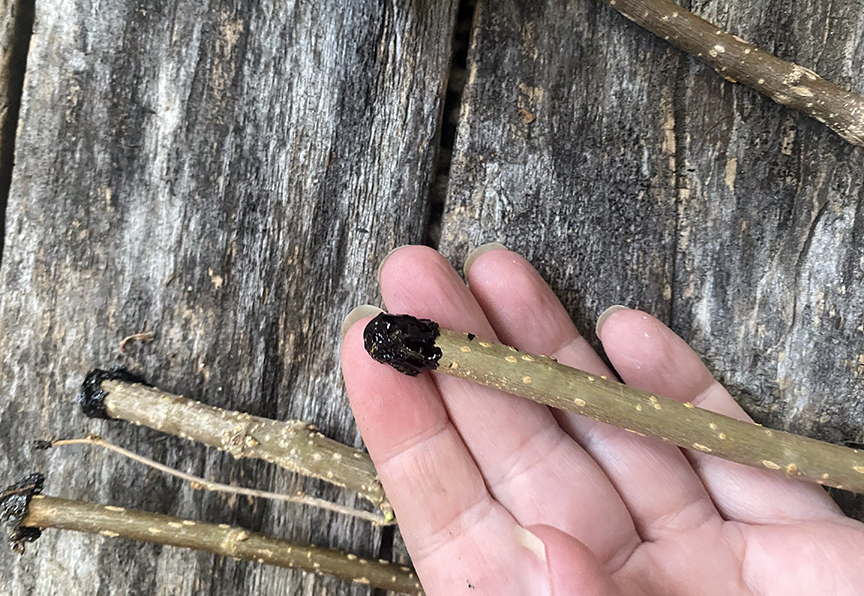
I knew as soon as we read about the wooden/ resin foot that we would need to make some pine resin glue– it’s and easy and fun thing to do over a campfire. This “glue” is only sticky when it’s warm, so you store it by globbing it on sticks and rewarming it over a campfire. The whole thing is a little fiddly and not likely to replace school glue in your life, but a fun experiment. And it smell good. Pine resin is most common, but we have a bunch of spruce trees in our yard so that’s what we use. Resin is easiest to collect in the winter when it’s frozen (rather than sticky.) Don’t harm a tree to get to the resin, look for naturally broken branches or knot holes that collect resin. Resin is not water soluble. To get it off your hands or tools use a little veggie oil.
Materials:
- two metal cans, one that fits inside the other
- evergreen resin
- charcoal (ground into a powder)
- sticks
- nail
- tinsnips
- tongs
- oven mitts
Notes:
This project requires adult supervision. Resin is flammable and must be carefully watched. The charcoal can be sourced from the campfire.
Method:
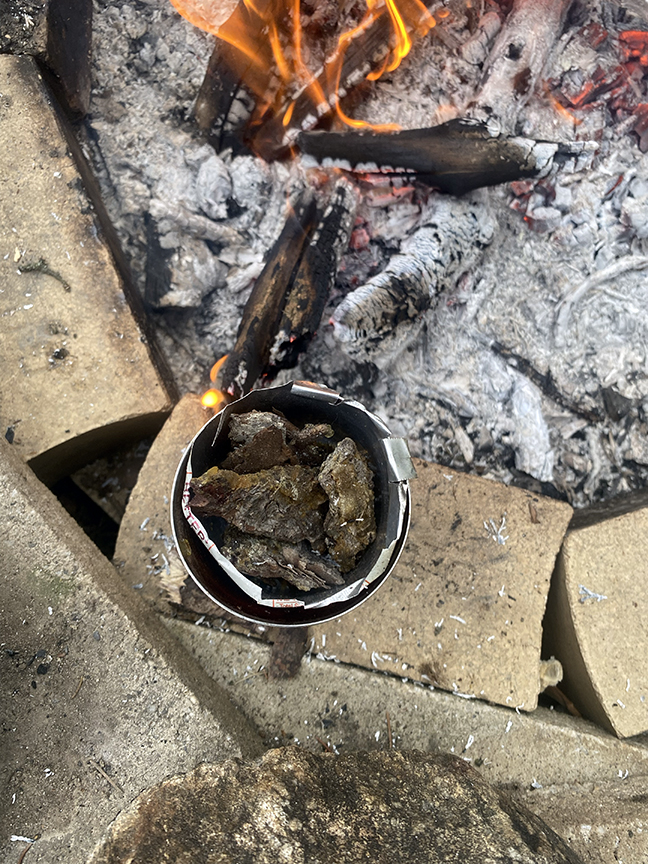
If you have really clean chunks of resin you can do this with one can and skip this step, but my resign is always mixed in with bits of bark. To separate it, I fit one can inside the other. In the picture you can see I used a thinner soda type can inside a tomato can. The soda can is easier to bend and cut. You’ll want to poke holes in the bottom of the soda can so that the melted resin drips through and the bark is stuck. I cut little tabs and bent them over the tomato can so that there was room for the resin to drip.
Place the can either in the coals or off to the side of a smoldering campfire. Resin is quite flammable so you don’t want it in direct contact with flames or too much heat. Just enough to melt the resin.
Once it is melted, carefully remove the soda can (the can will be hot use tongs and or oven mitts!!) and stir in the charcoal. You’ll want 1 part charcoal to 3 parts resin. I do this entirely by eye. Stir them together with a stick.
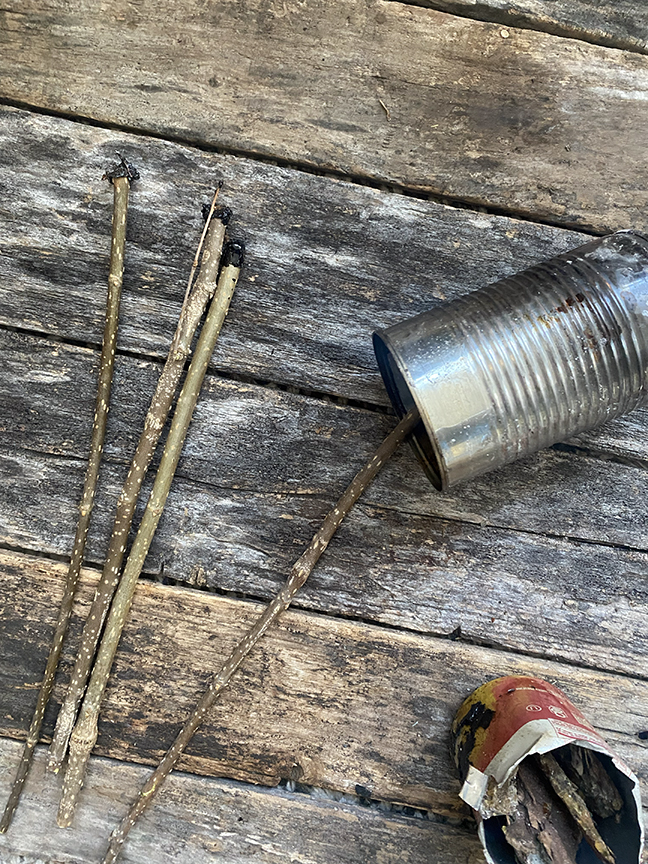
Scoop up globs of your pitch glue on sticks and let them cool. They will harden.
To use, rewarm the glue on the sticks just until sticky again.
Snacks
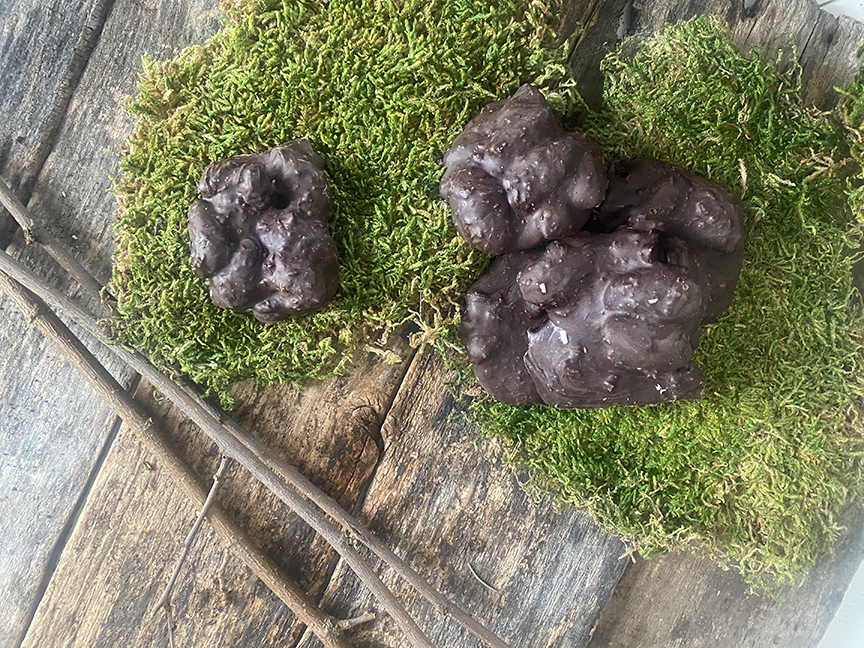
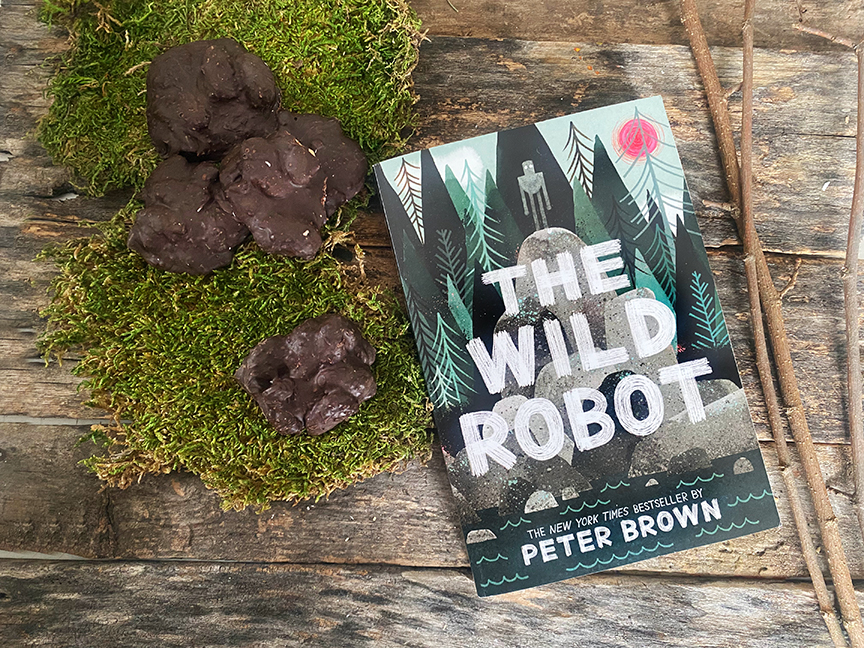
Scat Snacks
“The more droppings, the richer ths soil, the healthier the garden. As you can imagine Tawny’s request got everyone’s attention.” pg 33
I know, I know this is gross, but they talk about droppings over and over in the book, Roz doesn’t eat, and kids think it’s hysterical. My kids absolutely hounded me to eat these. And once you get over the ick factor they are actually delicious. When I first had the idea I looked around to see if anyone else had done it, I only found one recipe from the DNR, but it was so hyper realistic I couldn’t deal with it. If however, you aren’t grossed out by this and want more I suggest taking a look! (Note: that recipe has since been taken down)
Ingredients:
- salted peanuts (or something else- see note)
- unsweetened coconut (I like the kind that is tiny pieces not long shreds)
- dark chocolate
- coconut oil
Method:
Chop up enough chocolate to make the number of snacks you are looking for. They are free form so portioning is a guide at best. 4-6 oz of chocolate is a good starting place for around 12 pieces.
Place the chocolate chunks in a glass (microwaveable) bowl and add a teaspoon or so of coconut oil. This just prevents the chocolate from crystalizing and stops you from having to temper it. Butter and peanut butter will do the same thing.
Place in the microwave and cook in 30 second increments until most, but not all of the chocolate is melted. Stir until the last bits have melted completed.
Add your nuts and coconut (or other mix-ins– see note) and stir until well coated. You can add as much or as little as you like. The goal is to imitate the texture of scat and make something tasty.
Spoon into irregular scat-ish shapes on a parchment lined baking sheet and allow to cool until hardened.
NOTE: Use seeds, pretzels or puffed rice in place of the nuts and coconut and replace the coconut oil with butter to make this nut free. You can really use any combination of crunchy things you like, so adjust as you see fit. The mixins provide flavor, but also “scat texture”. You can also take the DNR tac and try to replicate different types of scat with different ingredients if you are feeling gross!