By New Year’s Eve I am pretty tapped out. Strangely though, it’s become one of my favorite holidays to celebrate with my family. My kids love it and I do way less in preparation. We have what I lovingly call “tiny dinner” which is a bunch of store bought appetizers heated up throughout the night at pretty random intervals. My kids love this, probably more than any of the huge homemade meals I make for the other holidays. We have adapted that “do an activity every hour” pinterest stalwart to do a bunch of activities at completely random intervals until we get tired and go to sleep. We do a bunch of fortune telling games and activities for the new year. (You can read more about some of our traditions and fortune telling here) The only thing I actually make are these chocolate piñatas and they are super simple. They are also dramatic and fun for kids and grownups alike.
Edible Chocolate Piñatas for NYE
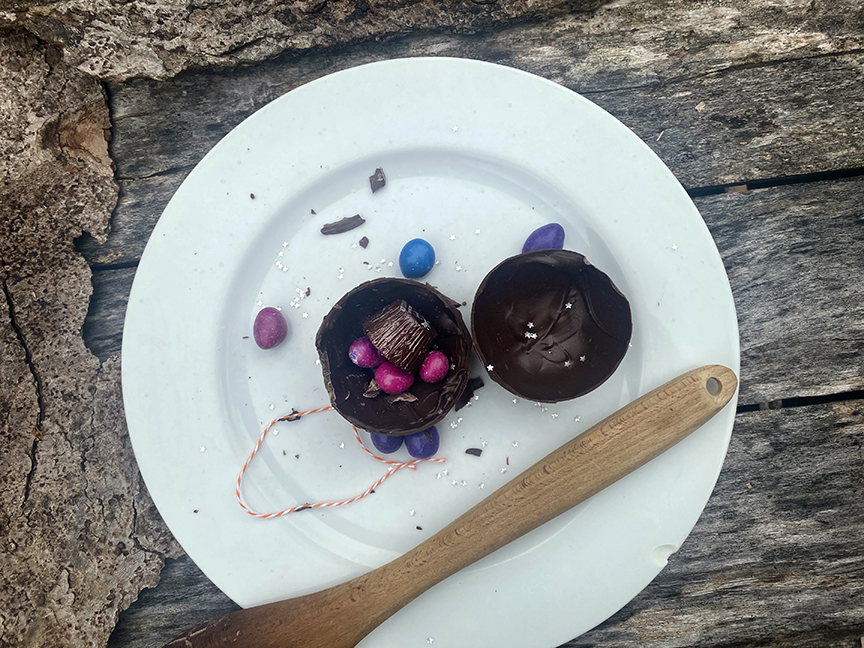
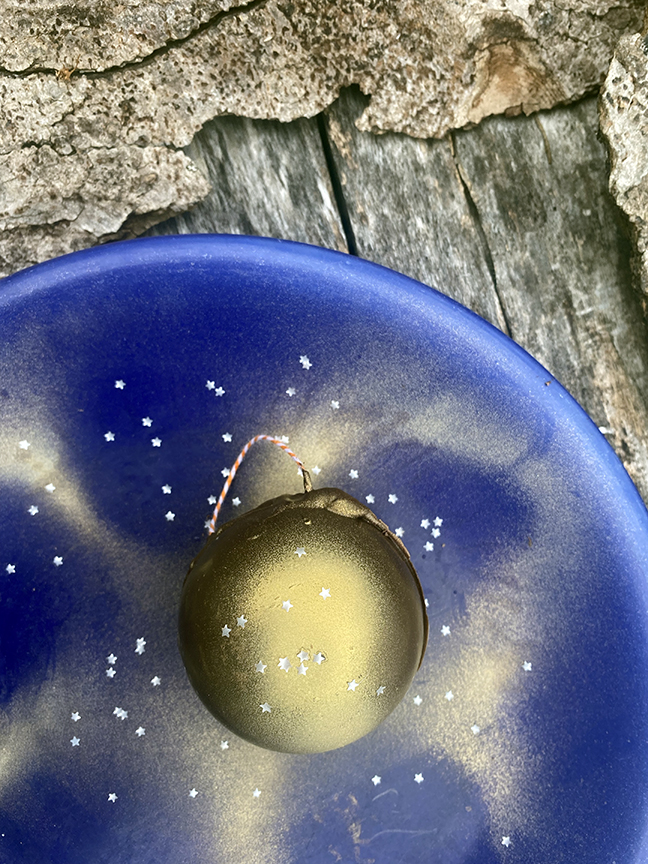
If you have made hot chocolate bombs before this is basically the same process. It’s worth seeking out the melting wafers so you don’t have to mess around with tempering chocolate (which I am perfectly capable of, but still use the wafers) I like the ghirardellii dark, but you can use milk or white chocolate if you prefer. (And obviously any brand you prefer.) If I didn’t dislike white chocolate I’d probably use that and drizzle in multiple colors. I just buy candy for the inside, you can use anything you like. I make one of these for each person– they are fairly small. You could use a bigger mold and make a collaborative piñata, I would just reinforce the hanger more than I outline here in that case. The gold spray and stars are completely optional, but really add to the New Years Eve glamour!
Ingredients:
- chocolate melting wafers
- candy of your choice for filling (make sure it fits!)
- edible gold spray (optional)
- edible silver stars (optional)
- silicone half sphere molds
- bakers twine or string
- microwave safe plate
Method:
Melt the chocolate wafers in the microwave. Heat in 30 second burst stirring after each time until they are just melted. The amount of time they take will depend on your microwave and the amount you are heating.
Use a spoon or small spatula to spoon some chocolate into each cavity of the mold. Keep in mind you’ll need two haves for each piñata you want to make. Use your spoon to spread the chocolate up the sides of the molds and check to make sure the whole thing is as evenly coated as you can manage. It doesn’t need to be perfect, but try to avoid holes. Once you have filled all the molds, put the whole thing in the fridge to set up.
Once the chocolate halves are completely set and cool, assemble your filling, pieces of string (cut them long enough to make a little hanging loop) and a plate to store the finished pianats as well as a microwave safe plate to heat.
Pop the first two halves of chocolate out of the mold. Set the first one on your work surface and fill it. Lay the piece of string over one side in a u-shaped loop with the cut ends inside the chocolate dome.
Microwave the plate for 30 seconds or so until it feels warm to the touch. Place the second chocolate half seam side down on teh plate for just a few seconds until the edge begins to melt. Quickly put it down on top of the filled half and press gently to ensure it makes good contact.
Most of the time I find they stick well enough that this is all I have to do. However if you have any big gaps or the string loop doesn’t feel secure you can melt a little more chocolate (or scoop some off your hot plate) and smear it over any problem areas.
Continue until all of your halves are filled and made into spheres. Spray them with the gold color and sprinkle them with the edible stars if using.
You can store them at room temp (provided it’s not super hot in your house) or in the fridge.
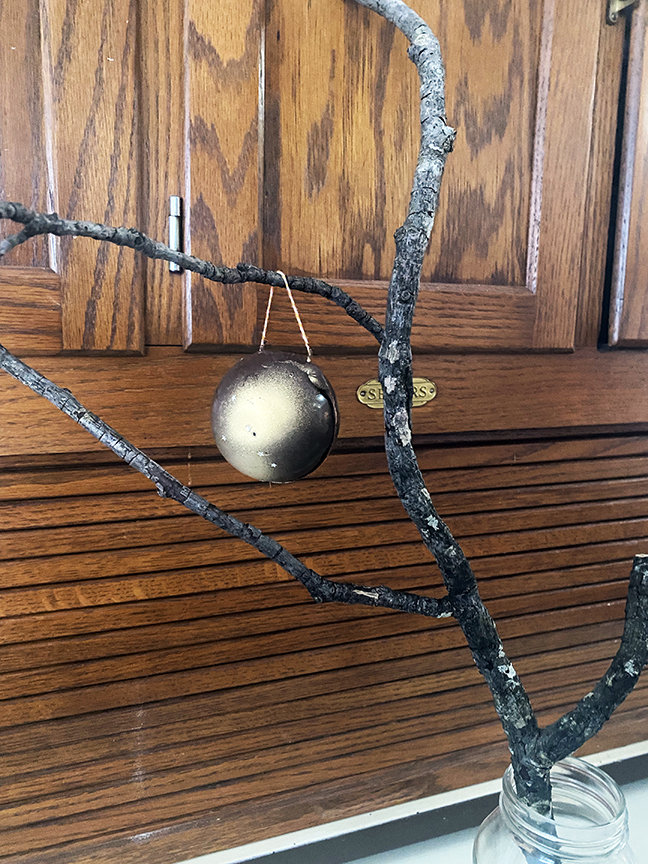
When you are ready to use them, hang them from a branch anchored in a jar (or other structure we have a piece of a board game that we sometimes use) and let everyone smack them with a sturdy wooden spoon. Squeal merrily!