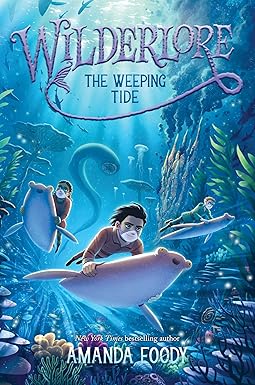
Continuing with the middle grade book buds, I present the next book in the Wilderlore series, The Weeping Tide! I have been reading a ton of middle grade books lately, but would love to hear your suggestions for more book buds! Middle grade books are substantially longer, so I have broken the middle grade book buds into a lesson (called lore in honor of Wilderlore here), a craft or two, and a snack. All are driven by the themes and ideas in the respective book. These could be the jumping off point for a more in depth academic book study, or just a fun project to further immerse yourself in the worlds of your favorite books!
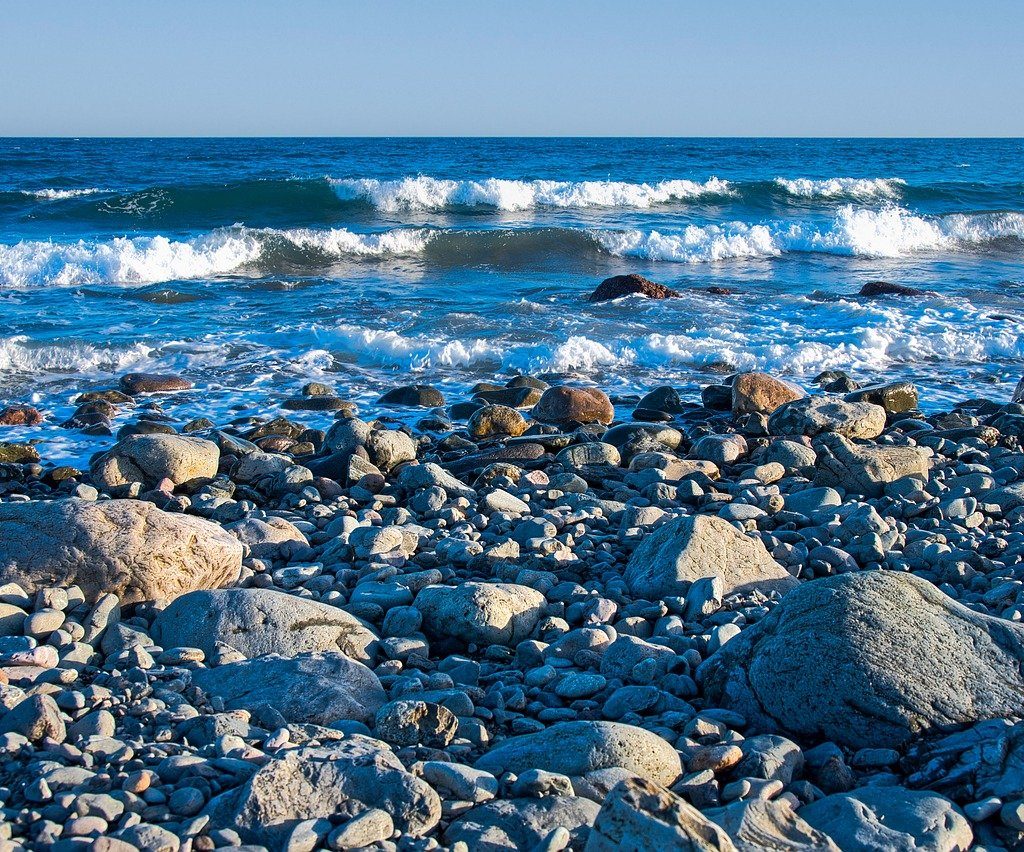
The Weeping Tide (Wilderlore Series)
Written by: Amanda Foody
The Weeping Tide is a middle grade book, but perfect as a read aloud. (This is how my kids and I read it) We adore this series, it works for my youngest and my oldest and honestly I’d read it without them. The world-building is phenomenal, there are important undercurrents of self acceptance and belonging, and the story twists and turns and keeps you on the edge of your seat! We also loved all of the plants and animals, while it takes place in an imaginary world it is very nature focused which makes it easy to draw parallels to the nature of our world. The first book was set in The Woods, but the Weeping Tide takes us to The Sea.
Scholar Lore
Folktales & Sea Shanties
“‘Maybe in the history section?… Oh! And the fiction section might have some good stories. Maybe they shelve fables there…'” pg 159
In the hall’s corner, on Guardian sang a mournful shanty while another accompanied him on the fiddle. pg. 190
An interesting story element in The Weeping Tide, was the folktale of Maedigan which ended up containing some significant truths. This isn’t something that only happens in stories, but something that happens in real life. For years scholars though the city of Troy detailed in the Iliad was a myth, until archeologists found it. Snow White and the Seven Dwarfs was based on Margarete von Waldeck, a 16th century Bavarian noblewoman. (Fair warning it’s a gory story as are most of the origin stories of fairytales.) John Henry and Paul Bunyan were both real, albeit sensationalized, people. Klamath legends about a battle between the spirit of the sky god the spirit of the mountains actually describe a massive volcanic eruption that created Crater Lake 7,700 years ago. Folktales, fables, and myths often contain kernels of truth, and this can be a really interesting way to combine creative writing and history. And because this story is set at the Sea, I couldn’t help but think about sea shanties which often record the stories of real events and people in a similar way. At the very least you can listen to shanties as you work! Shanties are traditionally work songs, with repetitive phrases and rhythms that were timed to various tasks aboard ships. So, let’s get to work!
Create your own folktale inspired by a real historical event.
Start by researching the historical event you’ve chosen so that you are familiar with what happened. Make note of the setting, the time period, the people involved and the Think about what details might be important in your folktale. How can you tell the story without all of the information? What is the most important? What can you leave out? What elements of the setting or main characters will you focus on? Folktales are usually fairly short so you’ll have to edit and change some details to make the story work. Reading some myths and folktales that describe real events might give you some ideas. After you write down your myth consider on of the extension ideas below!
Extension:
- Create art depicting your folktale either in a narrative format like a storybook, or as a single image like a book cover.
- Design and make artifacts from your folktale. What clues might help archeologists understand the story?
- Write a sea shanty telling the story of your historical event.
Other Project Ideas:
- Study a myth that was later found to have real elements and make art about it.
- Write a sea shanty. For a struggling learner this could be as simple as summarizing the events of The Weeping Tide in shanty form. For a more advanced learner, try creating your own shanty about a real event in narrative form.
- Write a shanty that is timed to a specific task. Focus of rhythm and meter and practice actually completing the task while singing.
Crafts
I got a bit out of hand with the crafts this time… I made the lanterns first and then forgot about them and decided to make the ink and quills. My senior moment is your extra wilderlore crafts!
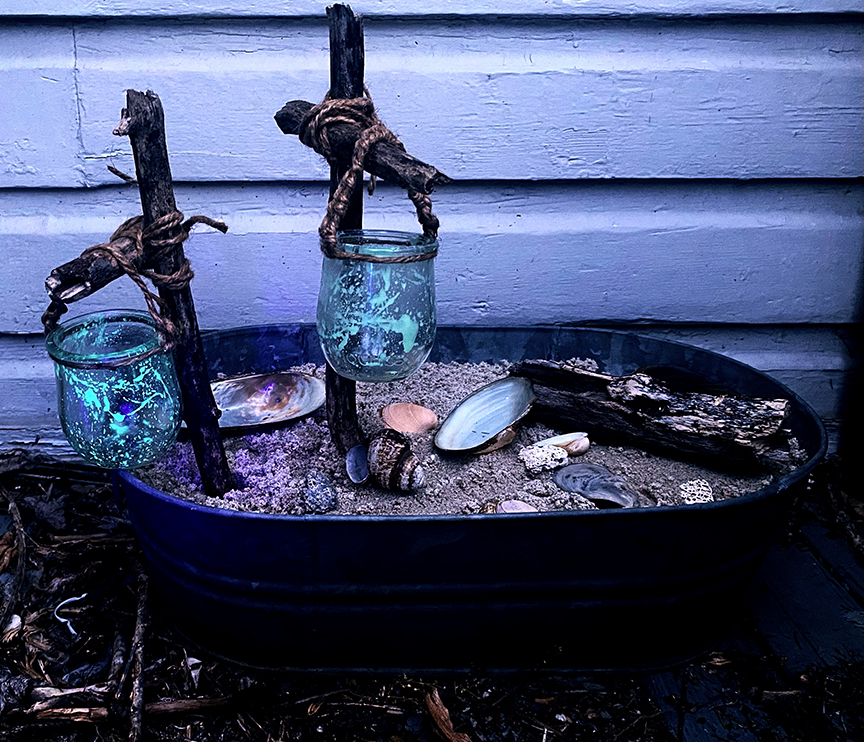
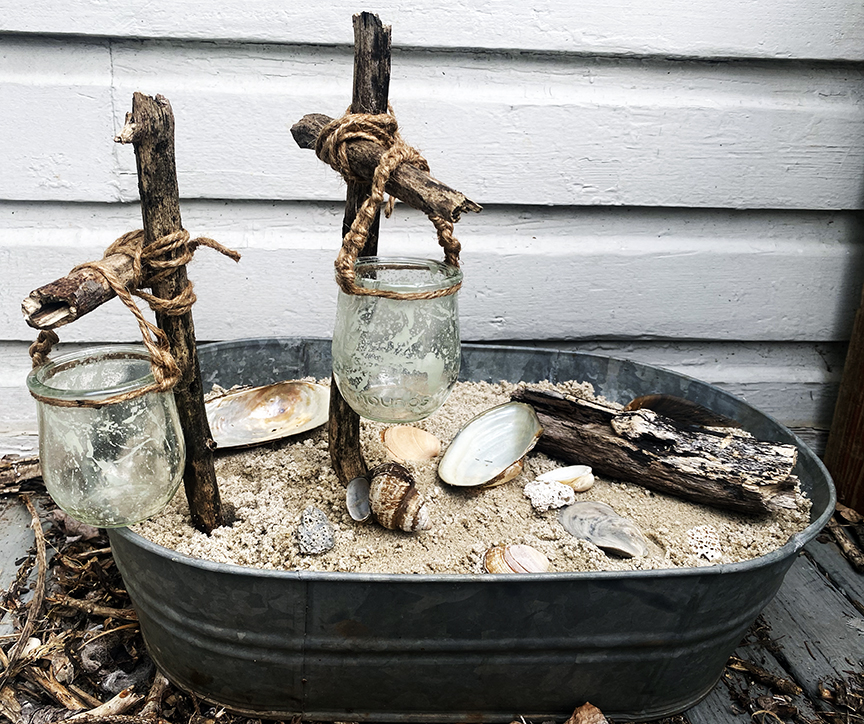
Firenekkie Lanterns
“Barclay spotted Ansley tending to one of the streetlamps, feeding whatever it was that glowed blue inside.” pg. 61
“‘Underwater is full of Firenekkies, the Trite Beasts that light all the streetlamps.'” pg 107
As soon as I read about these lanterns I knew I needed to make some. Both my boys have these in their rooms and LOVE them. They are also super simple and fast to make. You can use them to pretend you are at the sea, or as a lantern for a lovely summer evening.
Materials:
- recycled glass jars
- glow in the dark paint- blue (I used this one and liked it)
- a cheap paintbrush
- twine
Method:
First, clean and dry your jars. I like to use these little yogurt jars because of their rounded shape (also delicious yogurt..) but you can use any glass jars you have on hand.
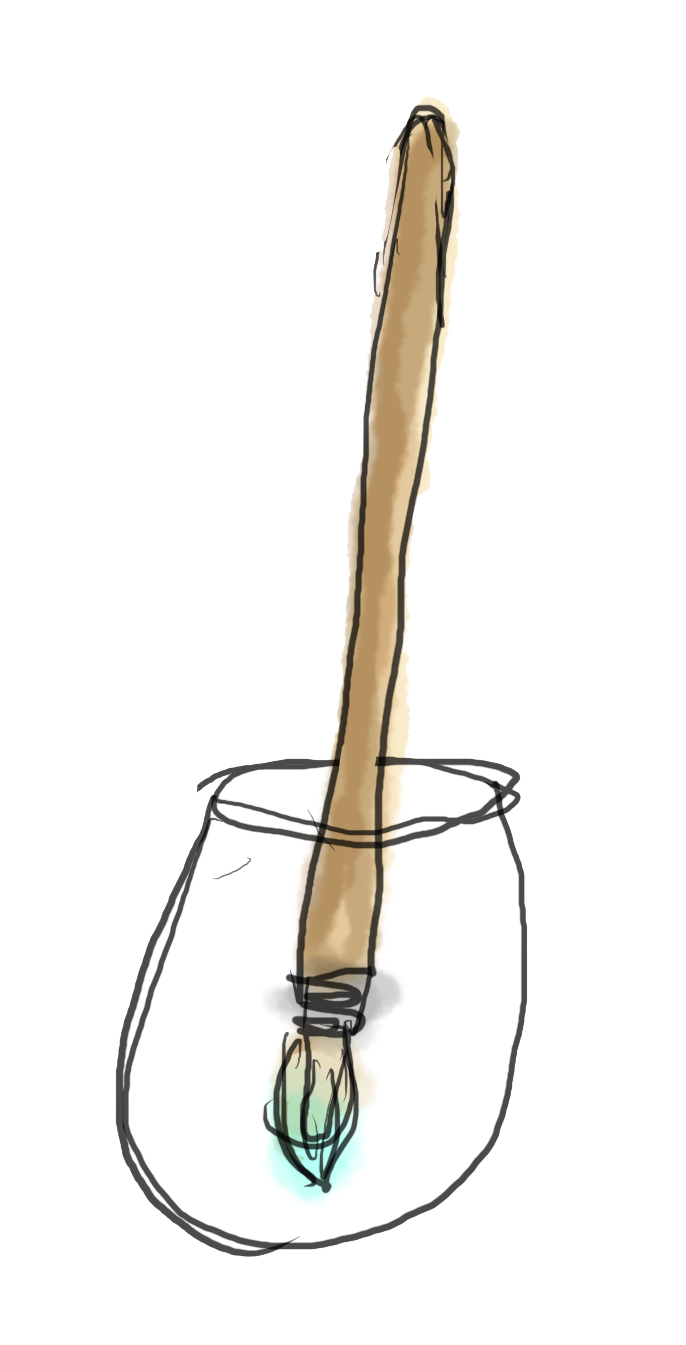

Dip an older raggedy brush into the the glow in the dark paint. Put it inside the jar without touching the sides or bottom. (Just hover.) Flick your finger across the bristles so that they splatter all over the inside of the jar. Do this a few times until you are happy with the coverage. Allow the paint to dry completely.
Tie some twine around the top to make a handle. I experimented with tying knots around the hanging string to make it look more sea-ish.
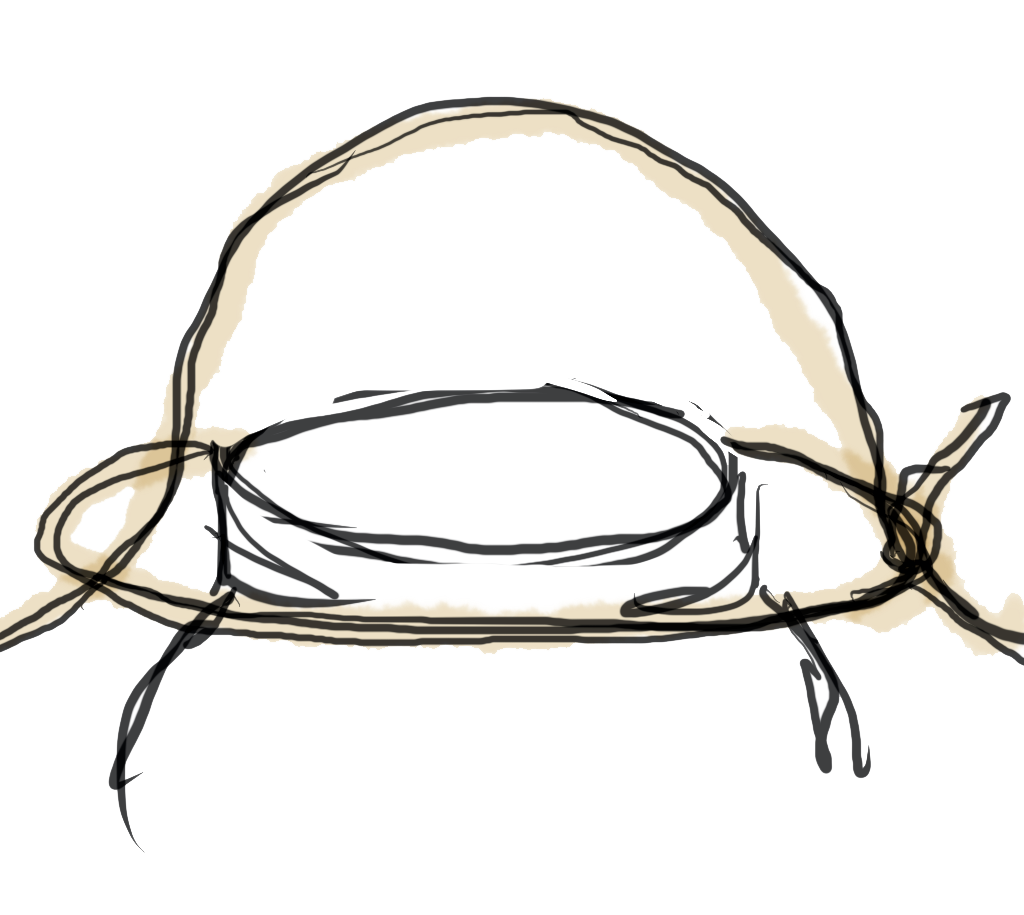
I tied some sticks together because I needed something to hang it from in the picture, but I love the way they came out!
h
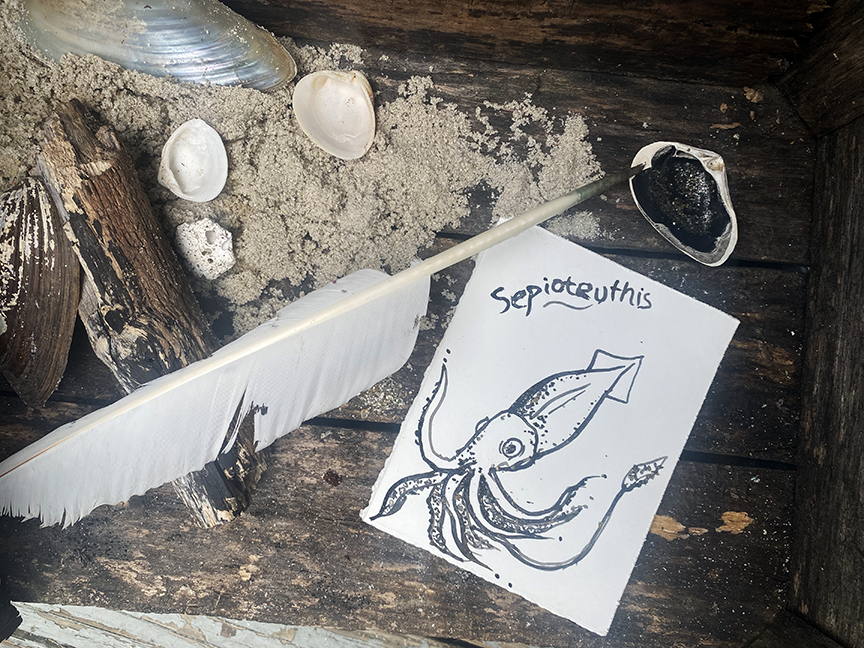
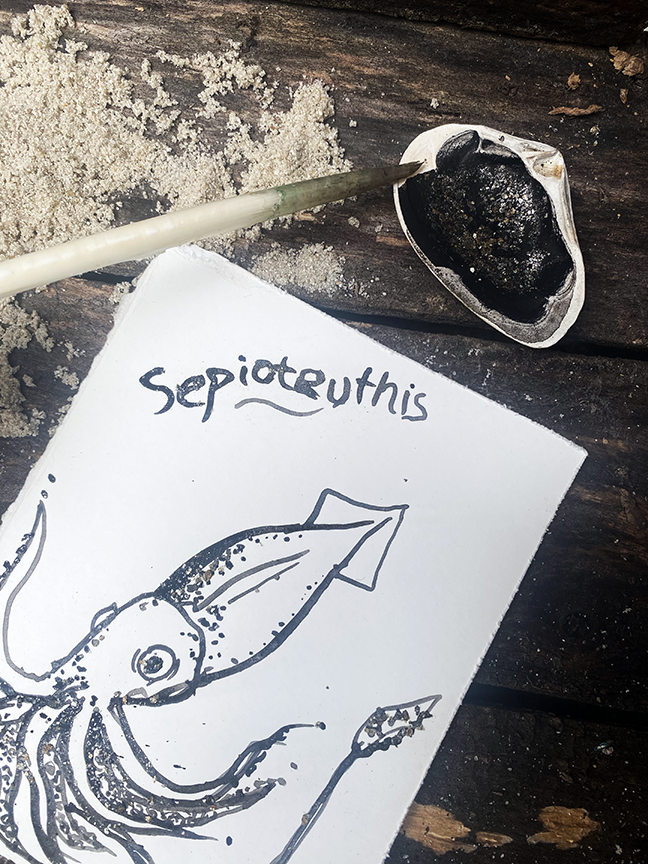
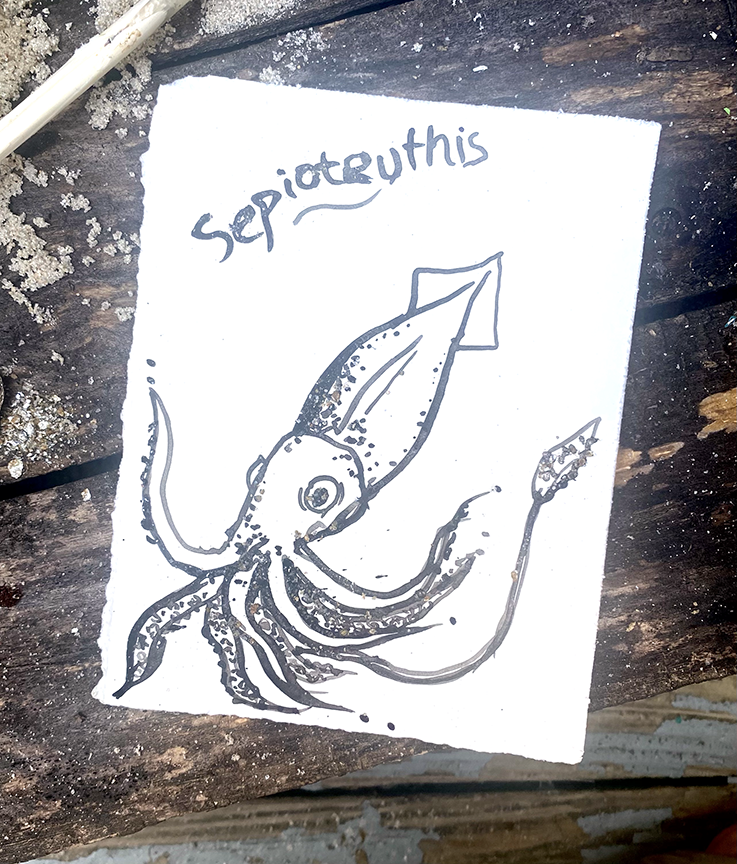
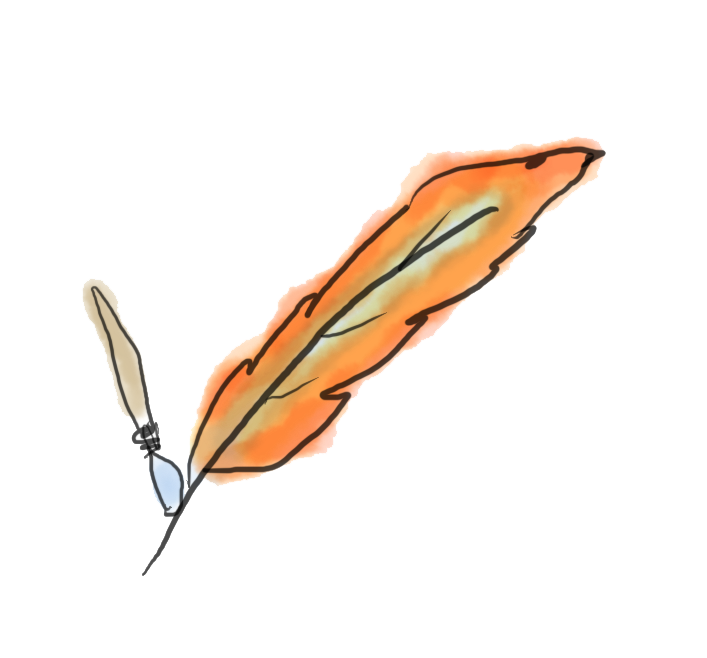
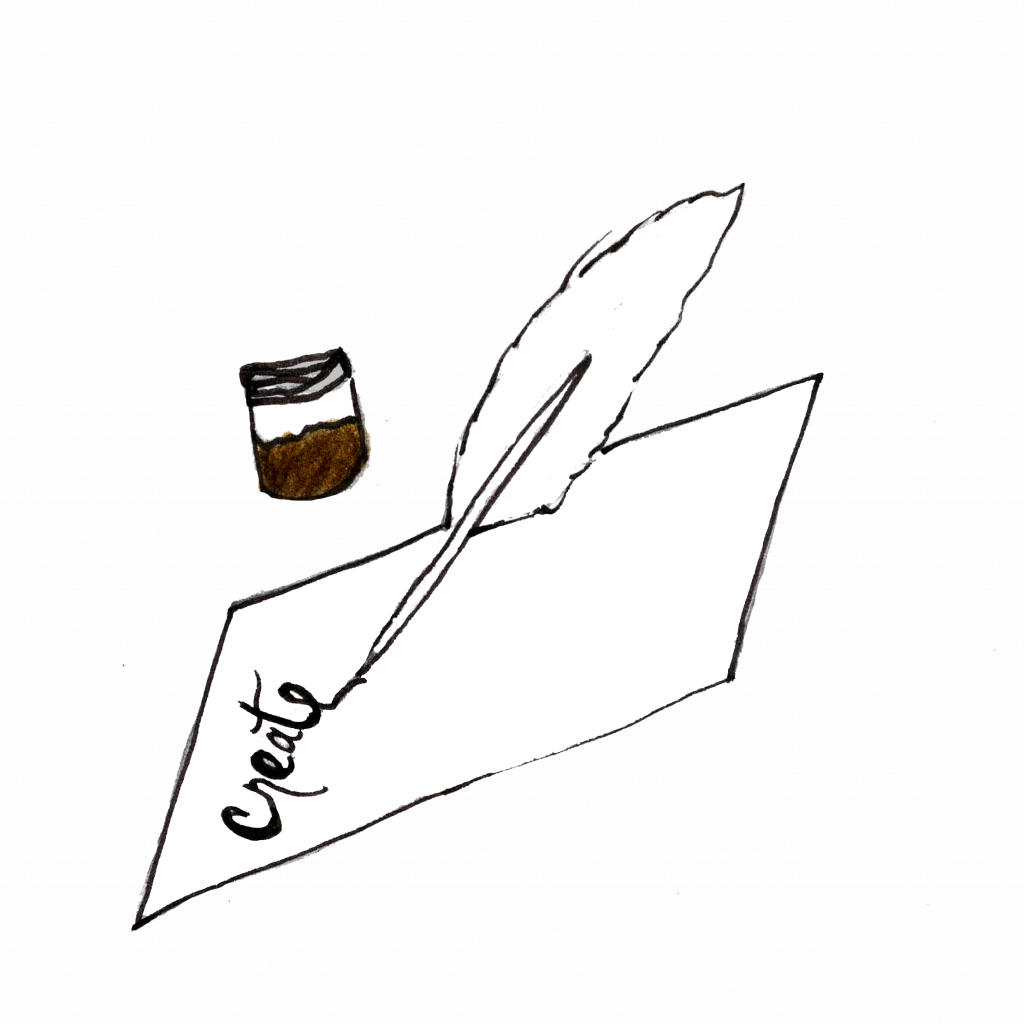
Squid Ink Glitter Pens
“The place was a mess. Clay pots were scattered across the tables and shelves… Tinctures bubbled in glass beakers, and plants grew wild from their pots… It was piled high with craft supplies: balls of yarn, squid ink glitter pens, an embroidery hoop, and dozen’s of crosswords from the Keeper’s Kronicle.” p. 89
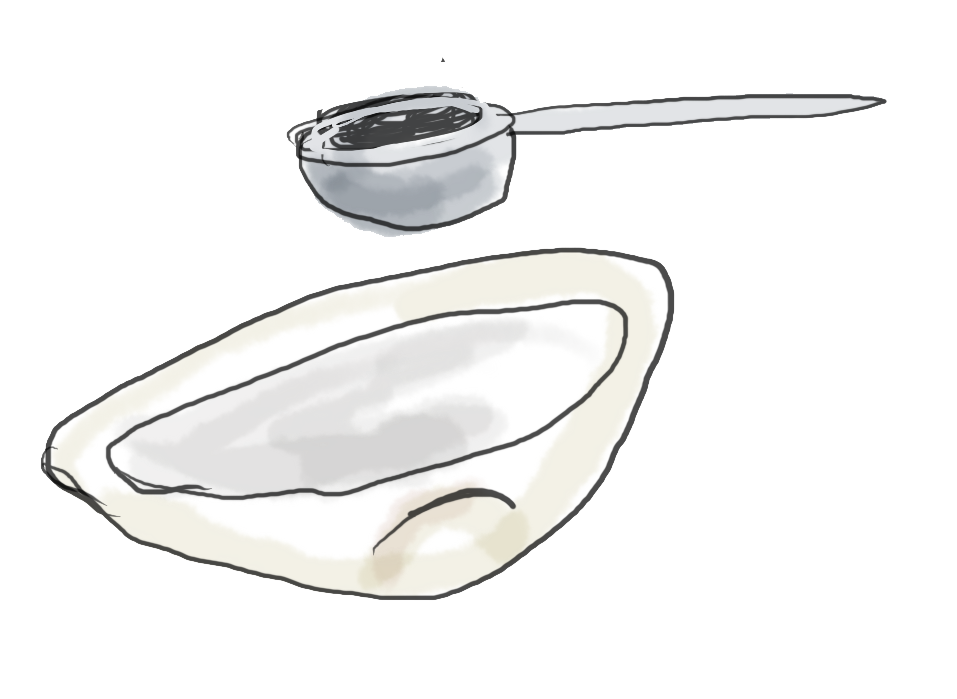
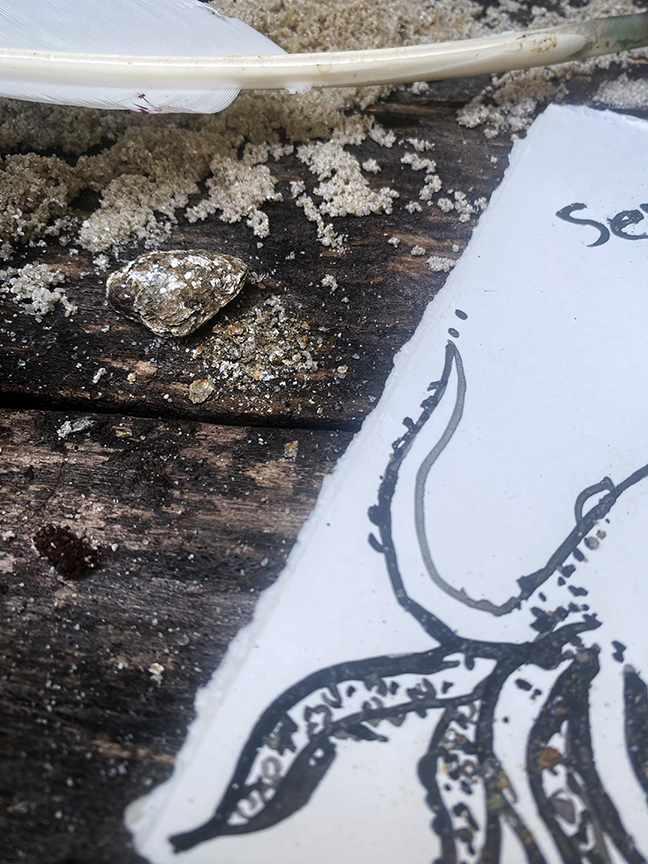
As soon as I read this line I knew I needed squid ink glitter pens. I am generally anti synthetic glitter however, it is really terrible for the environment. And any glitter, natural or otherwise is going to be hard to make work in a pen. Pens in general are diy-able but really not an entry level craft, and every nearly mention of writing I have noticed in the books has mentioned a quill, so I decided that my glitter pen would be an ink and dip pen. The color sepia is named for the squid whose ink was used to make it. The involved process used to prepare it resulted in a dark brown ink. I do not have access (nor especially want access…) to ink bladders so I simplified things quite a bit form the historical method. There are still a handful of brands that make true sepia ink, but it’s labor intensive and quite expensive. For the glitter, I used my favorite natural glitter– mica. I love in a mica rich area so we find chunks of mica all the time, but if you don’t you can purchase some or substitute your own favorite natural glitter. (Just make sure it’s not water soluble.) Mica was used commercially as glitter until the modern synthetics took over, you can still sometimes find christmas decorations that boast mica glitter. I added a video because it’s hard to see in the photos, but this is was satisfyingly sparkly and only smelled a little like squid. ha. The traditional vessel for storing watercolor paint is actually a shell, so I used that as my ink pot to increase both my historical accuracy and my sea-ness.
Materials:
- dried powdered squid ink (for culinary purposes generally)
- water
- crushed mica
- vessel for mixing (shells are traditional, jars work fine)
- dip pen, quill, or brush
Method:
Mix teaspoon of the powdered squid ink with around a tablespoon of water. Mix well. Add more water until you have a nice thick ink consistency.
Mix in a few pinches of crushed mica.
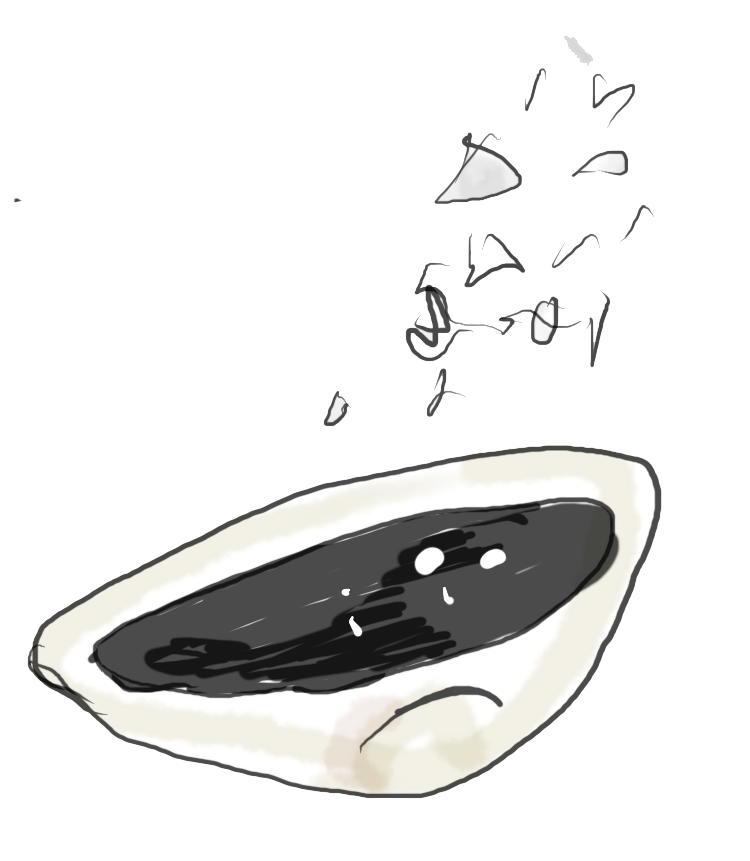
Draw and write with your new ink! You can sprinkle a little more mica on top for extra sparkle, it’s pretty hit or miss how much the pen actually picks up.
h
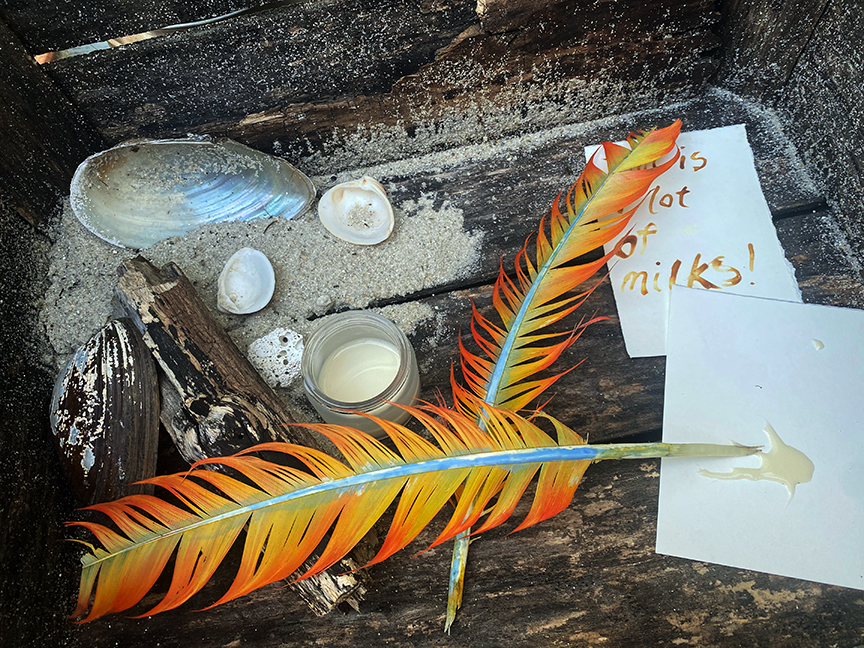
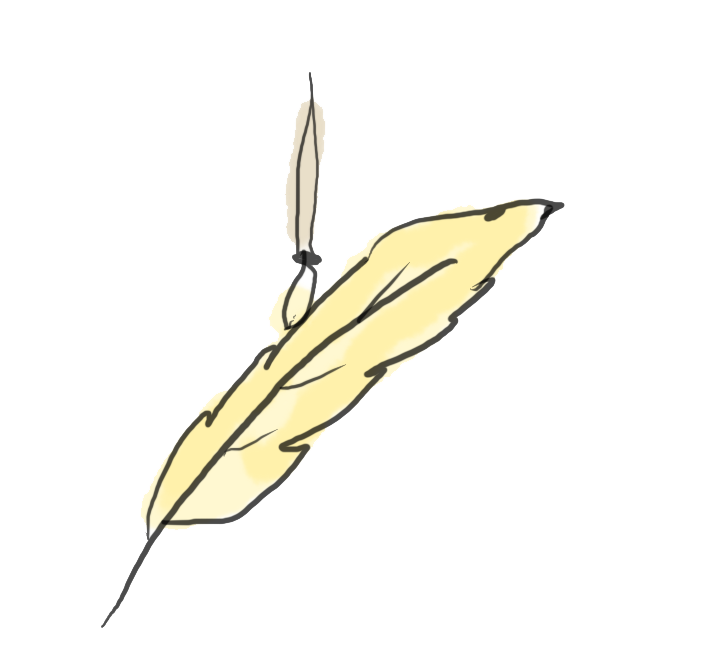
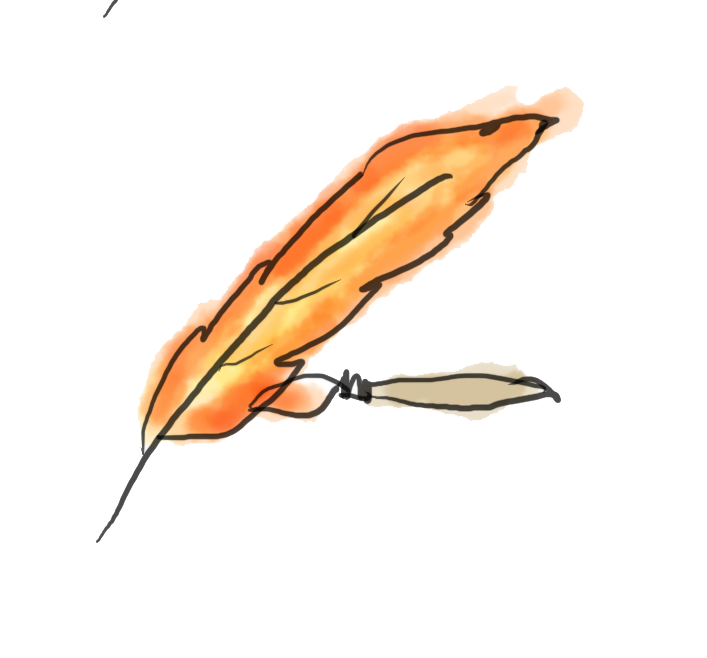
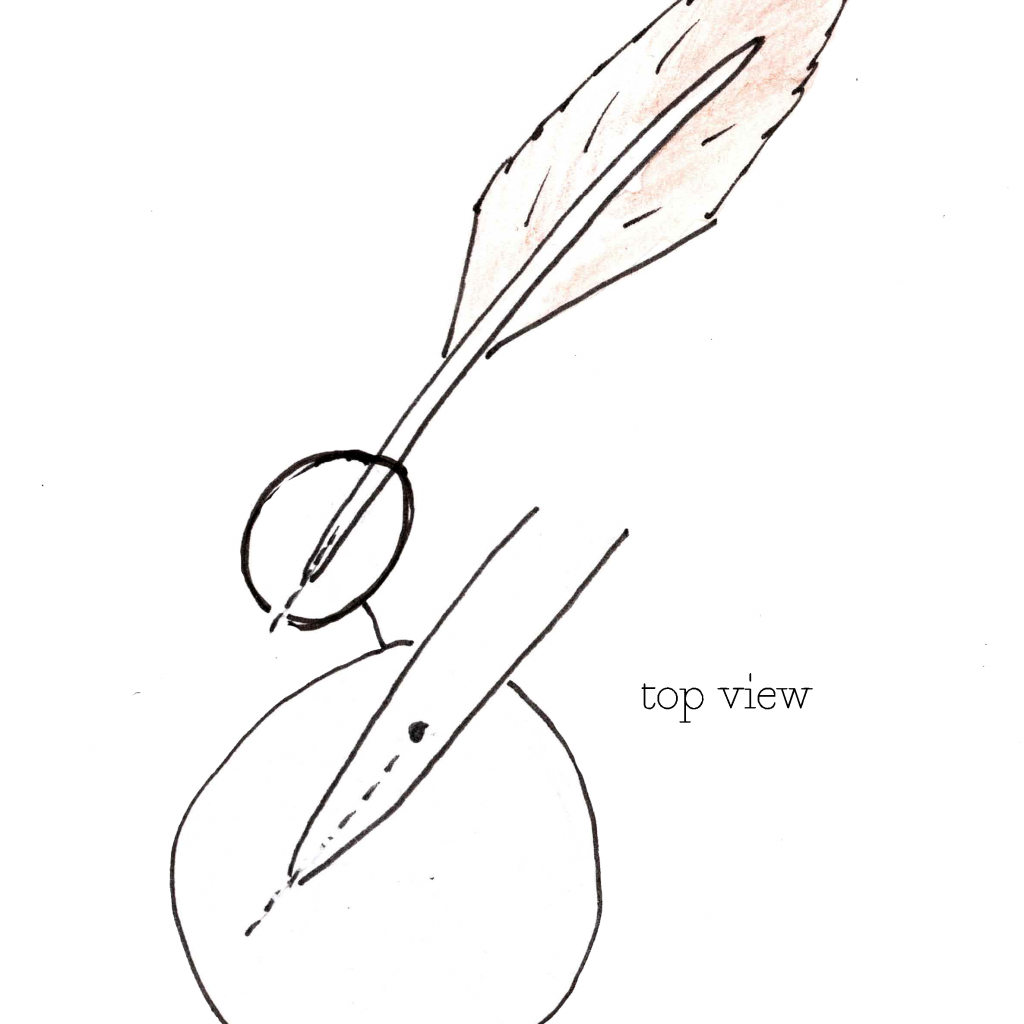
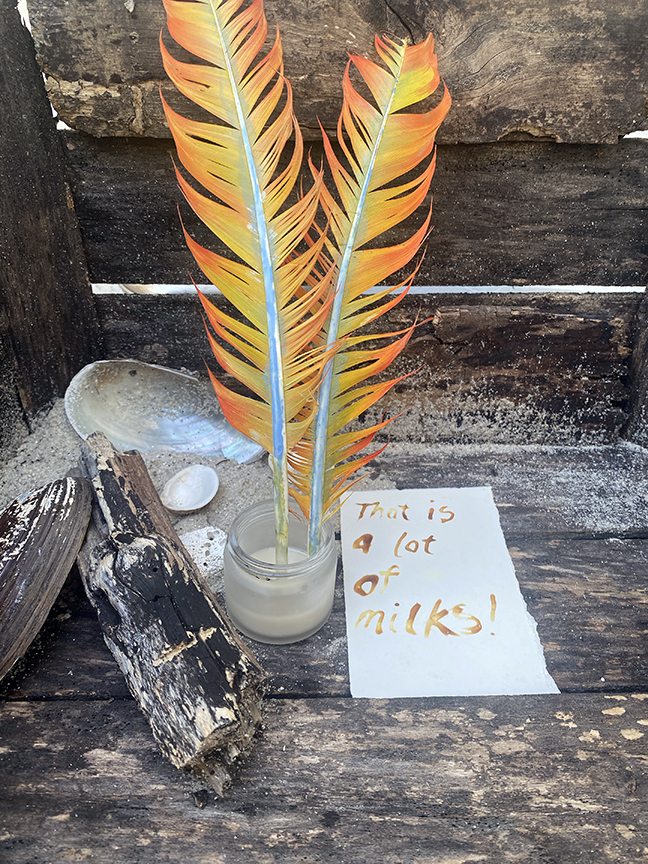
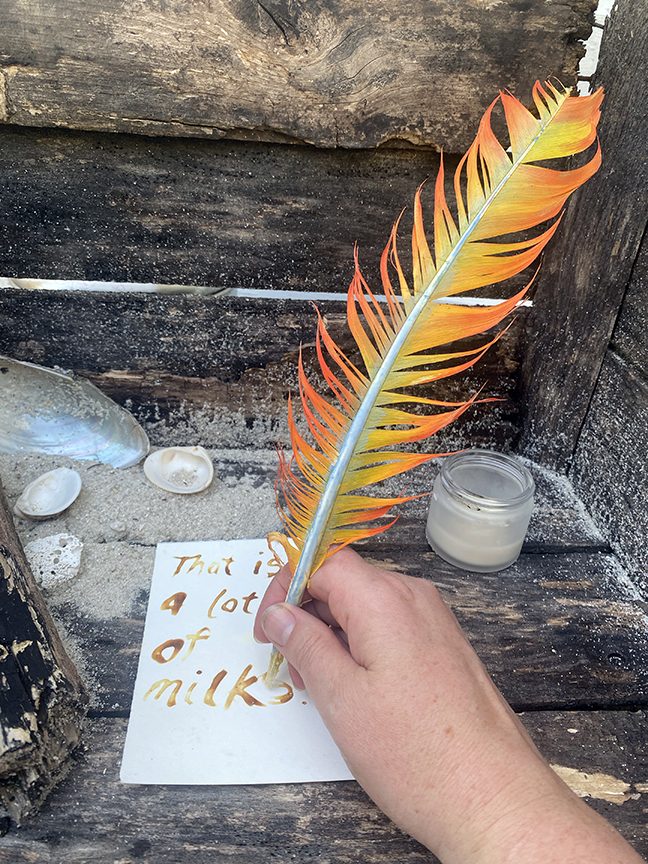
Phoenix Quills
“Startled, Tadg collied with a display of phoenix feather quills labeled FOR SECRET MESSAGES. JUST ADD HEAT!” pg. 102
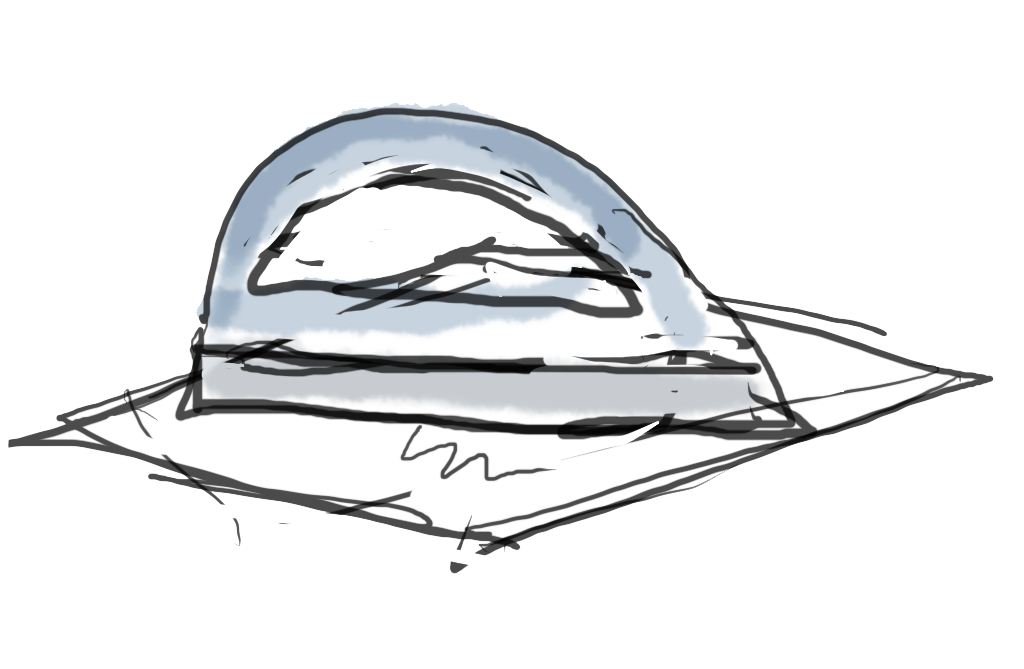
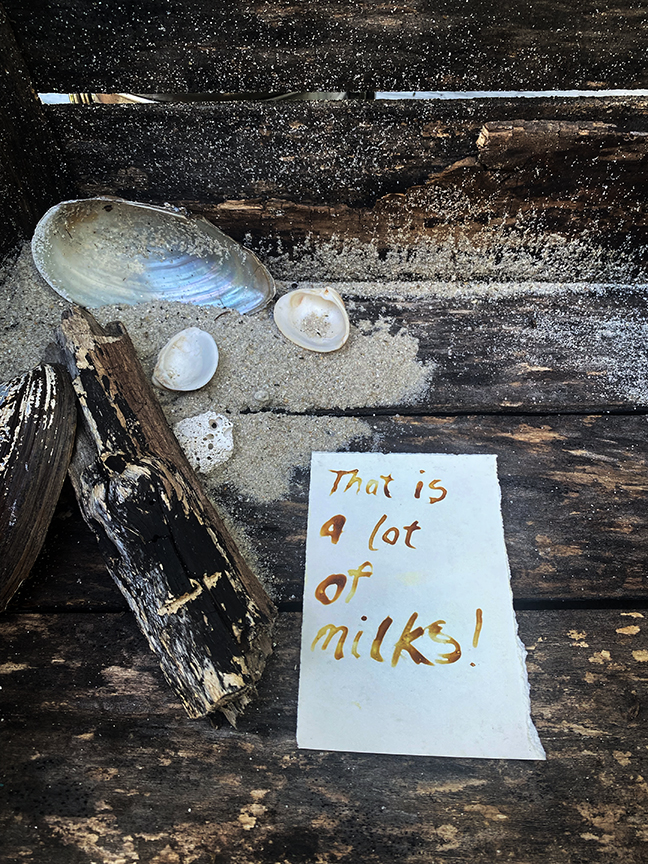
Since I had already decided to make ink, a quill seemed like a logical next step. Making quills from feathers is actually pretty straightforward, although writing with them has a bit of a learning curve. I went with an easy watercolor paint method of coloring the phoenix quills and decided that they should look like flames. Obviously. Now, if you are familier with my work, you may have noticed that I love secret messages and color changing herbal potions– so clearly I was going to use an ink that actually appeared with heat. There are two easy options here: lemon juice and milk. I went with milk in honor of the 16 milks of the Sea. In the video below you can see me revealing the message with a candle flame, it looks awesome, but honestly I caught my paper on fire more than once and wouldn’t really recommend it. The easiest (and safest) method is to use a hot iron to reveal your messages.
Materials:
- turkey or goose feathers*
- watercolor paint
- exacto knife
- milk
- paper
- paintbrush
Method:
It doesn’t really matter if you paint the feather first or make the cuts first, do it in whichever order works best for you.
Painting the feather:
Place your feather flat on a work surface that you can get paint on. Start with yellow and paint the whole feather front and back.
Next paint a ring of orange and red paint like a flame. Repeat on the back. Smooth the feather down on the table, it will stay in the shape it dries to. Let the watercolor dry.
Use a pale blue paint on the center shaft and a little bit of the adjoining feather. It won’t stick as well to the shaft. Repeat on the back. Dry completely.
Cutting the quill:
Older students may be able to make the cuts themselves, younger students will need assistance. Review safe use of the tool with students who are cutting the quill. Alternatively, to simplify, younger students can make one diagonal cut with safety scissors which will produce a usable, but much less refined quill.
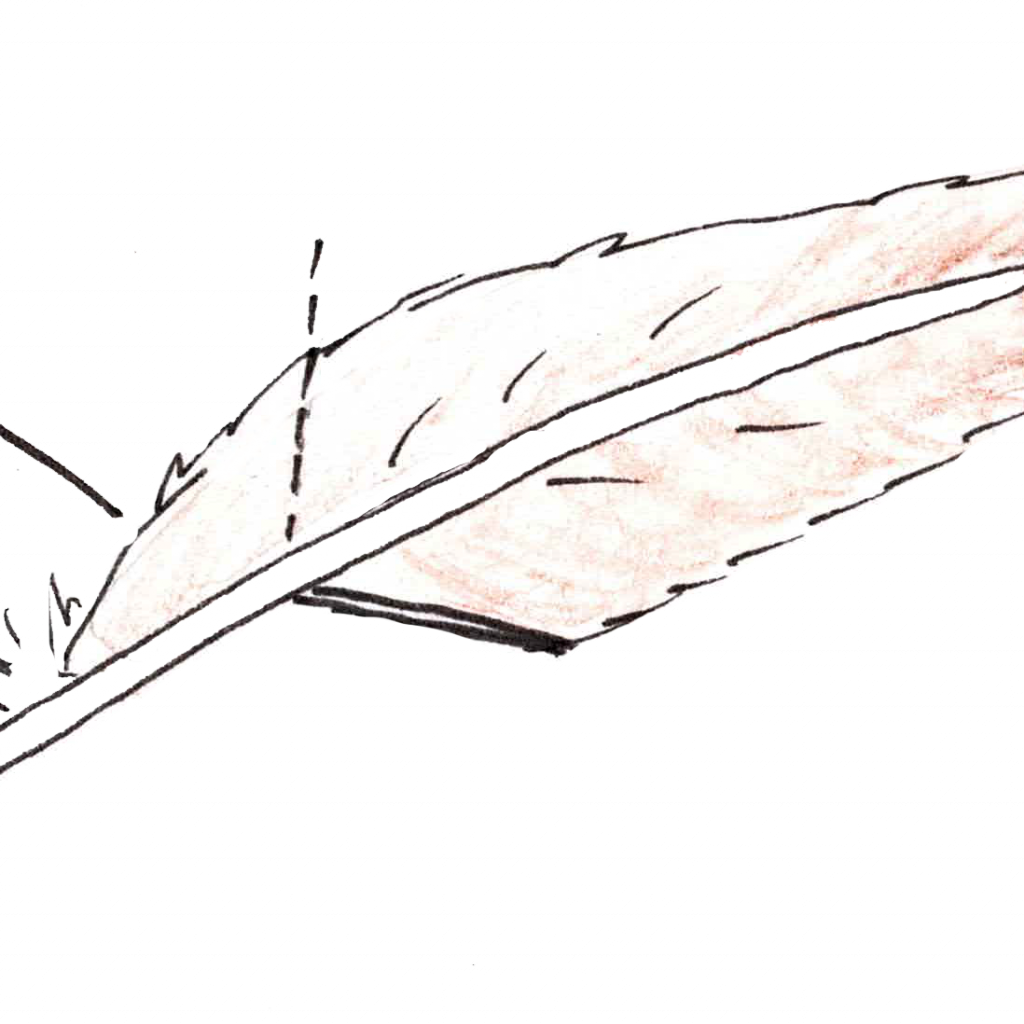
Choose a large turkey or goose feather from the wing or tail. Strip off some of the bottom feathers from the shaft so that you can comfortably hold the base.
The surface of the shaft is covered in a membrane, gently scrape it off with an exacto knife. (This will make the pen write more smoothly but isn’t critical)
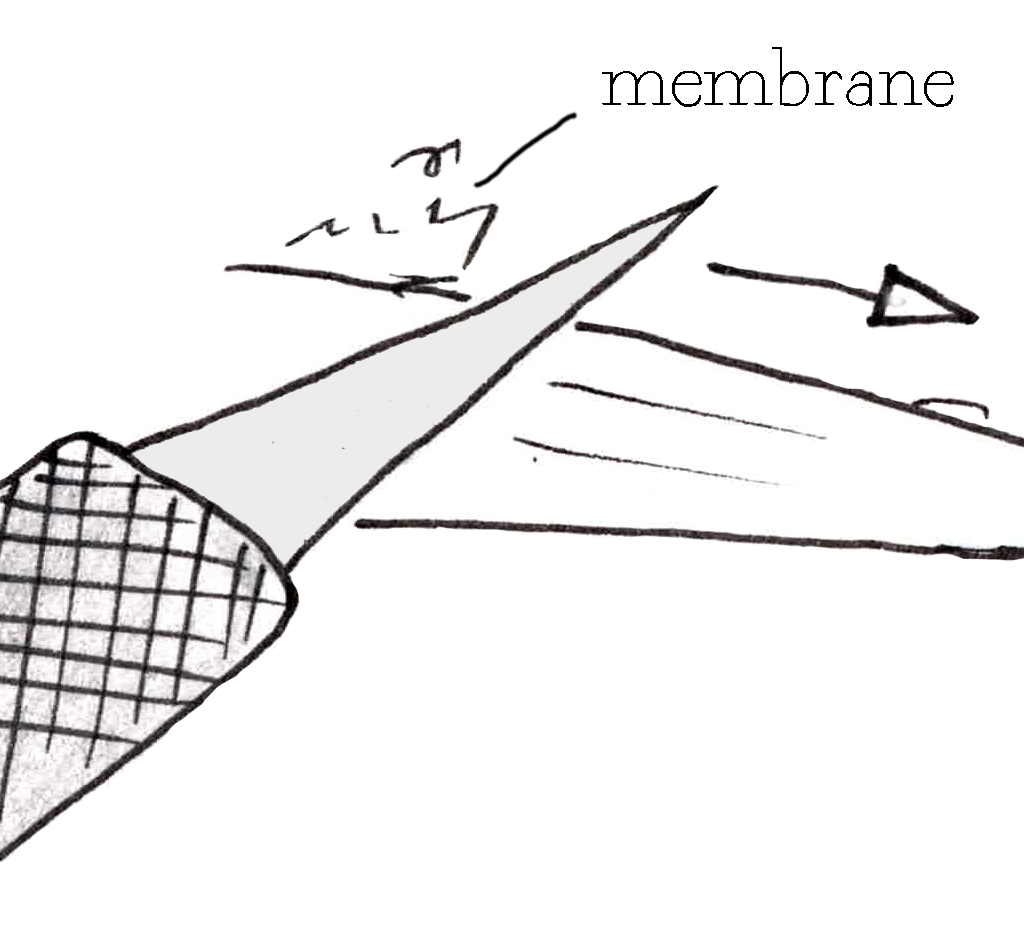

The feather will have a natural arc, orient it so that the tip points down. Make the first angled cut.
With the tip of the blade carefully remove as much of the quick as you can. (the papery stuff inside the shaft of the feather)
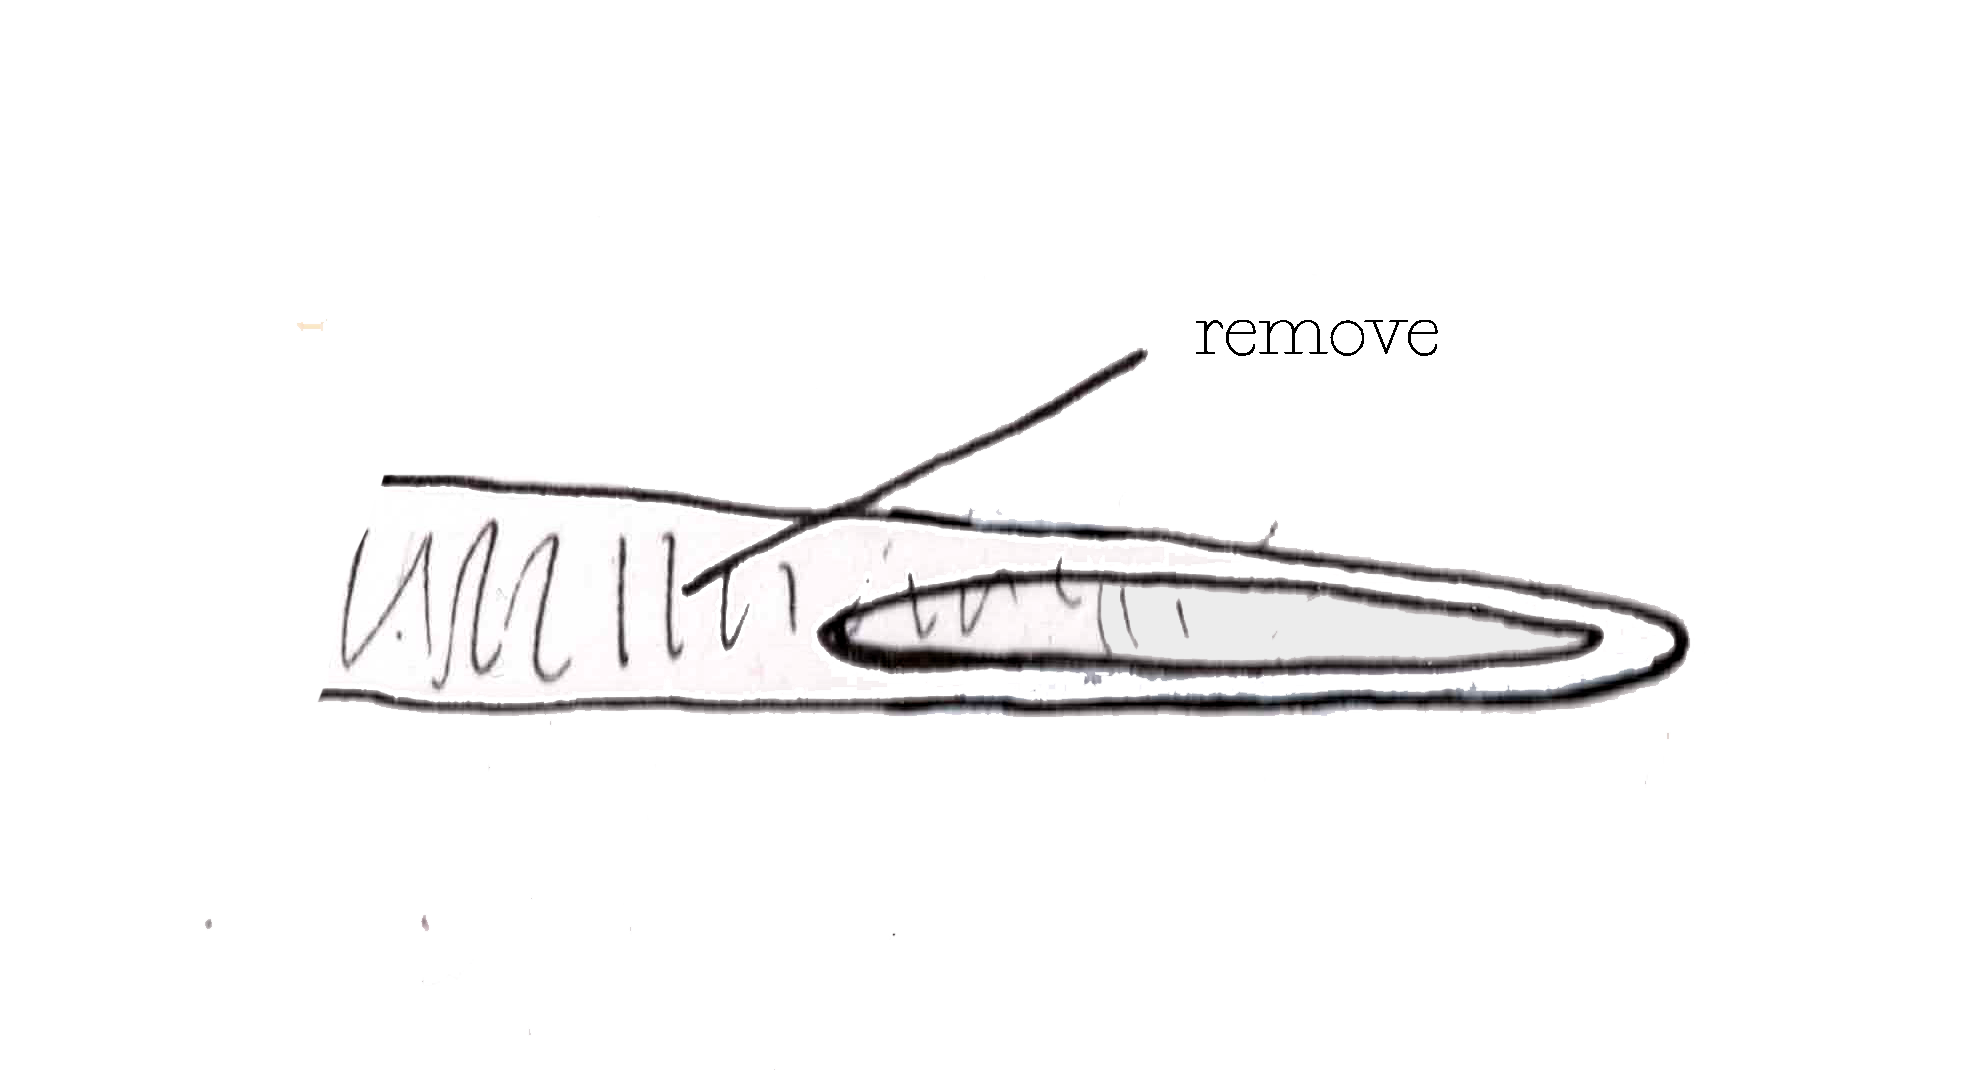
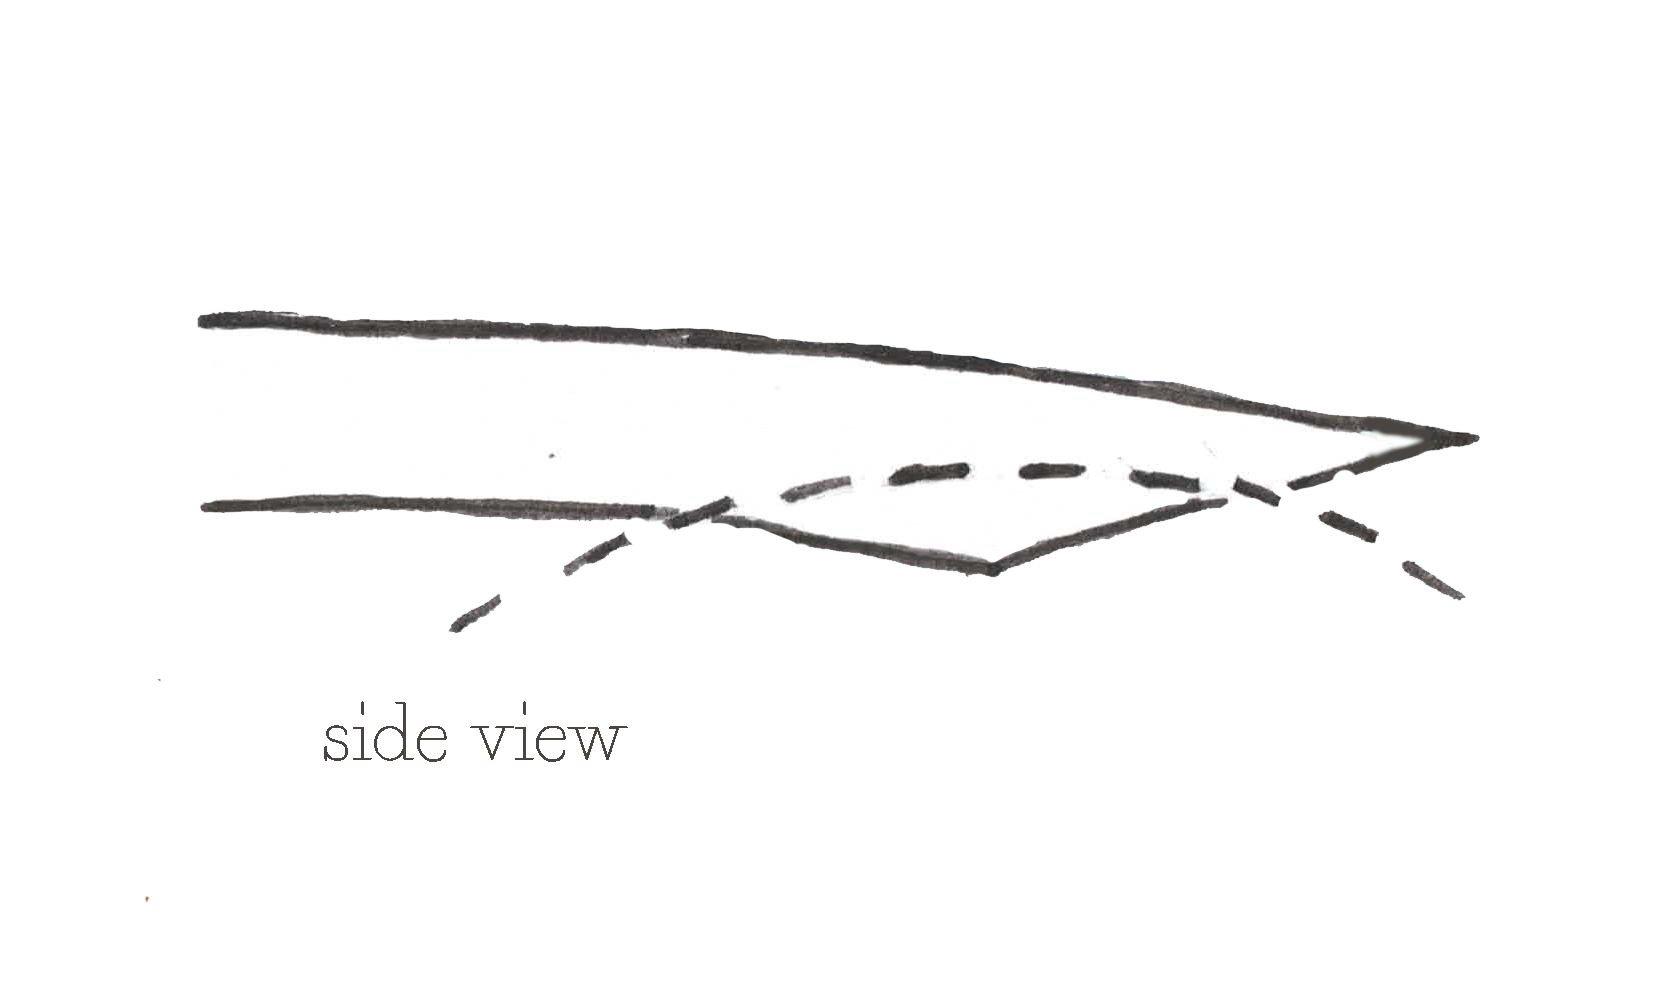
Make the second cut.
Next cut the slit. This is where the ink will catxh.
Practice writing and drawing with your new quill- see if you can vary the width of the line by repositioning the angle of the quill.
*NOTE: Turkey and goose wing and tail feathers make the best quills because they have nice, thick shafts. They are are one of the only bird feathers that are legal to possess in the US and available for purchase in craft store. You can use found feathers if you have access to a turkey farm or geese at a local pond, just clean and dry them before use. If you are purchasing feathers, make sure you get the big sturdy feather, not the soft downy ones.
Writing & reading secret messages:
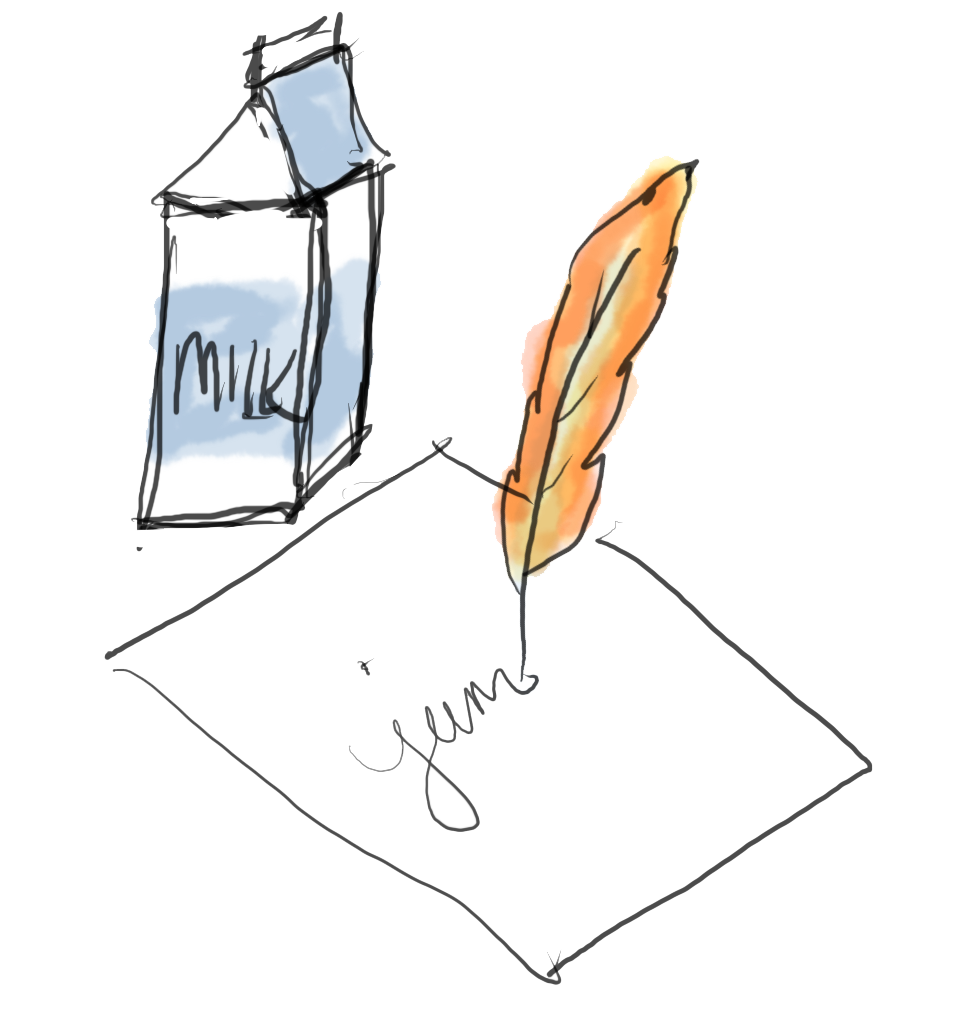
Dip your new quill into some milk and write a message on a piece of paper. It will be a little tricky to keep track of because it’s nearly invisible when dry. Allow to dry completely.
Give the message to it’s intended recipient and explain how to read it: Apply a hot iron to the message for a minute and then keep checking to see if the message is visible. If it’s not apply more heat. Eventually the milk will effectively toast and turn brown while the paper stays white.
Snacks
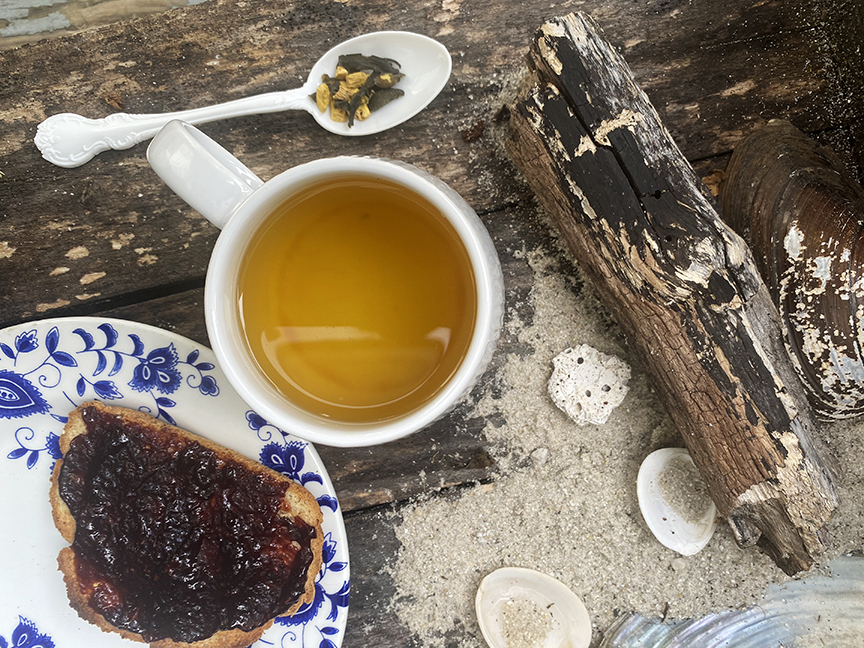
Sea Tea
“‘I rarely get visitors who aren’t customers. I could brew some tea!’ Her eyes, already magnified by her glasses, went wide with excitement.” pg. 93
Ansley is a character that I immediately identified with. The puttering, expert creativity combined with discombobulation and a total lack of social skills is right up my alley. Not to mention the plant obsession. I loved how excited she was when she thought Runa might stay for tea. And I was utterly convinced that she drank seaweed tea. The book does not detail her tea choice, and I had no idea if seaweed tea was a real thing, but it just felt so right. So I did some research and found out that seaweed tea is a thing, albeit a less than common thing. Ume Konbu or plum kelp tea, is a traditional Japanese drink, although really more like a broth than a tea. There is also a little company in Maine that makes a seaweed tea that I ordered to try. It smelled more seaweedy than I would have liked and I was concerned that it was a failure, but it was delicious. (It didn’t taste seaweedy) I’ve included directions here, but unless you plan to make this all the time, you may be better off just buying the tea because I wasn’t able to find bladderwrack in small quantities.
Ingredients:
- 1 tsp dried bladderwrack seaweed
- 1 tsp dried turmeric root
- 1 tsp dried ginger root
- 1/4 tsp cinnamon stick
- boiling water
- honey (optional)
- milk (optional)
Method:
Place the tea in a tea strainer in a cup and pour over boiling water. Allow to steeo for a few minutes. Add honey or milk as desired.
Plumberry Jam
“He had to yank out a bottle of Dungwasp repellant, a grappling hook, a jar of plumberry jam”…. pg 207
Clearly Ansley needs some plumberry jam to go with her tea. Plumberries of course don’t exist outside of the Wilderlore universe, but beach plums do. Beach plums (Prunus maritima) are a variety of plum, native to the Eastern US coast that are quite small, about the size of berries. They also thrive in sandy maritime environments making them perfect for a jam from the Sea. However, they are quite difficult to find. You pretty much have to grow or forage them yourself, provided you live in the right climate. I do live in the right climate and I have never seen one in the wild, I grow them, but the rabbits always beat me to harvest. So while it is conceptually perfect, I decided on a recipe using conventional plums because it’s far more practical. However, if you do have an amazing source of beach plums please make this with them and tell me about it so I can live vicariously! This is a small batch, making only one jar, so it is not canned and must be stored in the fridge.
Ingredients:
- 2 cups plums pitted and chopped
- 1 cups sugar
- 1/4 cup water
Method:
Combine plums, sugar and water in a large pot and bring slowly to a boil over medium heat.
Stir until the sugar dissolves.
Turn the heat to high and cool until thickened, stirring frequently to prevent scorching. Finished jam should hold it’s shape when dropped on a frozen plate.
Remove from heat and pour into a clean jar. Cool and store in the fridge.