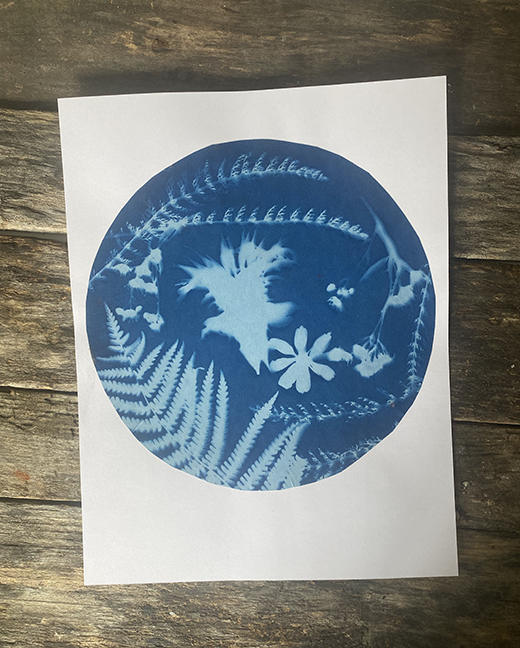
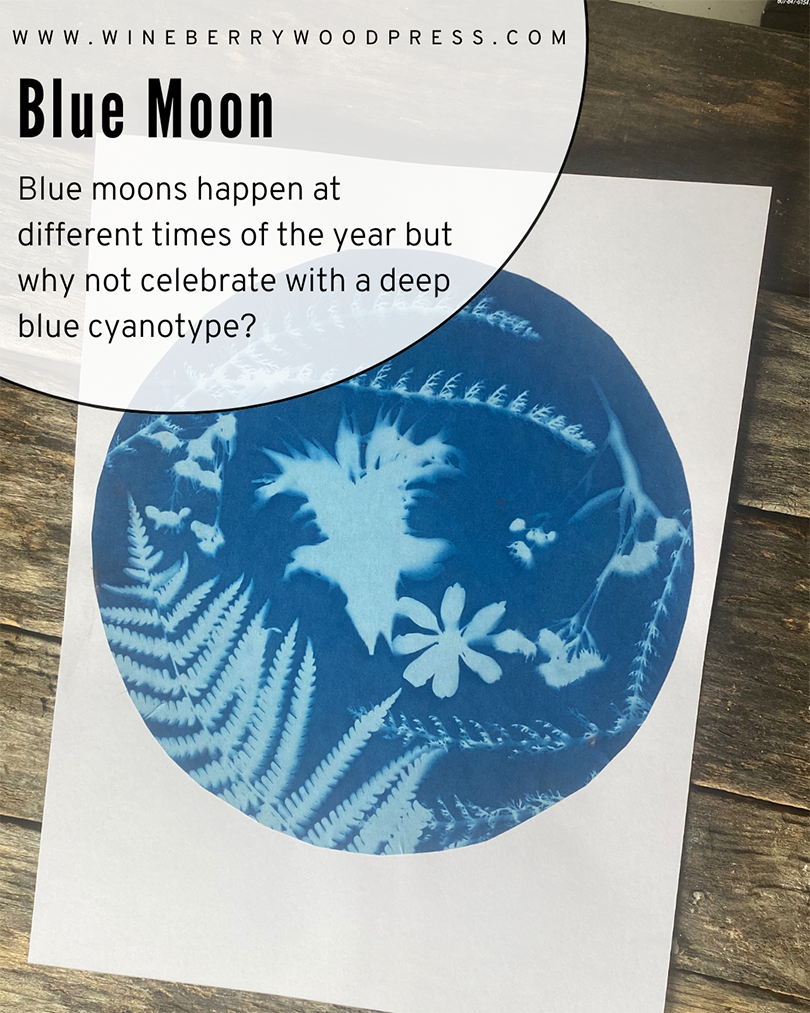
Blue moons are slightly misunderstood. You see we have 12 months in our year, but there are 13 full moons. So each year there ends up being an “extra” moon in the western calendar. (This is not true of some other calendars.) If you are interested in this sort of thing, the way we got to the current western calendar is somewhat fascinating and insanely circuitous. But anyway, back to the moons, the extra moon doesn’t always fall in same month and sometimes has it’s own special name (like if it falls in September) but generally it gets called a blue moon. (Like the expression “once in a blue moon.”) Why it’s called a blue moon isn’t abundantly clear, and according to astronomers the actually definition of a blue moon is “the third full moon in a season that has four full moons.” So while that isn’t exactly any “extra” full moon, it is more or less and that has become the most frequently used definition. To celebrate this special moon which it a bit less seasonal than the others because it travels around, we decided to lean into blue-ness and make a beautiful and simple cyanotype. We recorded the plants growing in our garden at that moment as well, bringing us back to the seasonal rhythm of the full moons. Our bee balm was looking especially stunning!
Blue Moon Cyanotypes
You can use store bought sun paper for this project which makes it super simple, or purchase cyanotype solution and mix your own. This is a fun way to bring in some chemistry and engage older kids. (You have to mix two different solutions to get the chemical reaction.) Either way, pick a super sunny day and choose plants that are thriving. If you do this project for a few years in a row write the date on back so you can see both how the blue moon wanders the calendar and what plants where abundant when you made your moon.
Materials:
- sunprint paper OR cyanotype solution and a heavy watercolor paper
- a few plants from your garden, yard or local park
- plexi or glass to hold everything in place
- a piece of scrap cardboard
- a shallow pan for water
Method:
In a dark room out of direct sunlight place a piece of sunprint paper face down and trace a circle onto the back with a plate or other round template. Cut it out with scissors. (Or mix your cyanotype solution and paint a circle on your paper. Follow the directions in your kit for mixing and drying)
Gather your plants, think about the shape that different leaves and flowers will make. If you have any that are super thick, you may want to press them first under a heavy book so they make better contact with the paper.
Once your paper is prepared, gather all of your other materials so you can work quickly. Read the directions on your sunpprint paper or cyanotype solution. Once you are ready, turn your paper right side up and place it on a piece of cardboard. (This is strictly to make it easier to move around- it could be anything flat and rigid.) Arrange your plants and flowers and the top with the glass/ plexi. This just holds everything down and stops it from shifting or blowing in the breeze. Quickly move outside and place you paper in a sunny spot for the time indicted on the paper you are using. (Usually five minutes or so)
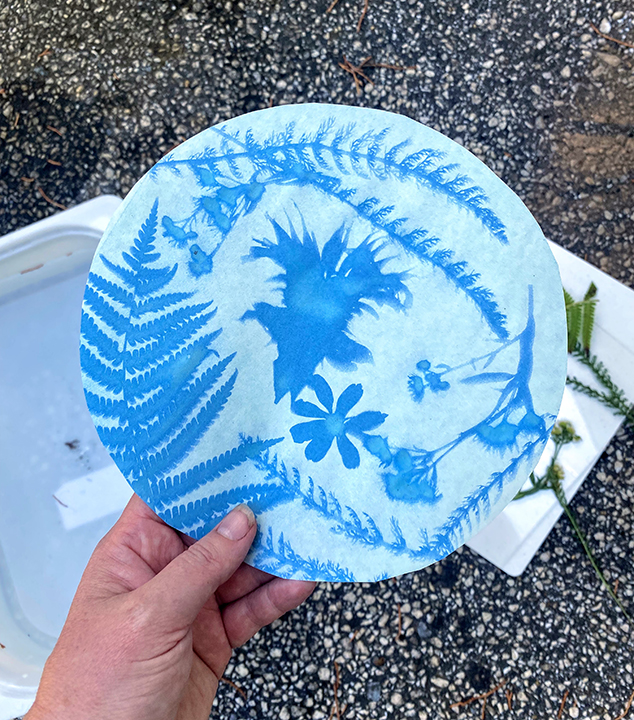
Once your paper has been exposed for the recommended amount of time, take the glass and plants off and rinse it in a shallow pan of water according to the directions. (Again usually 5-10 minutes.) The negative and positive shapes will switch! Set the wet paper someplace flat to dry and it will continue to darken. Once if it completely dry you can glue it down to a white piece of paper (if you used the sunprint paper) to flatten it out and make it look more elegant.
[…] Make Sunprints […]