Eggs are a classic symbol of spring, while they seem fairly ordinary to us these days, they must have felt magical to ancient people. One minute they look like a cold and lifeless rock, the next they explode with life. It’s exactly what the landscape if doing, one minute its winter, cold and dead, and then suddenly new life begins cropping up everywhere. Traditions around decorating and dying eggs substantially predate the easter eggs we now think of. It’s a perfect way to celebrate the Spring Equinox.
There is always a rash of natural egg dying posts this time of year, but I feel like they often fail to really explain the difference between natural and chemical dying. With those grocery store kits you can pop an egg into dye for a few minutes and be done- they are nearly instant gratification. That isn’t how natural dying works, you can get beautiful natural colors, but you are likely leaving your eggs in dye overnight at the very least. This can still be a fun activity for kids, but you have to understand that difference going into it or it will be frustrating.
Natural Egg Dye Recipes
The most important thing to remember about natural egg dyes is that the longer you leave them in the dye bath, the stronger the color will be. You can also dry and re-dip them to intensify the color. Start with overnight (in the fridge) and go from there. These recipes can all be scaled up as needed- I often just do one color rather than a rainbow. The hardest part honestly is finding enough containers to keep them submerged in the dye bath, I can usually only fit a few in the refrigerator at a time. You can use a shallow dish to purposefully only dye part of the egg. You can also dye multiple times in different colors with a resist like crayon or a leaf adhered to make more complex patterns.
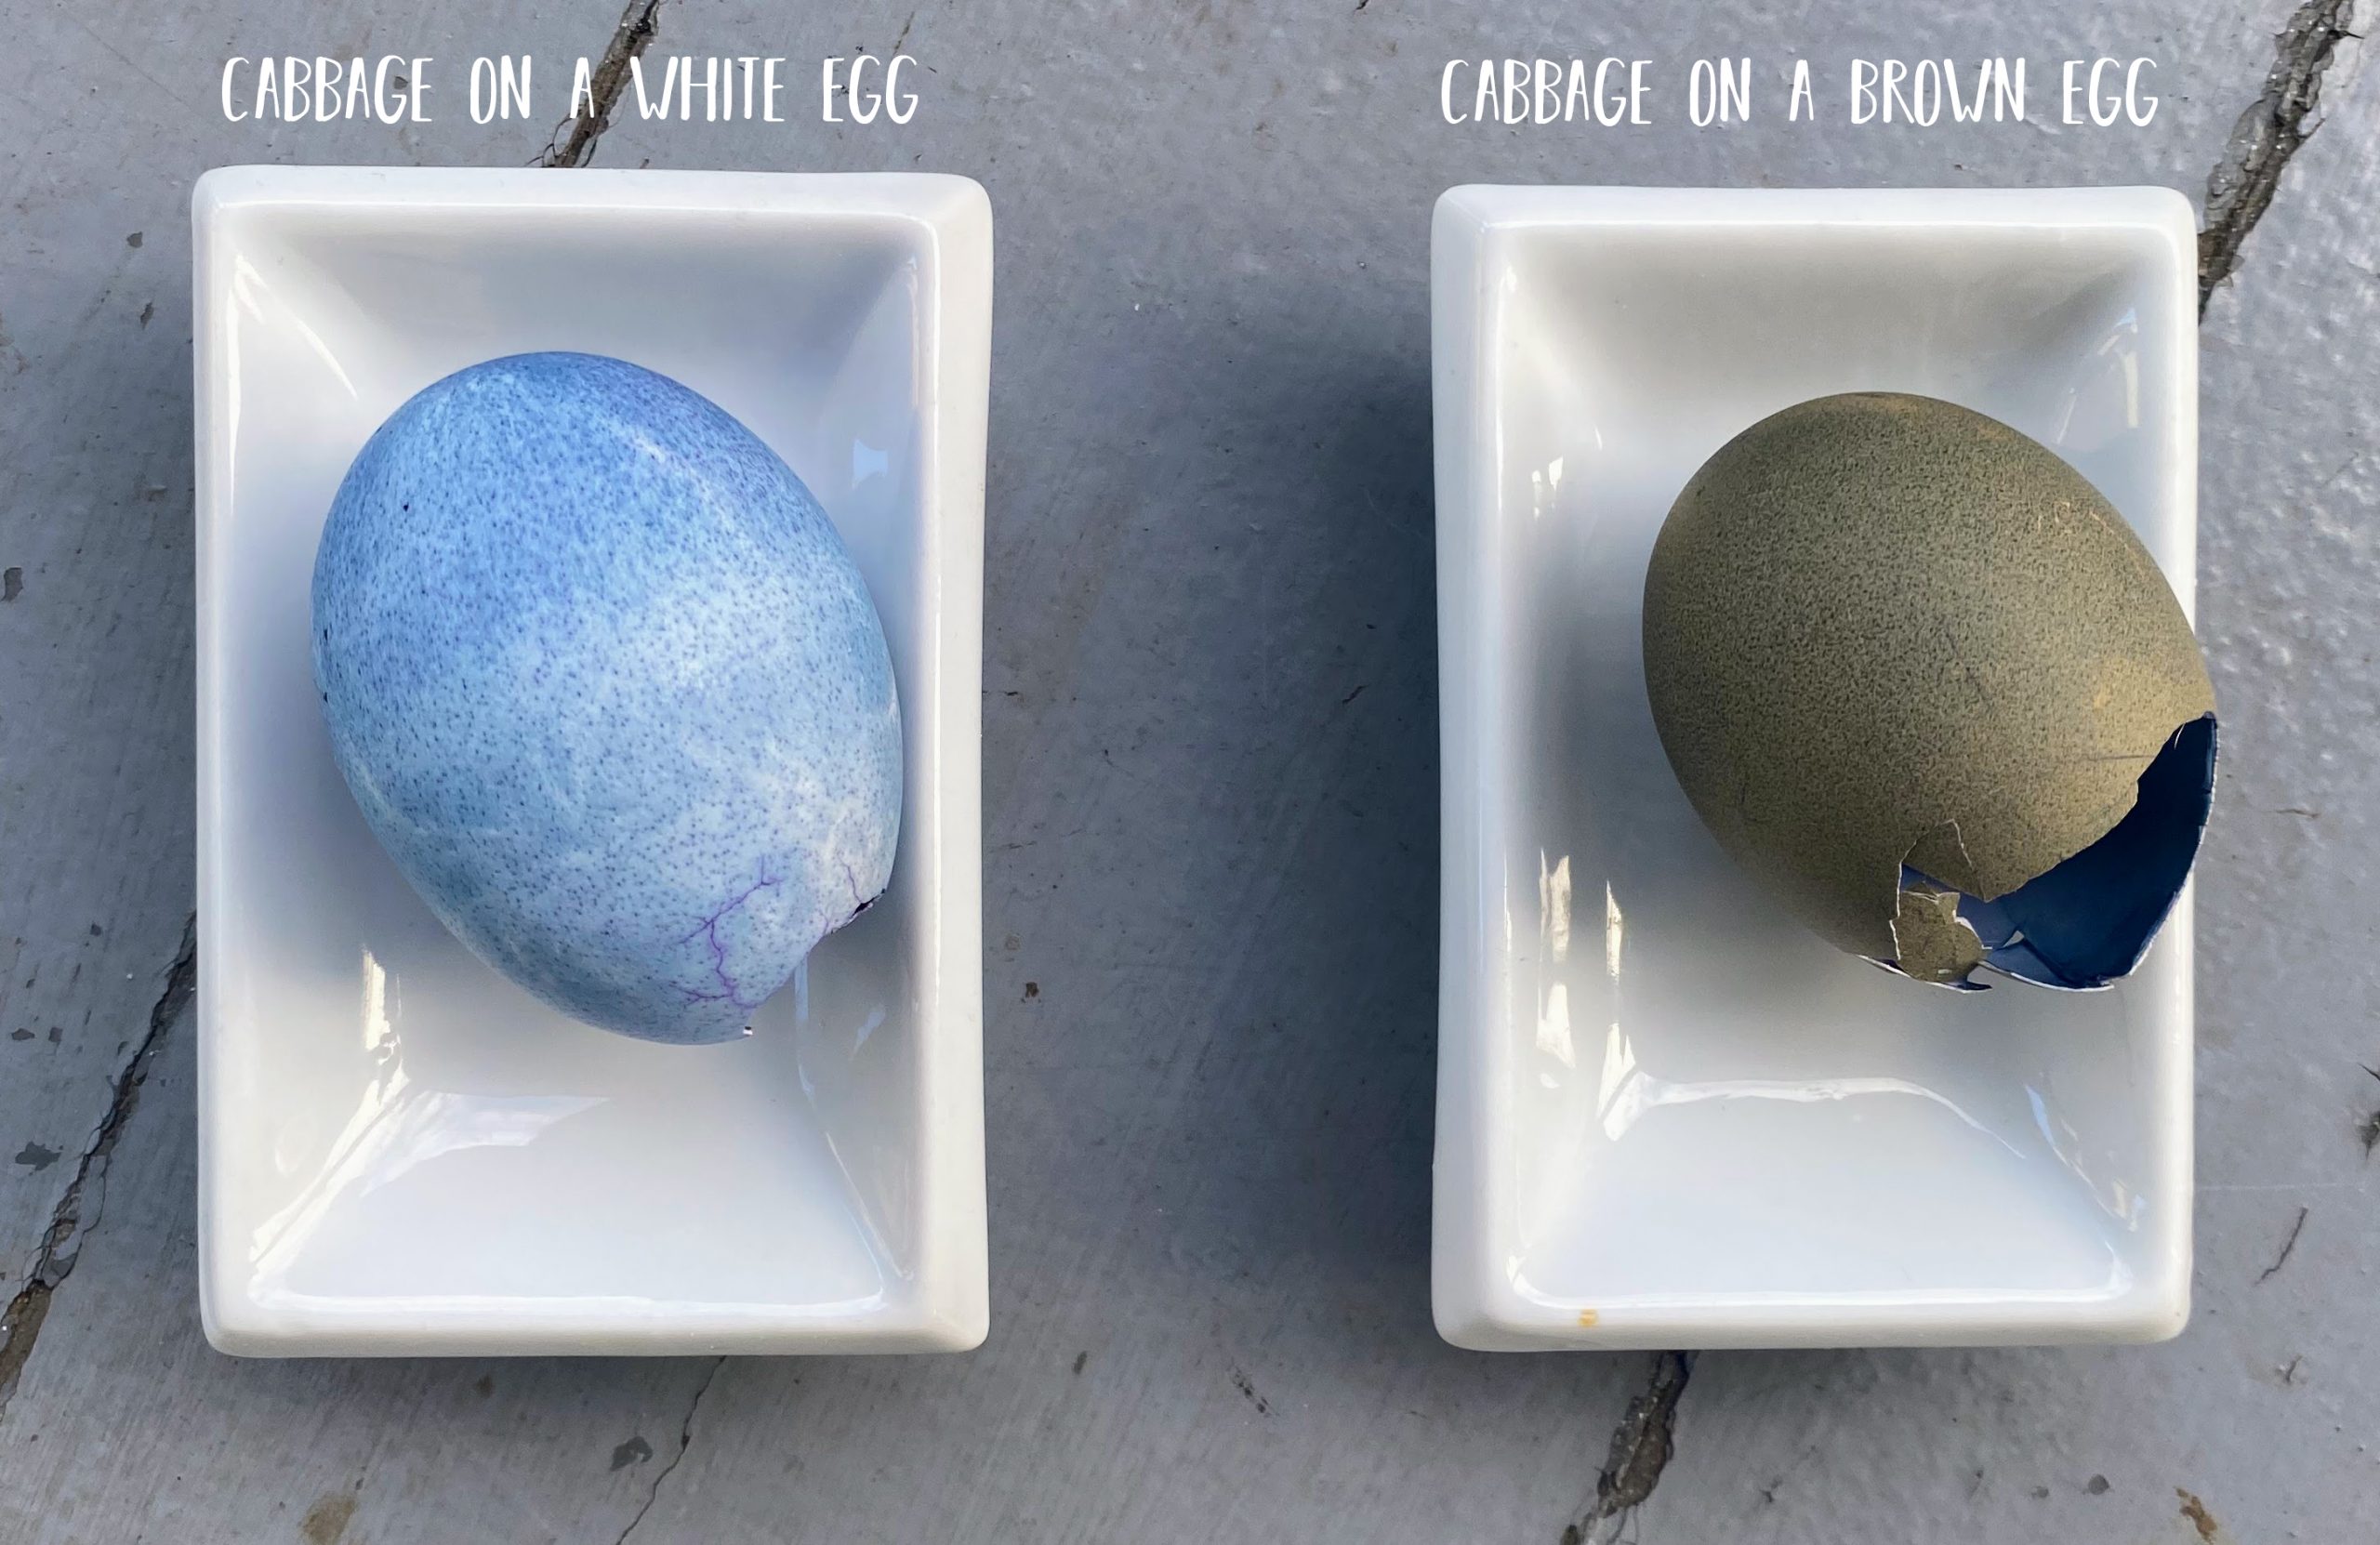
Deep Blue– Red Cabbage
- 1 cup chopped red cabbage
- 1 cup water
- 1 tsp white vinegar
Add your water and cabbage to a pot and bring to boil. Lower the heat to a simmer and cook for 30 minutes or so and then check the color by dipping in a paper towel. Cool, strain, and add your eggs. Put them in the fridge at least overnight and then check the color.

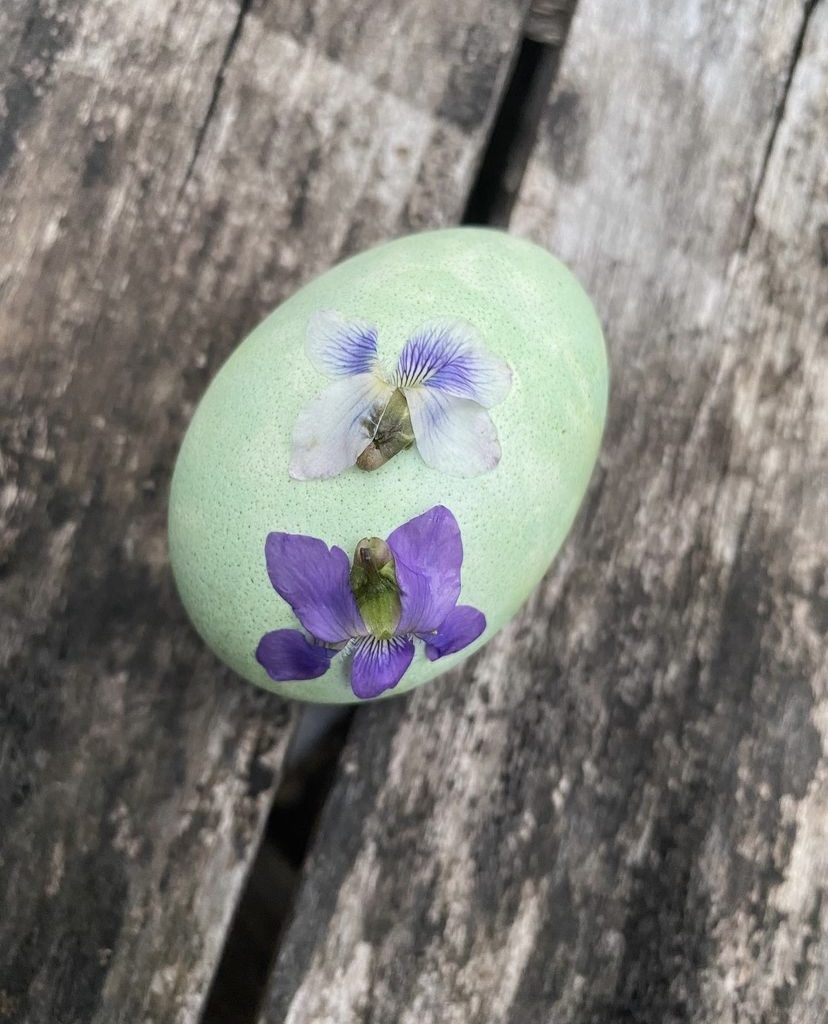
Pale Green Blue- Violet Flowers
I’ve never seen anyone else do this one and I’m not sure why- it makes a beautiful shade of blue and it’s so seasonal! I pressed the violets onto the egg right after I pulled it from the dye pot to see how they looked, but they actually just adhered that way and I never glued them.
- 1 cup violet flower heads
- 1 cup boiling water
Pour the boiling water over the flowers in a heat safe bowl and steep covered for several hours to overnight. Strain out the flowers and add the eggs. Let sit in the dye in the fridge at least overnight, preferably a few days.
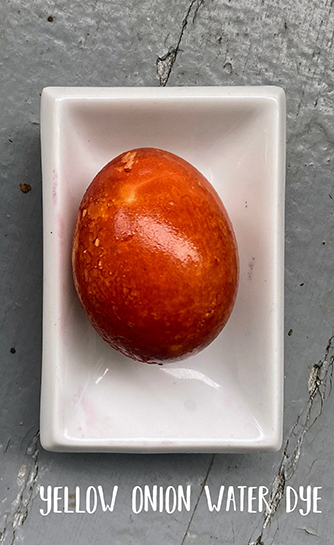
Red Orange- Yellow Onion Skins
- 1 cup yellow onion skins
- 1 cup water
- 1 TBS white vinegar
This is one of my favorites and you can get a deep rusty orange red if you leave them in the bath for a day or two. Put the onion skins and water in a pot and bring to a boil. Lower the heat and simmer for 30 minutes or so and then check the color by dipping in a bit of paper towel. Cool, strain, add the vinegar, and then add your eggs. Put them in the fridge at least overnight and then check the color.
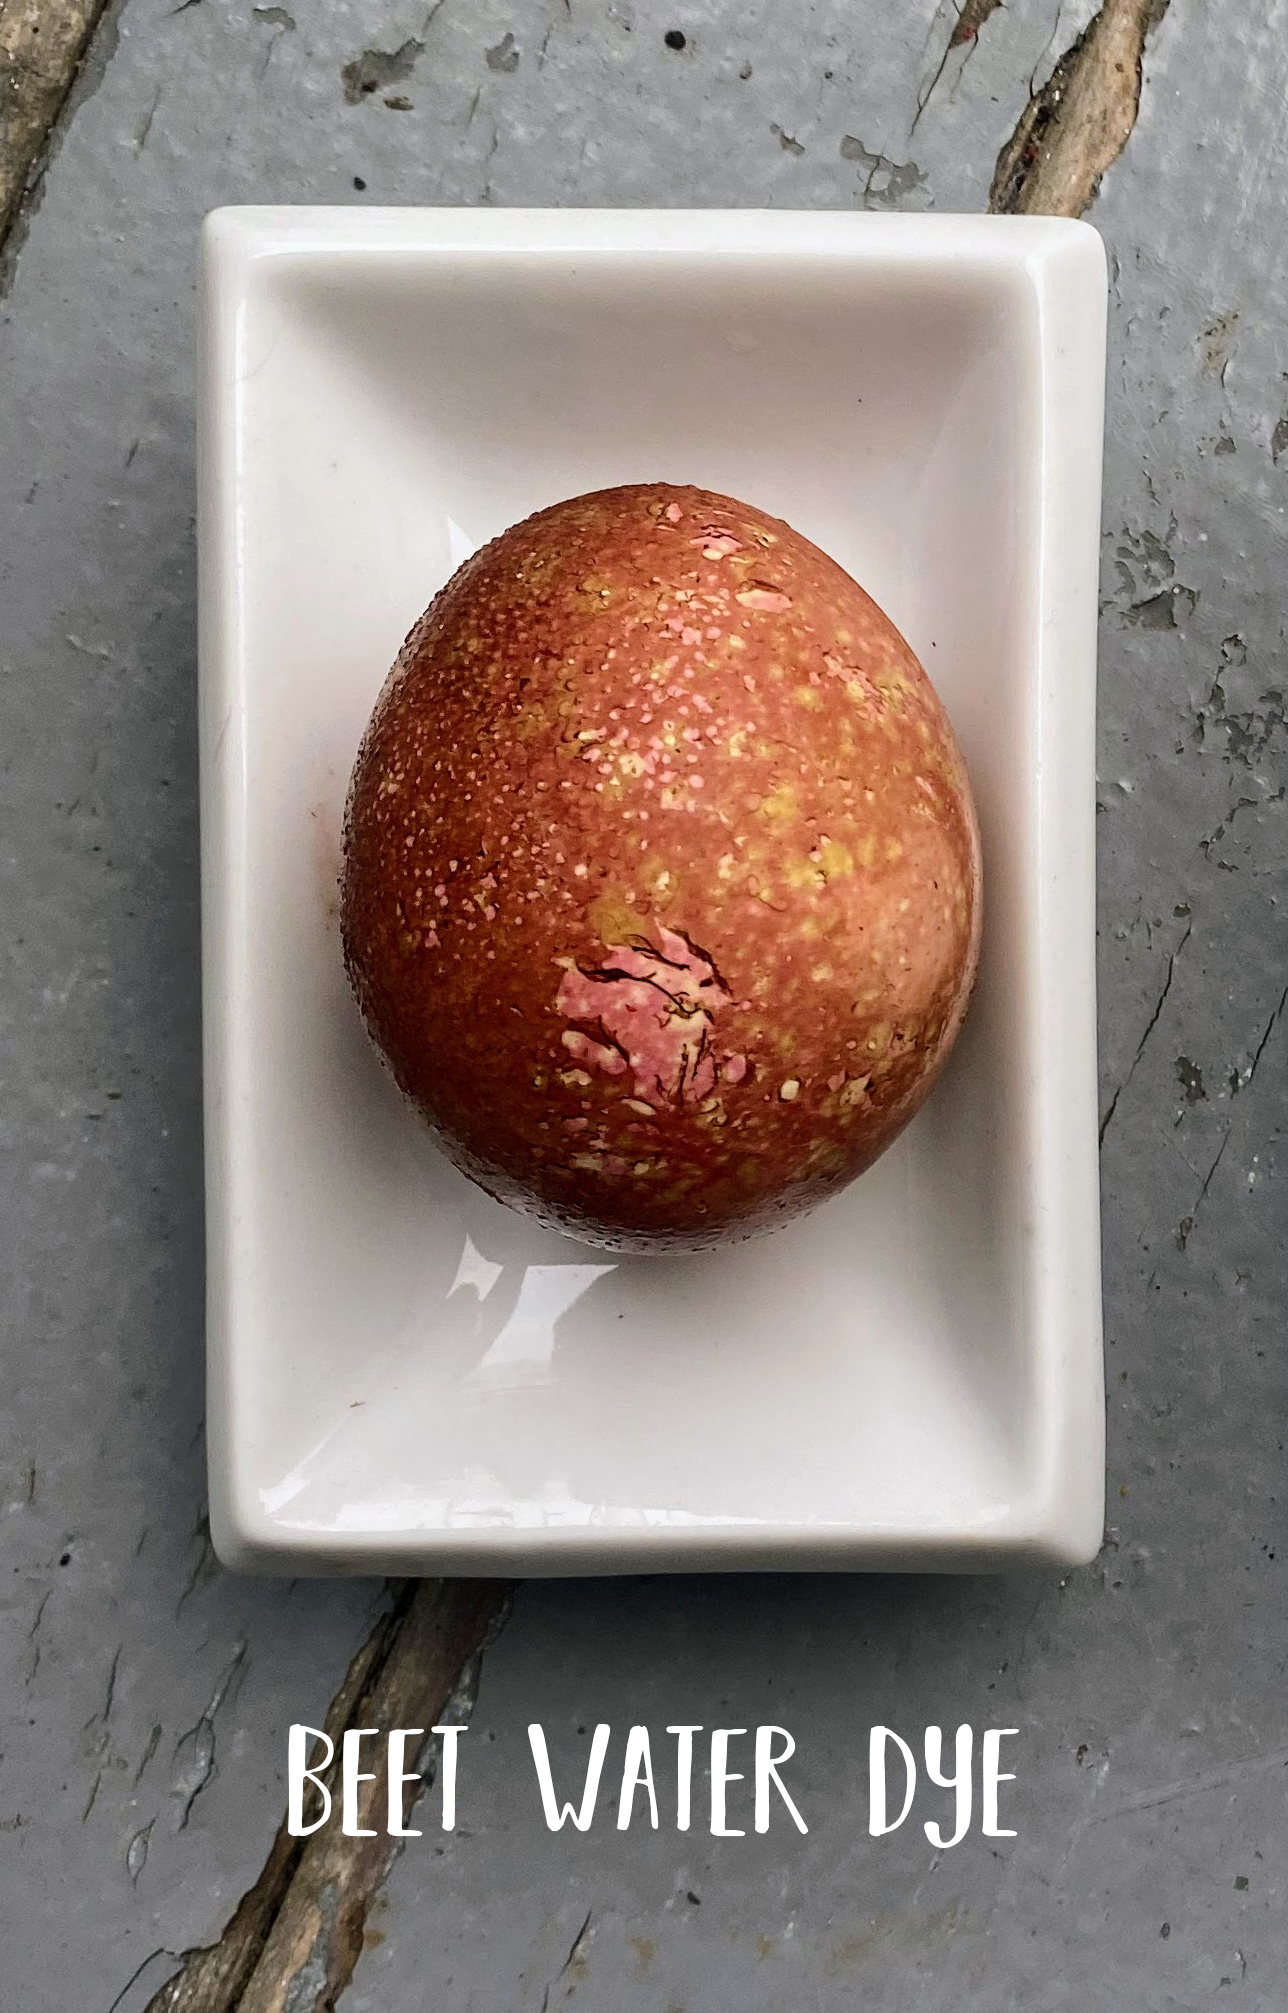
Pink Purple- Beets
- 1 cup chopped beets
- 1 cup water
- 1 TBS white vinegar
Put the beets and water in a pot and bring to a boil. Lower the heat and simmer for 30 minutes or so and then check the color by dipping in a bit of paper towel. Cool, strain, add the vinegar, and then add your eggs. Put them in the fridge at least overnight and then check the color.
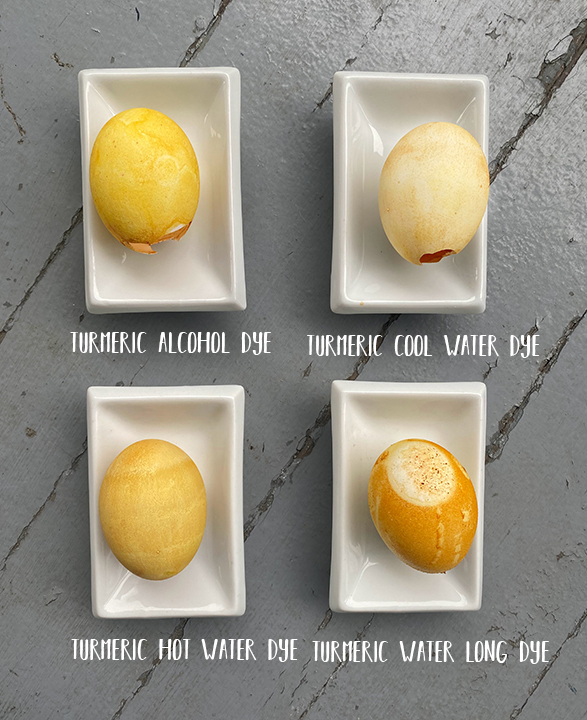
Yellow- Turmeric
- 2 tsp turmeric
- 1 cup water
- 1 TBS white vinegar
I only really make this if I want a base color or to dye a darker color over. I don’t really like it as an end product, turmeric produces much better color in alcohol, but because the shell is permeable that doesn’t work for boiled eggs. (It is fine for blown eggshells) Put the turmeric and water in a pot and bring to a boil. Lower the heat and simmer for 10 minutes or so and then check the color by dipping in a bit of paper towel. The other tricky thing about a turmeric/water dye is that it really has to be hot to get good color. Put your eggs in as soon as you take the dye bath off the heat and they will only need 20-30 minutes. You can keep using the dye bath after it cools down but the color will be much lighter and muddier. I am going to do a separate post on using an alcohol base as it’s both brighter and faster.
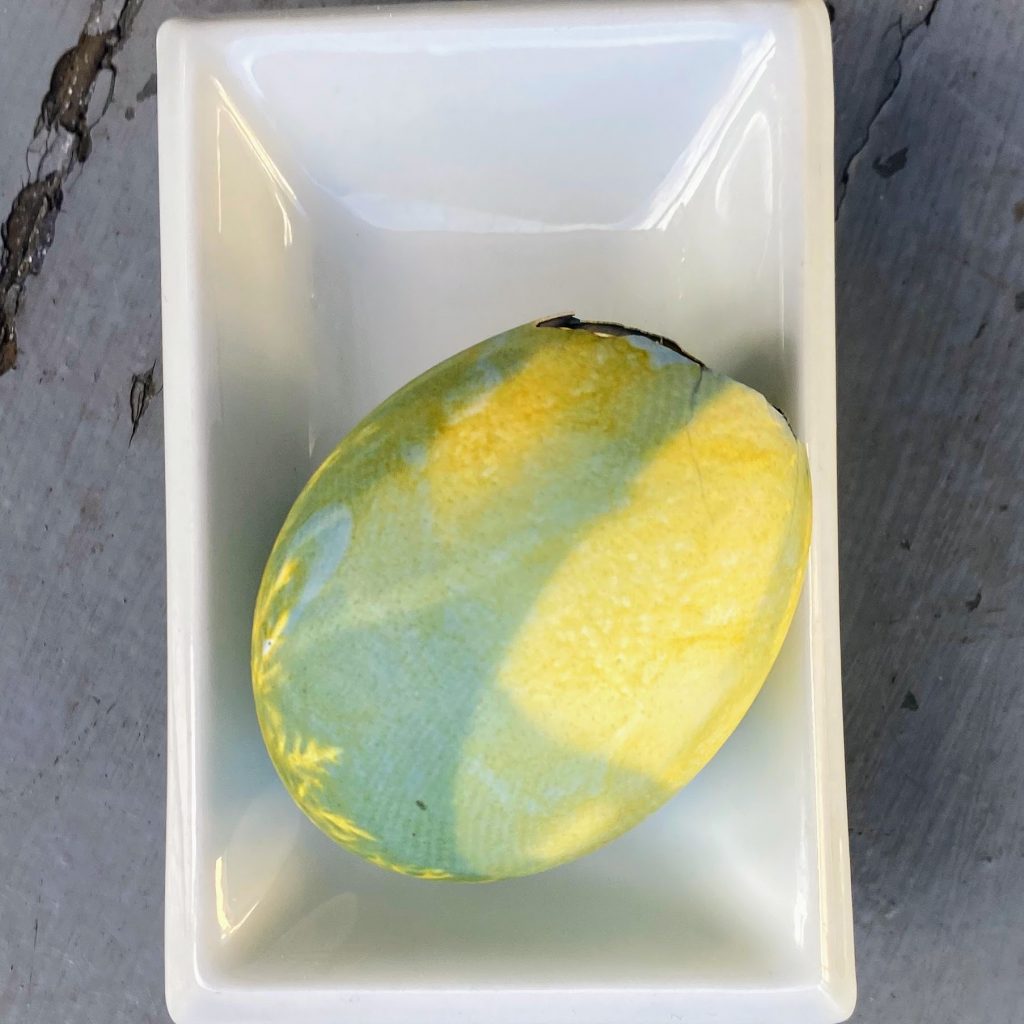

Green- Red Cabbage + Turmeric
- Turmeric Dye
- Cabbage Dye
Green is one of the hardest natural dyes to get, most green pigments are fugitive, which means they quickly brown or fade in the light. The easiest way to get green is actually to use the same cabbage dye, but use a brown egg instead of a white one. You can also dye a white egg first in turmeric, dry, then dye in cabbage which will allow you to control the shade of green you get more.
All of the colors benefit from a little bit of vegetable oil rubbed over the shell when dry- it brings out the subtle variations in color.
[…] Dying Eggs with Natural Materials […]
[…] (dyed or undyed– here is more on natural dyes for […]
[…] bit anyway…) I stumbled on this method by accident really, when I was making my conventional naturally dyed eggs post I was muttering to myself about how much better turmeric dye bath with alcohol is. I happened […]