Midwinter is a snowy sleepy time. The days are 42 minutes longer and brighter than then were on the Winter Solstice, but they don’t really feel like it yet. In one of my favorite winter nature books, Grandmother Winter, Grandmother shakes her down comforter out and the feathers become snow. This image is actually drawn from the Grimm’s fairytale Frau Holle, which itself is drawn from a much earlier myth. In early Germanic and Nordic folklore, Frau Holle controlled the weather and kept children safe in the winter. In modern lexicon she is a kindly old woman who makes it snow by shaking out her quilts. I like the idea of a sweet old woman who makes snow and looks after children. It follows to me that giving children lanterns might be a way to look after them. And it just so happens that Midwinter (and subsequent celebrations like Candlemas) celebrates light– the amount of daylight is increasing and candles and lanterns are made to celebrate and encourage that light to return.
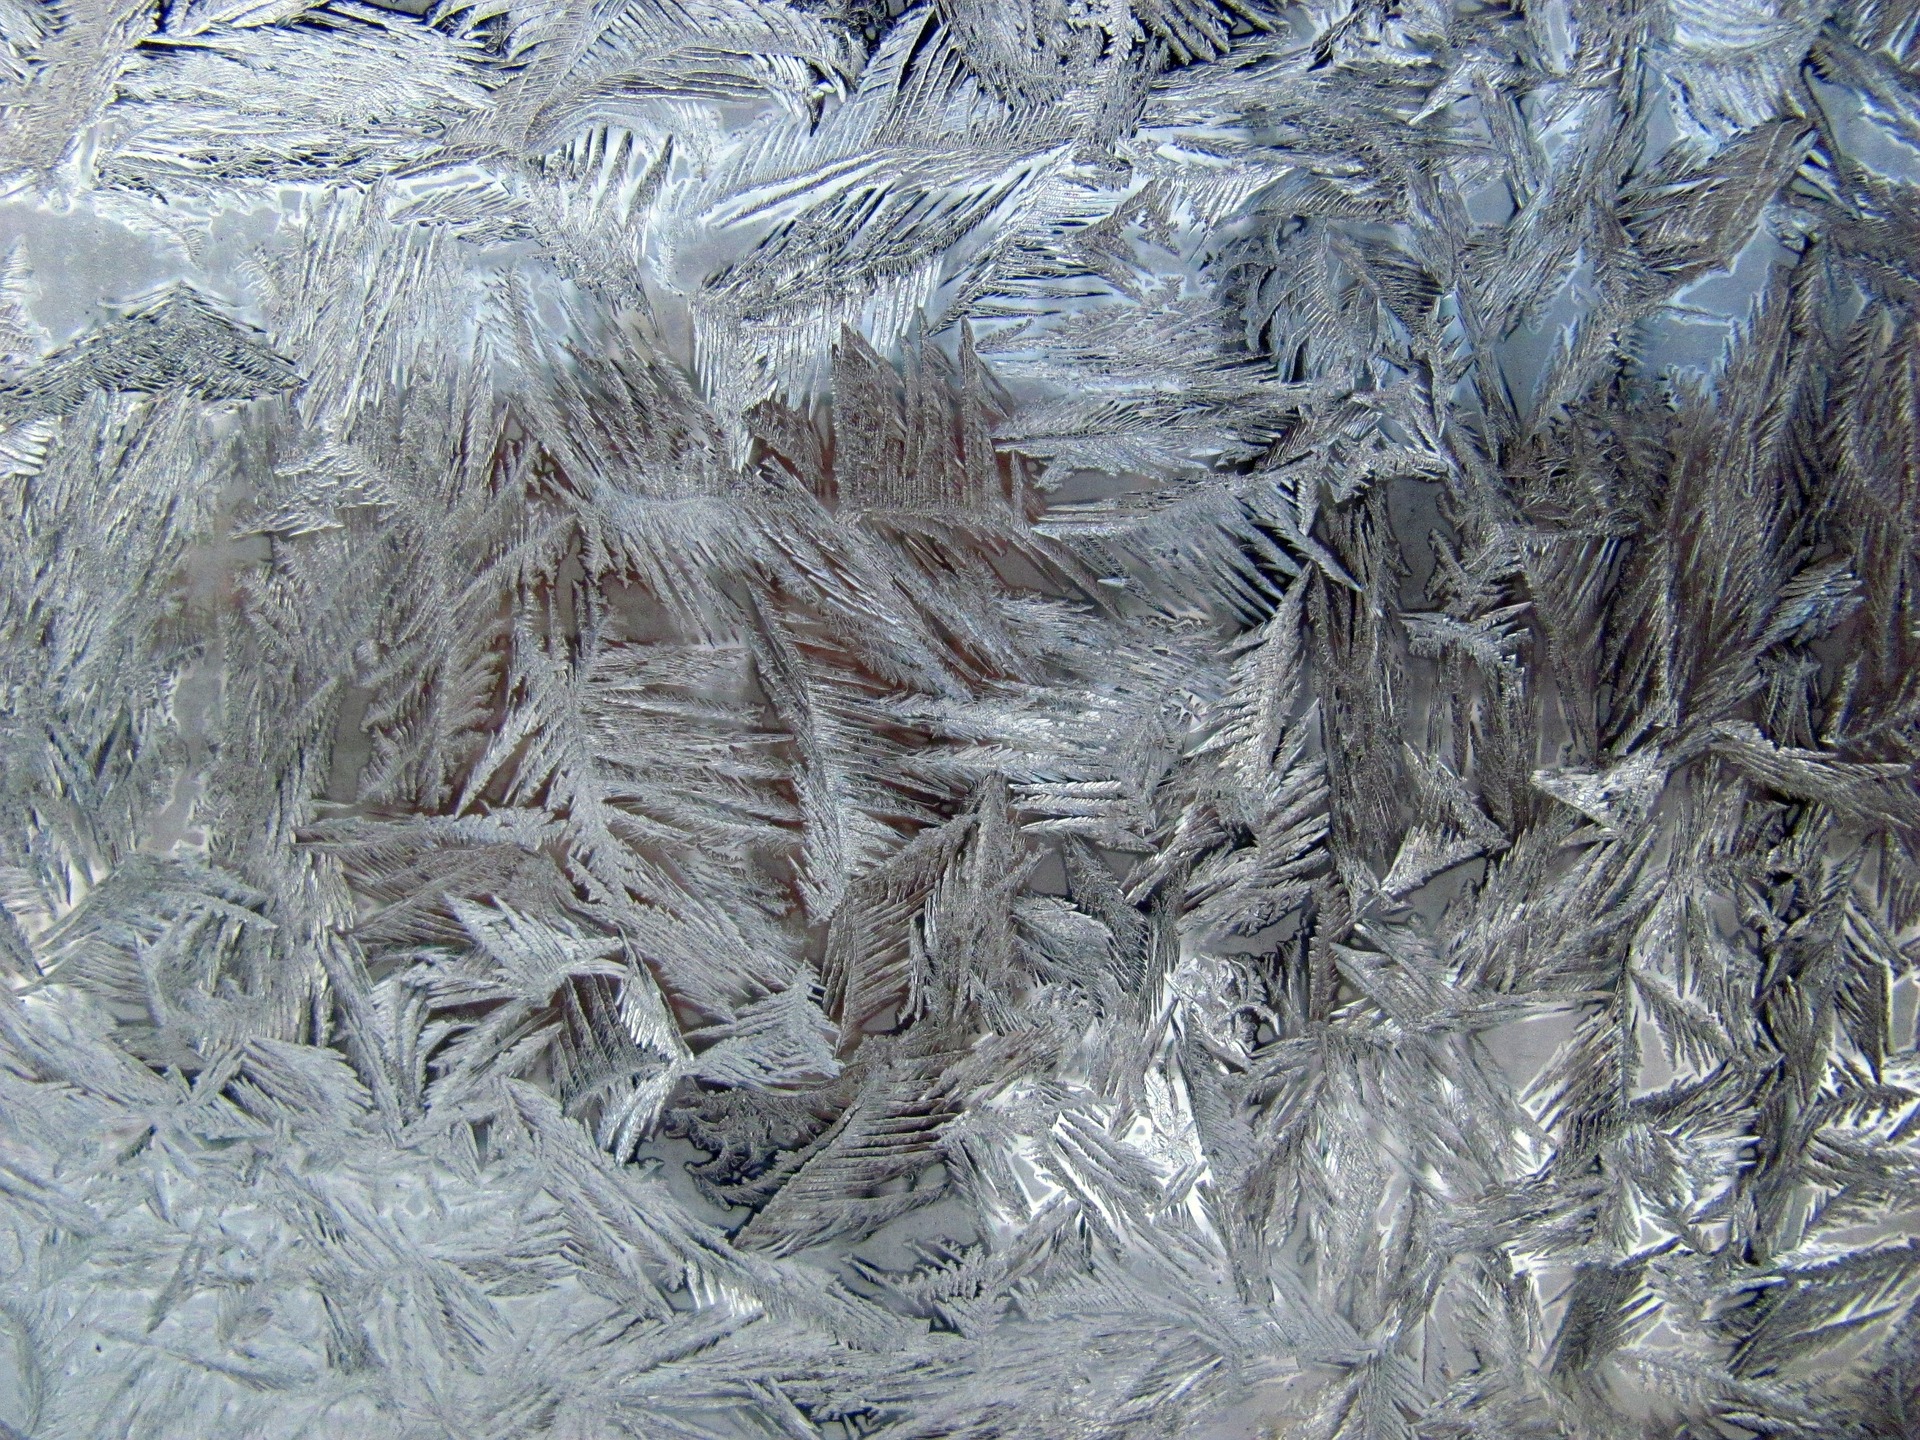
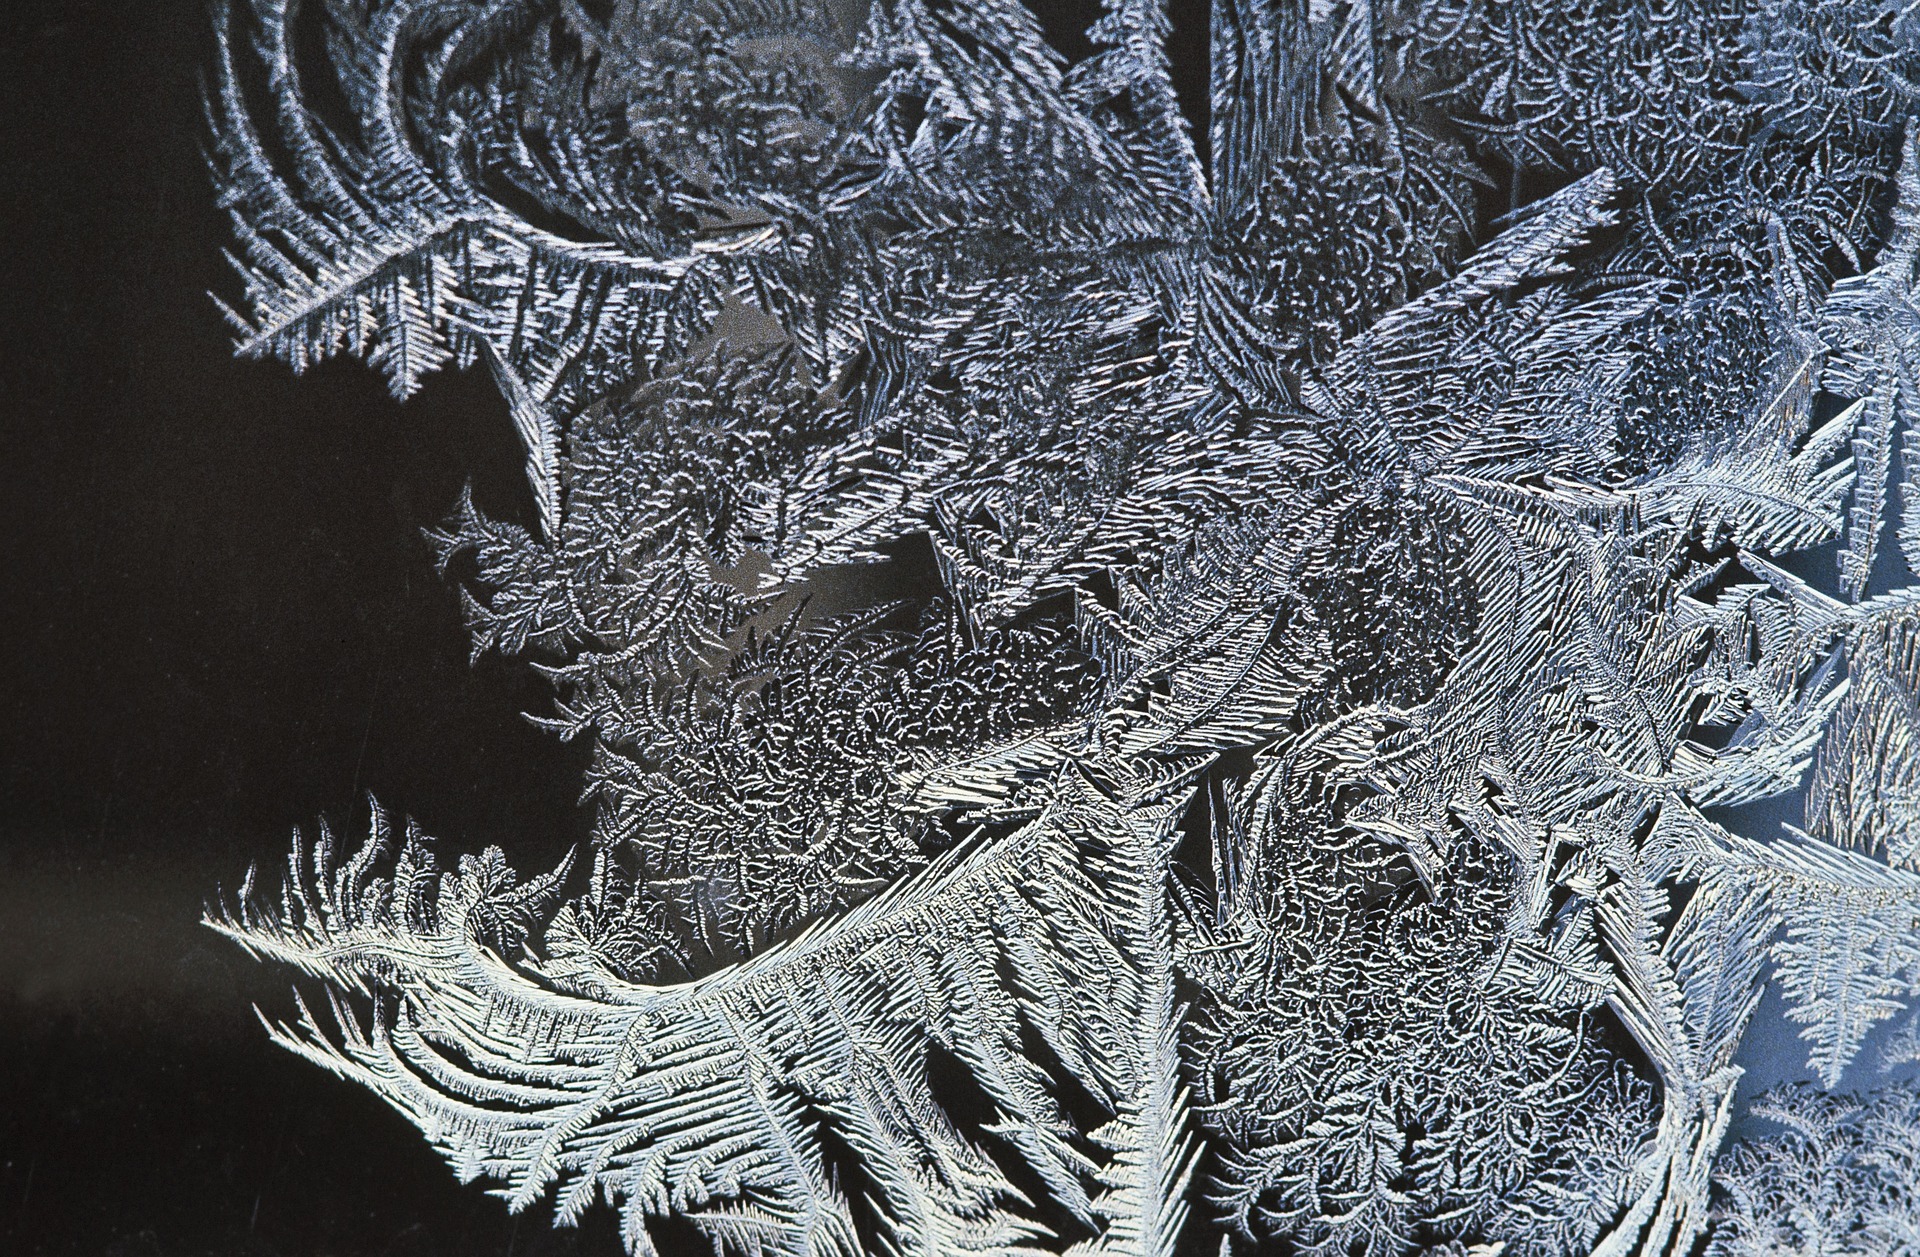
As I was contemplating what sort of lantern I wanted to make, I knew that I wanted to incorporate feathers and snow somehow- it’s such an evocative image. All of a sudden it dawned on me that frost on windows looks just like feathers made of snow. The frost lantern was then born!
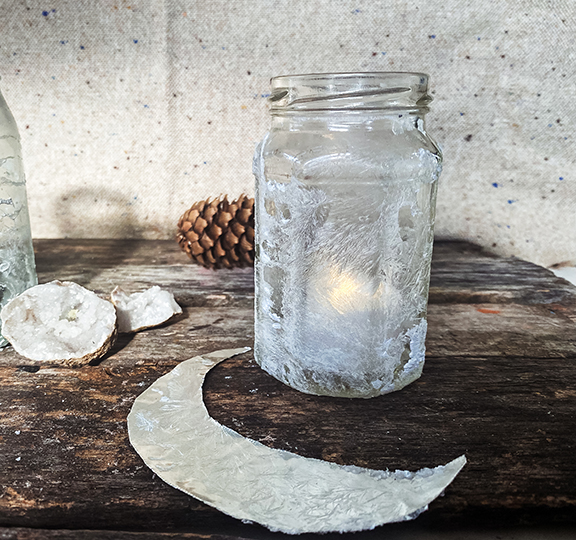
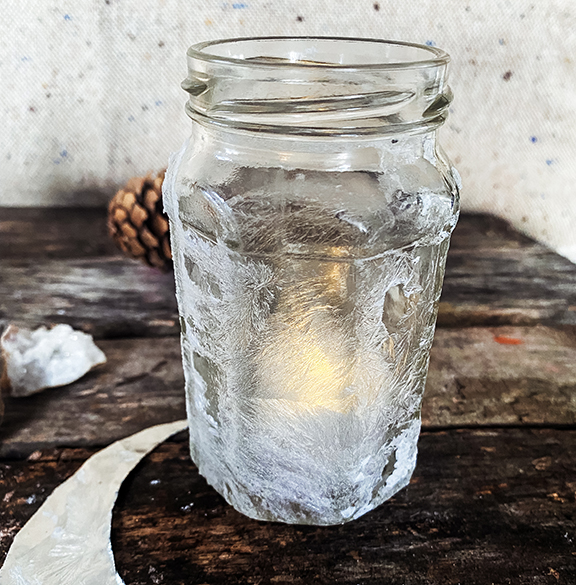
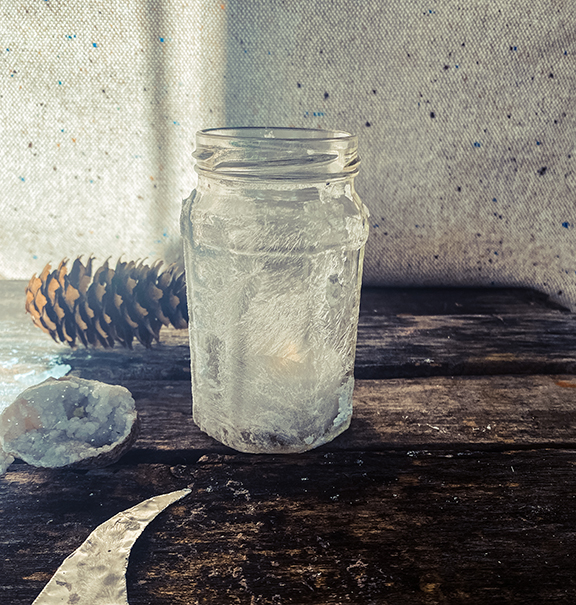
Recycled Jar Frost Lanterns
I tested this on a bunch of different recycled glass jars and found that the ones that worked the best had flattened sides, but they will all work to varying degrees.
Materials:
- Old glass jar, washed and label removed (large enough to fit a tea light)
- 1/2 cup hot tap water
- 1/3 cup epsom salts
- a few drops dawn dish soap (this helps your solution adhere to teh glass)
- tealight
- foam brush
- bowl for mixing your frost
Method:
Mix the hot (just from the tap, not boiling) water with the epsom salts in a small bowl and stir until the salt is completely dissolved.
Add the dish soap and mix.
I found that letting this salt solution sit out for a day or two and evaporate a bit made it work better, but it’s not strictly necessary.
Paint the solution onto your jar, I found it worked best with the jar on its side. You are trying to get decent coverage and stop the solution from dripping off as much as possible. Keep letting it dry and adding more until you are happy with the result. And keep in mind that much like frost this is a natural process, and embrace the randomness. No matter what the salt will form beautifully feathery crystals.
Once the jar is completely dry add a tealight (real or led) and enjoy!
Real Frost Experiment
This craft project can serve as a fun jumping off point for a science lesson about frost. There are many different types or frost and they all form in different conditions. The simple experiment below will allow you to make your own frost!
Materials:
- 8 oz. metal tin or a Pyrex-type glass measuring cup (regular glass can shatter with the temp change)
- 1 cup of ice
- 2 TBS water
- 3 ½ TBS rock salt
- Spoon
Fill the 8 oz cup with ice.
Add 2 TBS of water to the ice and stir.
Wipe off any condensation that forms right away.
Add 3 ½ TBS of rock salt to your ice water. Stir for thirty seconds. (This is lowering the temperature below freezing!)
For the next five minutes, observe your glass and look for frost. It can be subtle so try scratching the surface if you don’t see it. (A thin layer of frost should form)
This experiments forms frost because of deposition. Deposition causes gas (water vapor in the air) to go straight to a solid form (ice) without first becoming a liquid (water.) This experiment relies on the humidity (ie water) in the air. If your house is very dry, try running a humidifier and then trying again or using a humid room like the bathroom after someone has taken a shower. This is the same way frost forms in nature- albeit in different patterns and formations.
[…] Frost Lanterns […]
[…] Frost Lanterns […]
What fun!! These look so beautiful! Cant wait to try these. Love all of your ideas! ❤️
[…] Get the full instructions here. […]
[…] designs of varying complexity. (falling leaves lantern, star lanterns, harvest moon lanterns, frost lanterns) But when my kids were toddlers this was the go to lantern craft. It’s super easy for little […]