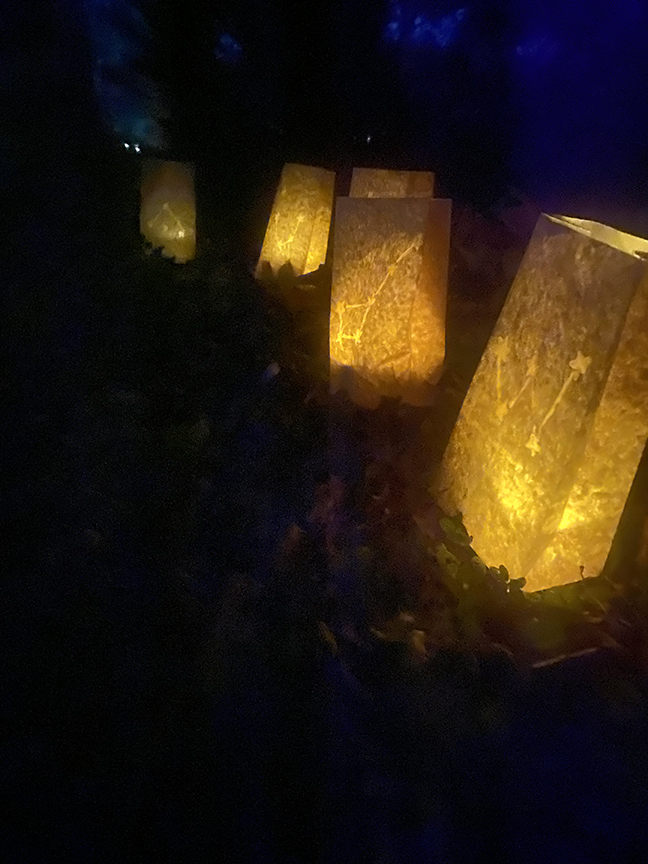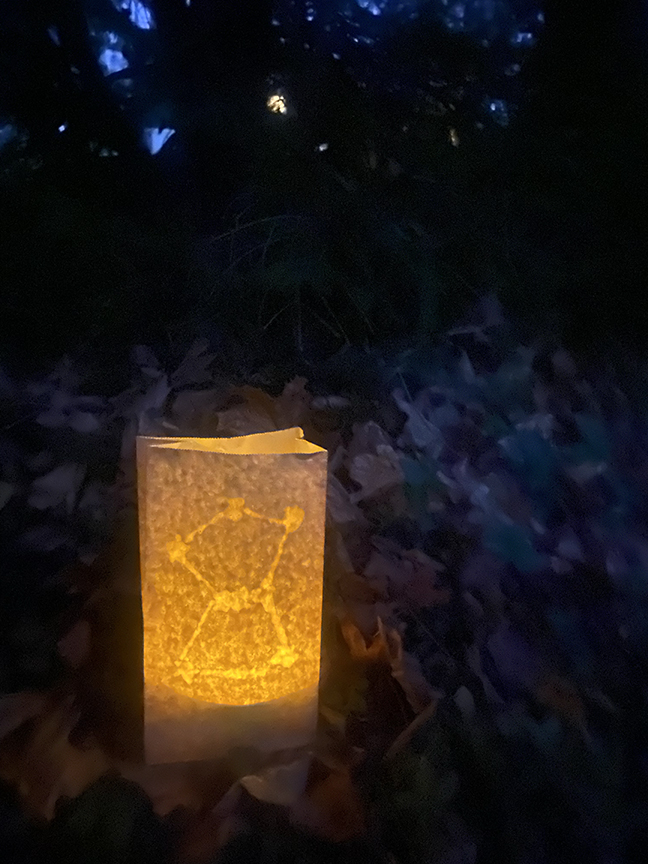
I remember luminaries being a bigger deal when I was a kid than they are now– did they go out of fashion? Is it the fire hazard angle? Regardless, I have always loved them and have been pondering a luminary project for awhile now. First off, if you weren’t born in the 80s you may not even know what a luminary is. It’s just a paper bag, usually a whole row of paper bags, lining a walkway or a driveway or something, that has sand or clean kitty litter in it to weight it down and a candle. Yes people probably still use real candles in paper bags, but I am 100% LED myself, doesn’t seem like there is any good reason to tempt fate there. I decided to do some research because I don’t know much more than it’s a thing my Grandma always did around the winter holidays, and it looks like it was originally a Mexican tradition that flowed northwards. (Which also makes sense in relation to my grandma.) Anyway, they are often plain bags, but sometimes you’ll see cut-outs or decorations on them. They are generally fairly simple though and the effect it largely from the mass of them trailing off somewhere. I decided I wanted to make constellation luminaries in honor of the longest night. They are simple enough to work in this format, super easy and cheap to make and look stunning. This is a great project for kids and grownups of all ages.
I tested a crazy number of ways to make these luminaries, I originally planned to use oil, because it’s cool way to make the paper translucent where you put it, but it bleed too much and just turned into greasy bags which had a whole different vibe. I eventually settled on chapstick of all things- its basically oil solidified with wax. making it pretty perfect for this task. And they smelled like cherries! You can draw right on the bags with the chapstick, and in fact that is how I made the lines between the stars, but we found it easier to stamp the stars. Chapstick isn’t the greatest of drawing tools. Our stamp was made from a cork, a pink eraser will also do the job. (And is a great thing to do with the dried up ones that don’t erase well.) The oil in the chapstick will still bleed into the paper over a time, and while it retains a starish shape, it’s at its crispest the day it’s made. These would be lovely and magical leading to a special Solstice celebration!
Materials:
- cork (or eraser)
- black sharpie (or other pen)
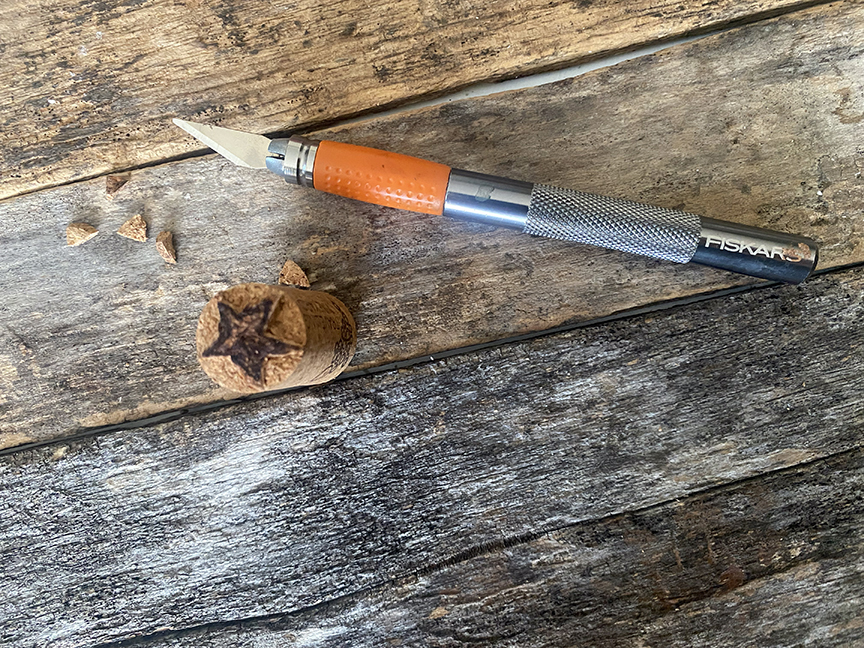
- exacto knife
- brown paper lunch type bags
- chapstick
- LED tea lights
- small dishes or sand/ clean kitty litter
Method:
First make the stamp. This is a grownup or teenager job. Draw a star with black sharpie then carve away the cork around your shape. You want the star to ultimately stick up an 1/8 inch or so higher than the part you carved away. If you are using a cork you can make a different star on each end!
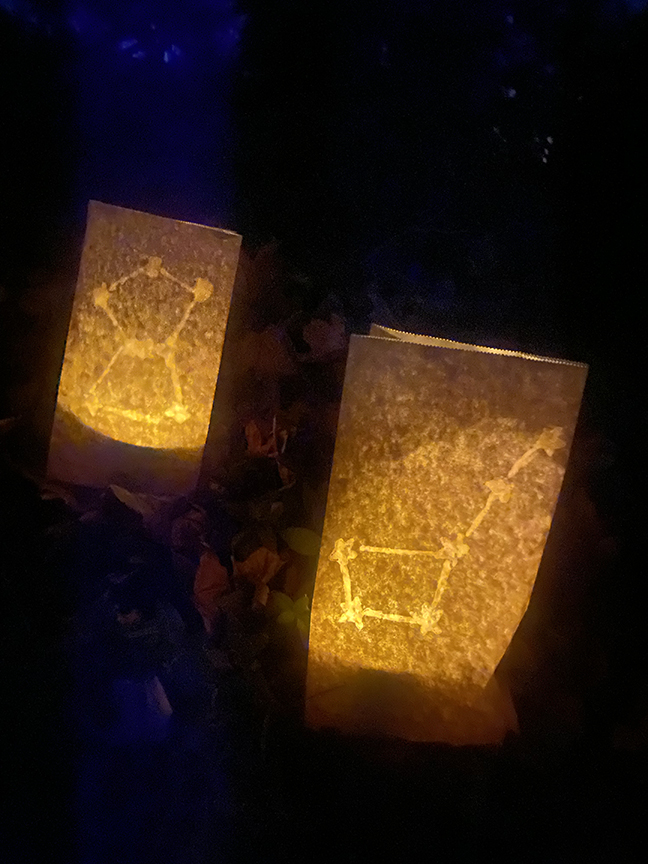
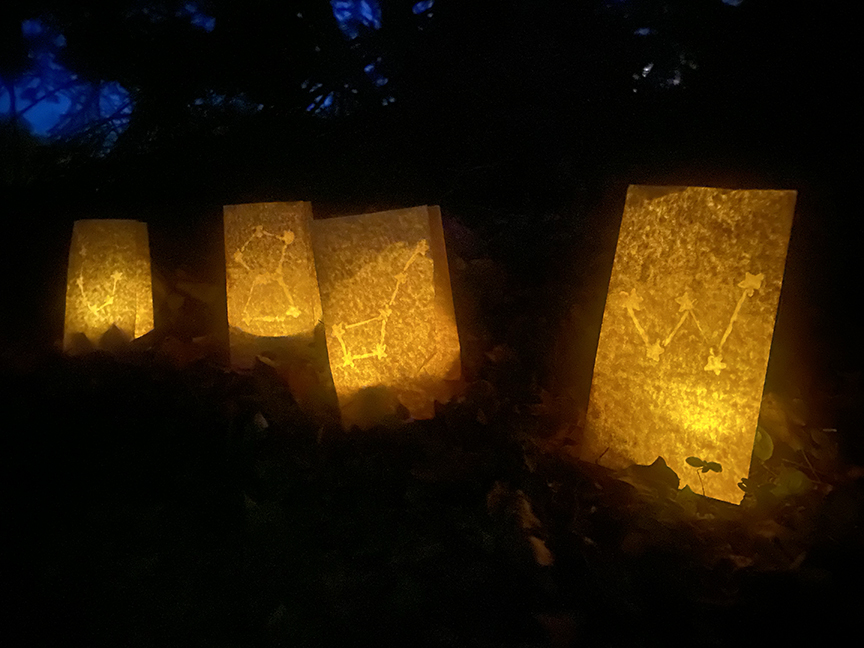
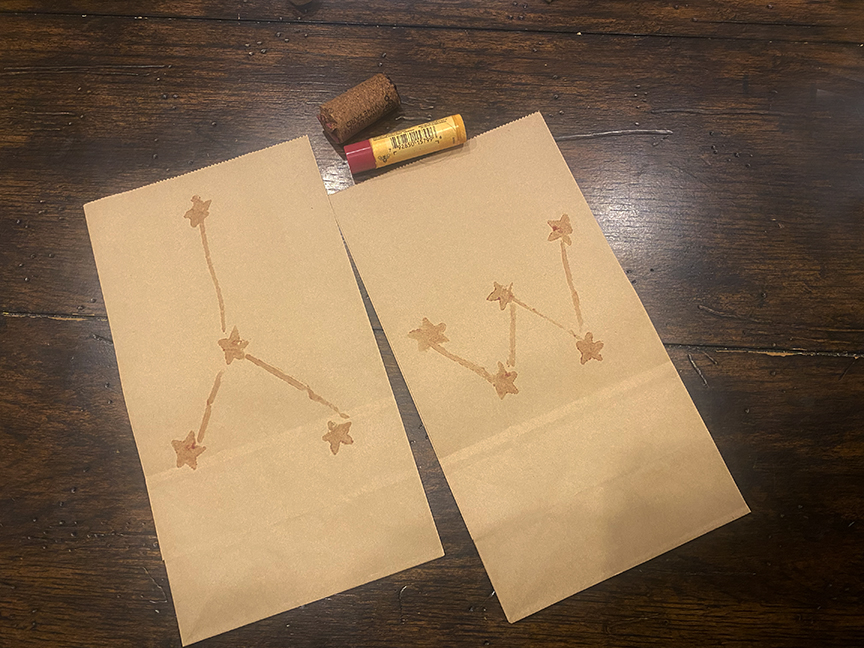
Now decorate the bags. Look up some constellations for inspiration. Wipe a thin layer of chapstick onto the stamp– you don’t need a thick layer. Press it onto the surface of the bag. Repeat in the shape of the constellation you have chosen. Then use the edge of the chapstick to connect the stars into a constellation.
Make a bunch of bags and then set them up outside with a little sand or kitty litter in the bottom. I also found that a littel dish or votive holder worked well.
Troubleshooting:
Make sure you put the seam side of the bag facing the back because it blocks the light.
Leave the bottom 3ish inches clear as that is where the candle will sit.
I found that because the LED tea lights kind of emit light all over (rather than just at the flame like a real candle) that they worked best tucked into a little dish or stuck down into the sand. In some of them I just stuck a dried leaf in front of the candle so there wasn’t a light spot at the base of the bag.
The globbier the chapstick is the more you will loose the shape. This is unavoidable with littles. They’ll still be cute.