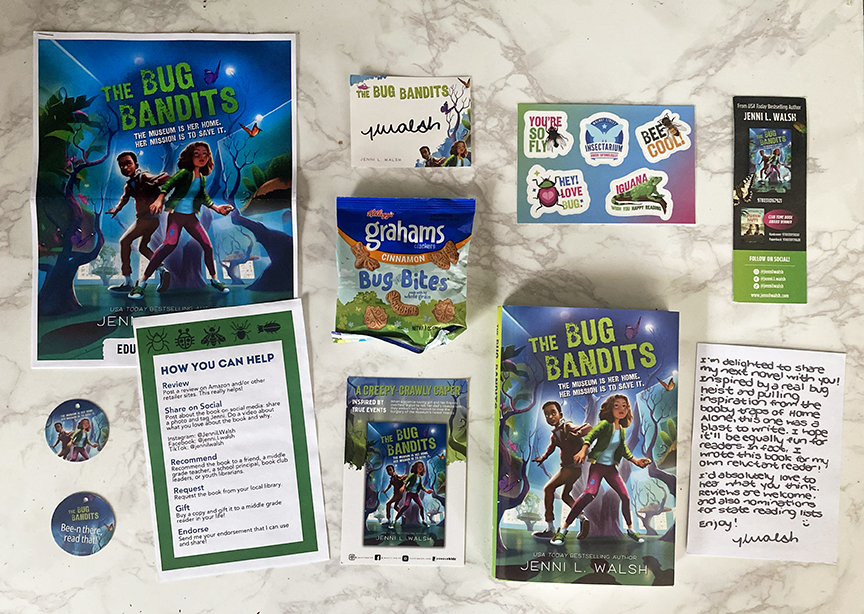
Next up in middle grade book buds, is a modern nature school classic– The Bug Bandits. I have been reading a ton of middle grade books lately, but would love to hear your suggestions for more book buds! Middle grade books are substantially longer, so I have broken the middle grade book buds into a lesson, a craft or two, and a snack. All are driven by the themes and ideas in the respective book. These could be the jumping off point for a more in depth academic book study, or just a fun project to further immerse yourself in the worlds of your favorite books!
The Bug Bandits
Written by: by Jenni L Walsh
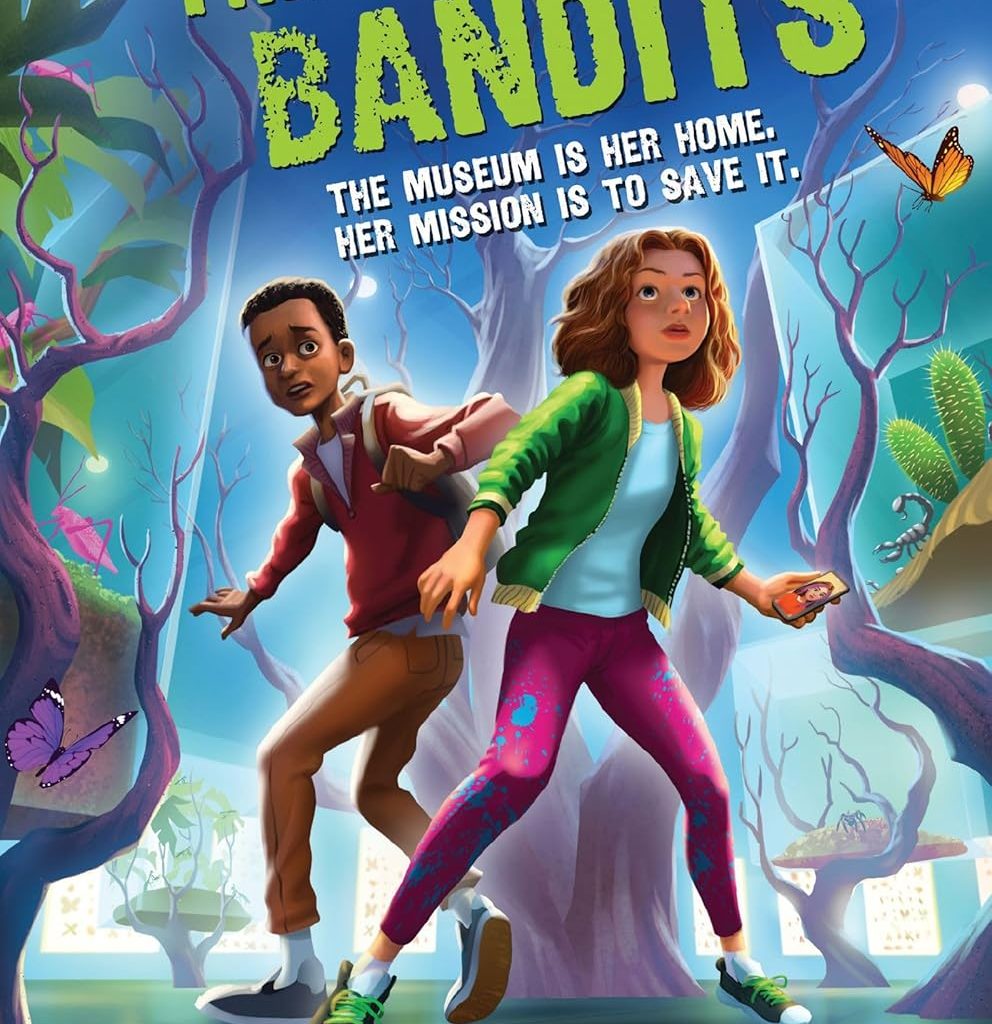
The Bug Bandits is a great new book about two kids working together saving an insect museum. As you’d expect, its chock full of cool bug facts and adorable drawings, but one of my favorite parts of this book is that the kids hatch a Home Alone type strategy to defend the museum from would be thieves. (But it also manages to make it feel much safer than that the absurd stuff they do in the movies.) I have met very few kids who weren’t taken in by the over the top hijinks of Home Alone and it was such a brilliant idea to pair it with something like a bug museum (more properly called an Insectarium!) which could have ended up feeling very academic. The chapters count down to the impending heist in a way that keeps the pace moving all while teaching us tons of bug science. Did you know a group of butterflies is called a kaleidoscope? There are also some great underlying themes about being yourself and friendship that will resonate with a middle grade reader. This would make a fun read aloud too! Perfect for bug obsessed kids, but also for kids who aren’t so sure about bugs… just waiting to become bug obsessed!
kid review: I liked this book because the kids outsmarted the adults. Kermit the iguana was the best character. I also liked the boa constrictor. I like how its based off of a true story.
Lesson:
I just couldn’t help myself and came up with two lessons for this book! There is a great educator guide with more suggestions too!
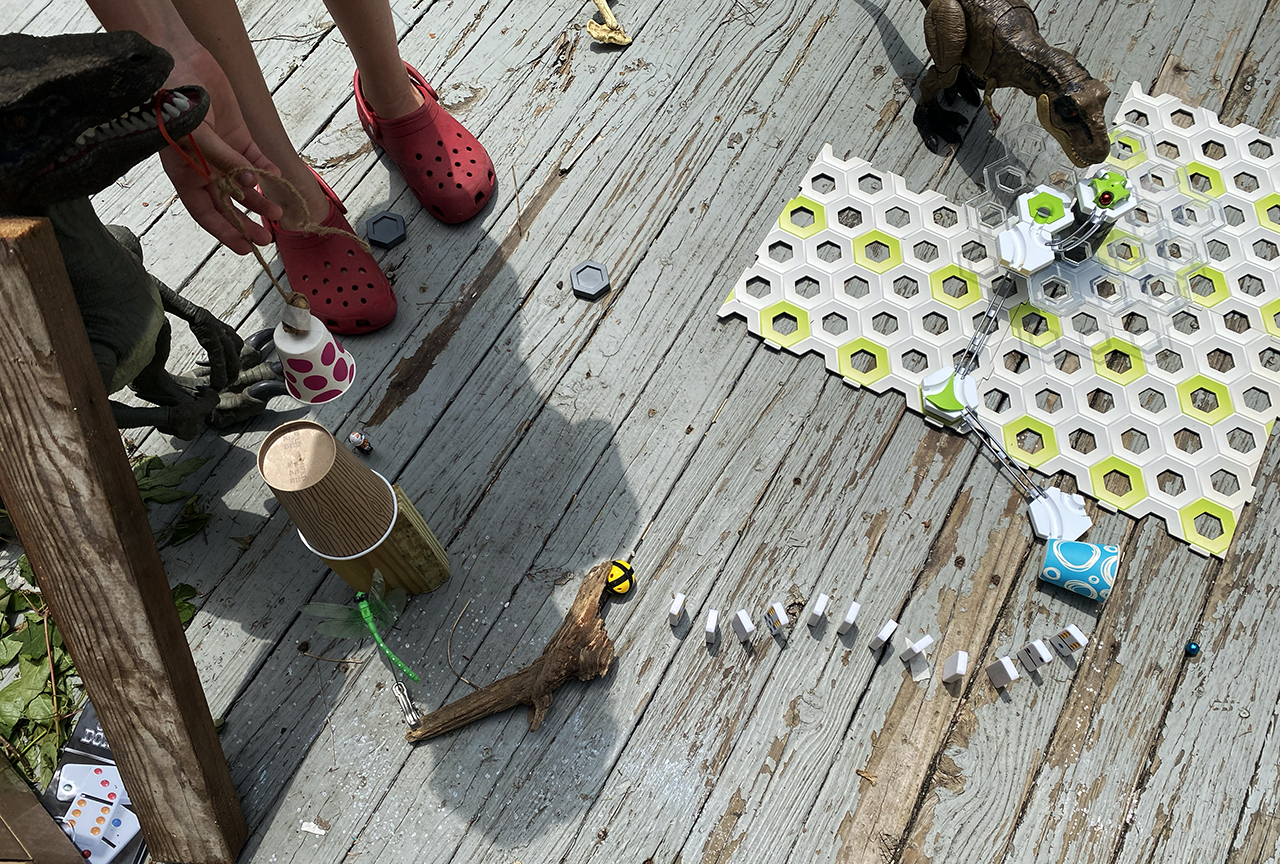
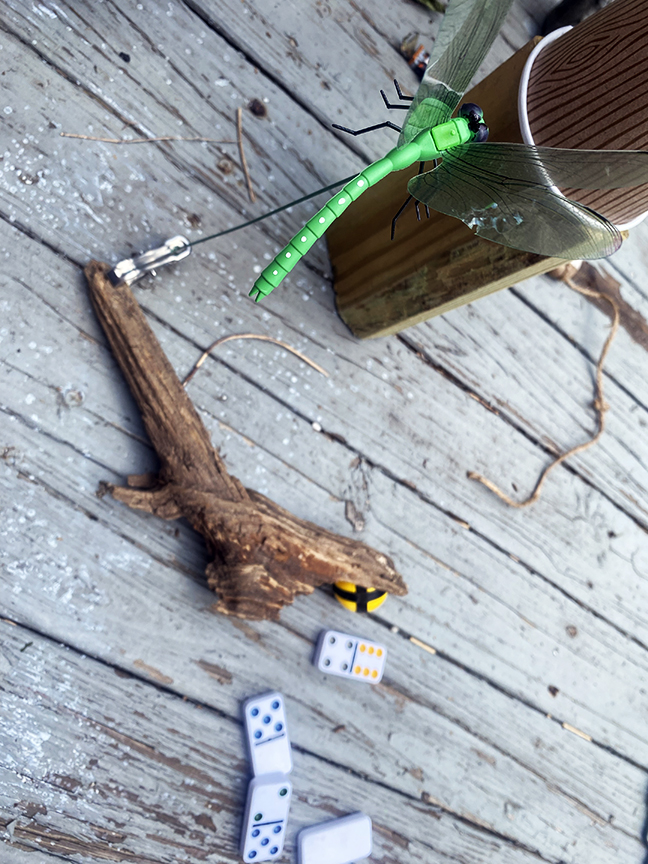
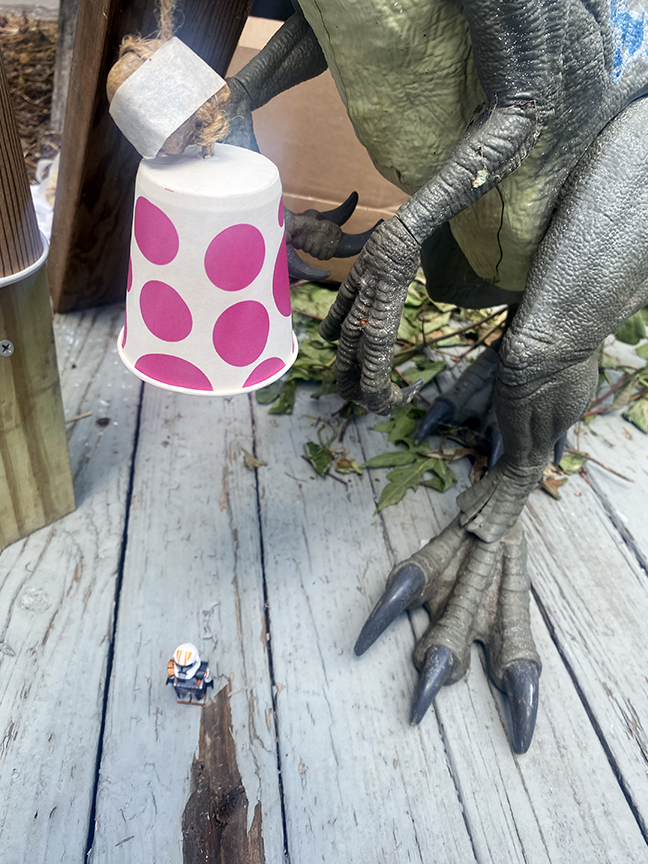
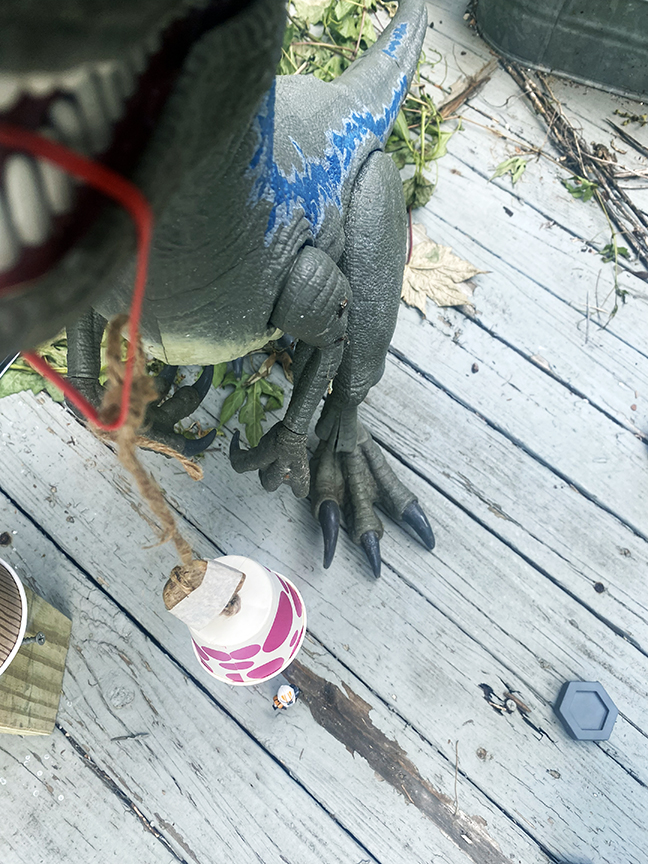
Rube Goldberg Bug Defense Traps
“But what if we mimic animal defensev mechanisms in our booby traps? Now that is a tactic I know about.” pg 136
One of my favorite things about this book were the over top the “Home Alone” style traps the kids concocted based on bug defense strategies. Aside from the fact that this has NGSS alignment all over it, (1-LS1-1.Use materials to design a solution to a human problem by mimicking how plants and/or animals use their external parts to help them survive, grow, and meet their needs.) it’s just fun. We decided to scale it down a little and make rube goldberg machines that relied on bug defense strategies to catch a lego character. (Anyone else having Mousetrap flashbacks??) I did this with my kid, but it would also be great in small groups. It’s harder to get all this things to work that it seems so make sure to allot a good chunk of time for it. We started off by watching a ton of rube goldberg machine videos on youtube for inspiration and I recommend doing some sort of research to get the ideas flowing. Here is the list of potential bug defenses from the book, you can probably think of more too!
- ants: play dead, abdomens can explode (exploding pieces can trigger the next step in the machine)
- stick insects: camouflage, spikes on body, toxic to eat (spiky pieces can connect to the next step in the machine. If you are generous this could be dominos)
- bombardier beetles: explosions to defend themselves, sprays chemicals (a baking soda/ vinegar or other simple reaction is a fun machine trigger- we did ours in a balloon so it also exploded)
- scorpion: stinger & pincers (pinching elements)
- snails: slime protection (you can use all manner of slimey things to trigger steps in the machine)
- millipede: curl into a tight ball (curling and uncurling elements can trigger the machine)
- mantis: camouflage (I can’t think of a way for this to trigger a reaction, but could certainlty be a part of the way the machine works. Maybe that’s how you lure the stormtropper in!)
- blue morpho butterfly: appear/ disappear while flying because of coloring (tunnels or other elements that conceal the marble)
The more you think about it the more whacky ideas you can come up with!
Materials:
- cups, balls, sticks, random household junk, trash, rocks, cardboard, etc
- glue
- tape
- wire
- marble run (this is cheating a little, but we started with a toy marble run to get things going)
Method:
Spend some time researching both rube goldberg machines and bug defense strategies. Make lists of promising ideas that you want to try. The thing to remember about these types of projects is that not everything you try will work so you have to be prepared for things to go south. And you have to experiment and try again a different way when things don’t work. It’s a process not a destination.
Start assembling your machine. Generally it will go better if you work with gravity and start high and end low. Other than that you can do pretty much anything. Test every part of the reaction several times before you try to do it all at once.
Have fun!!
b
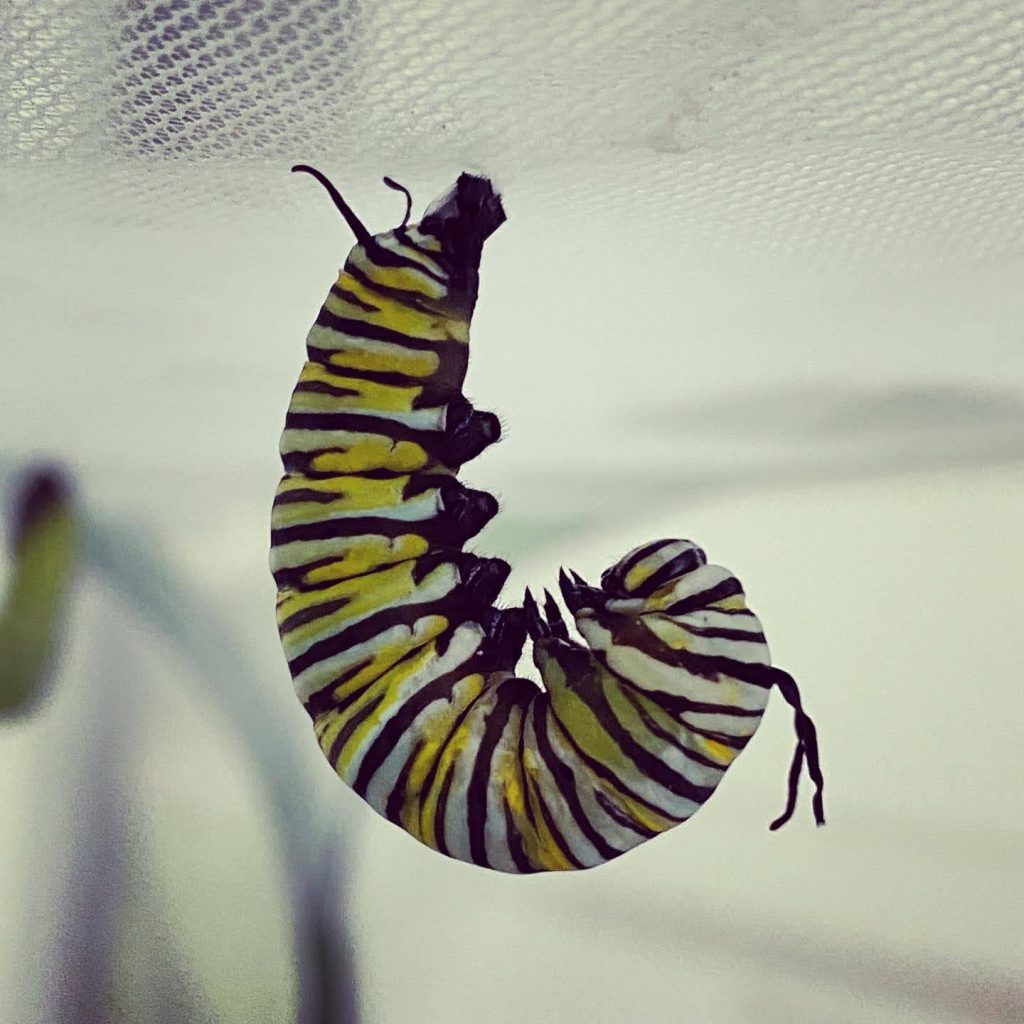
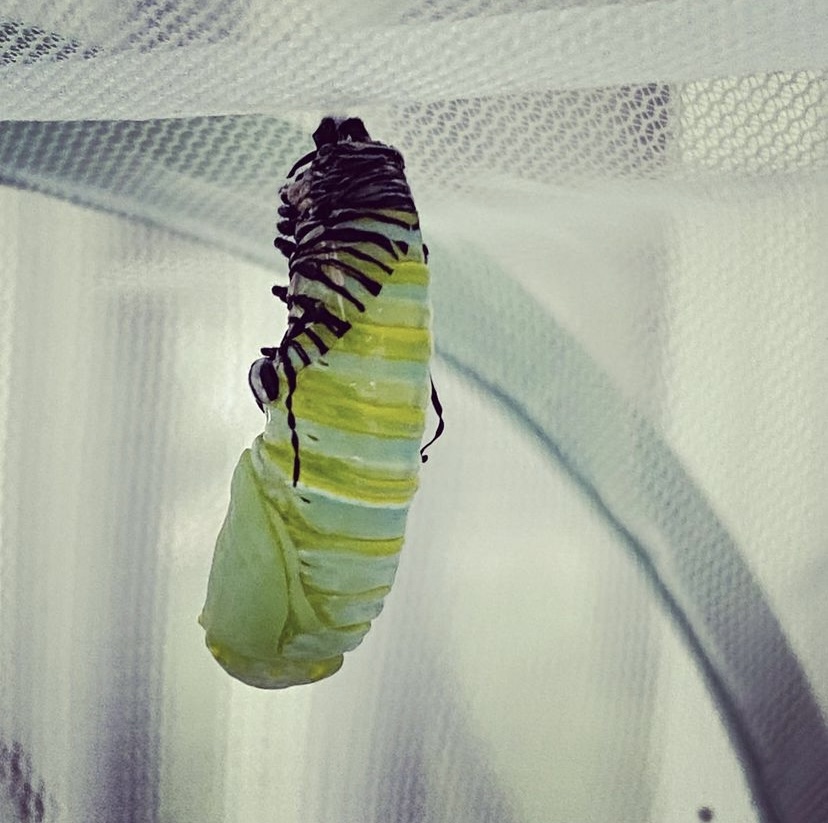
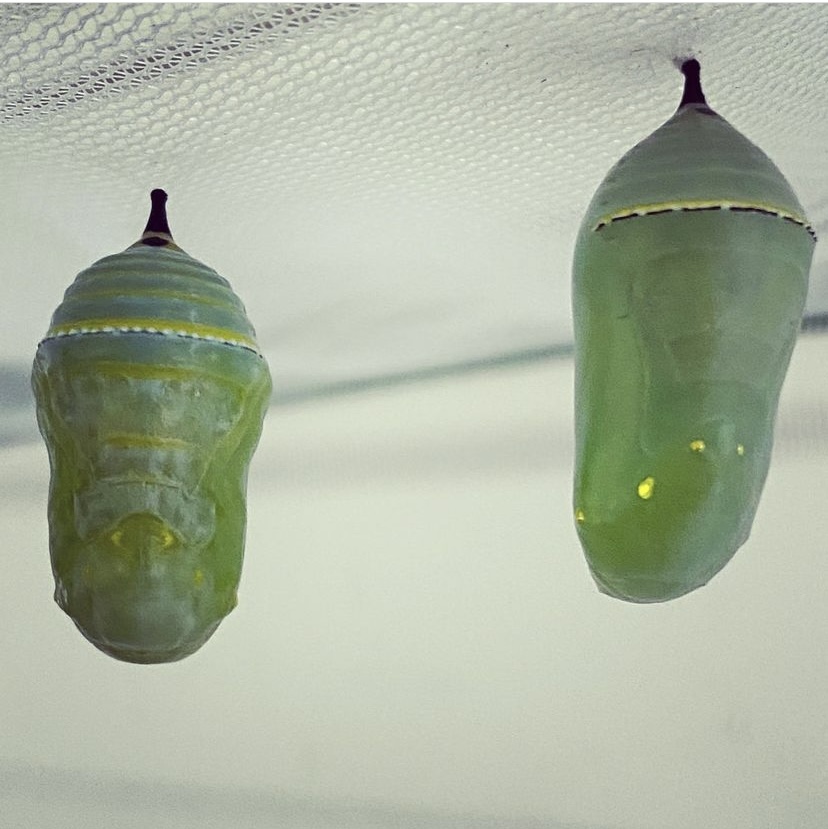
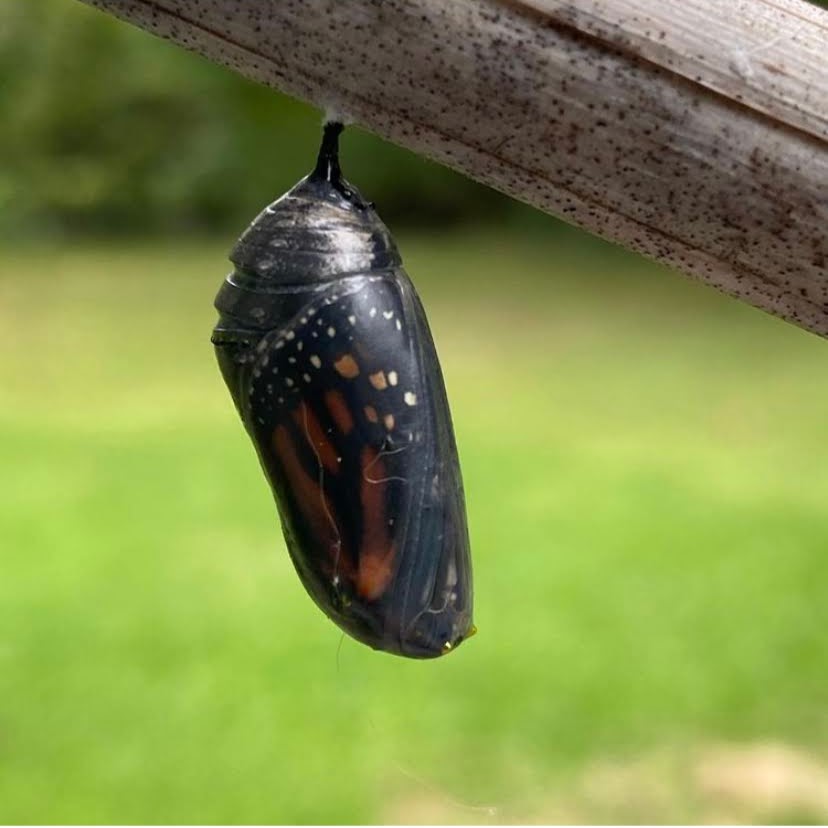
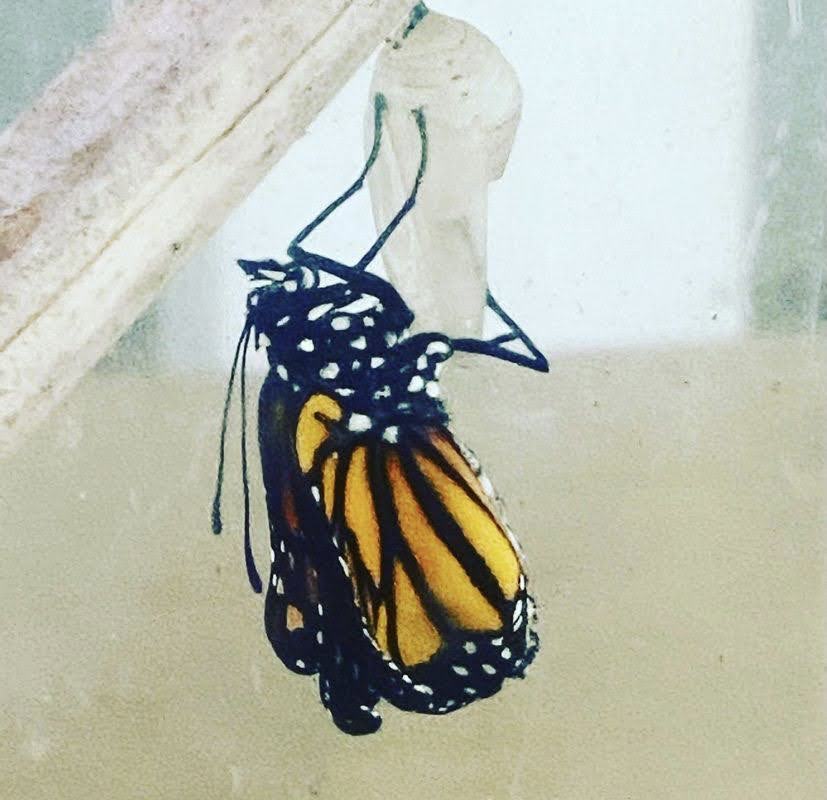
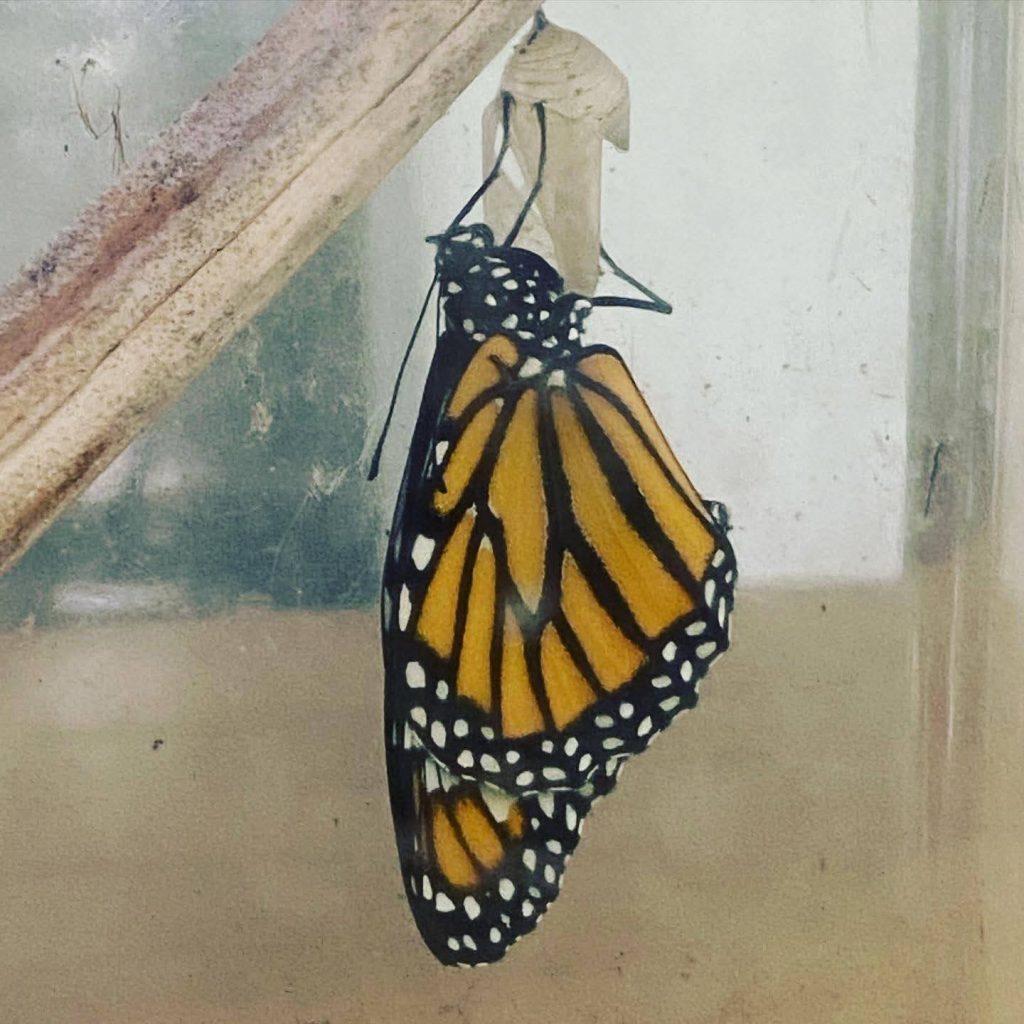
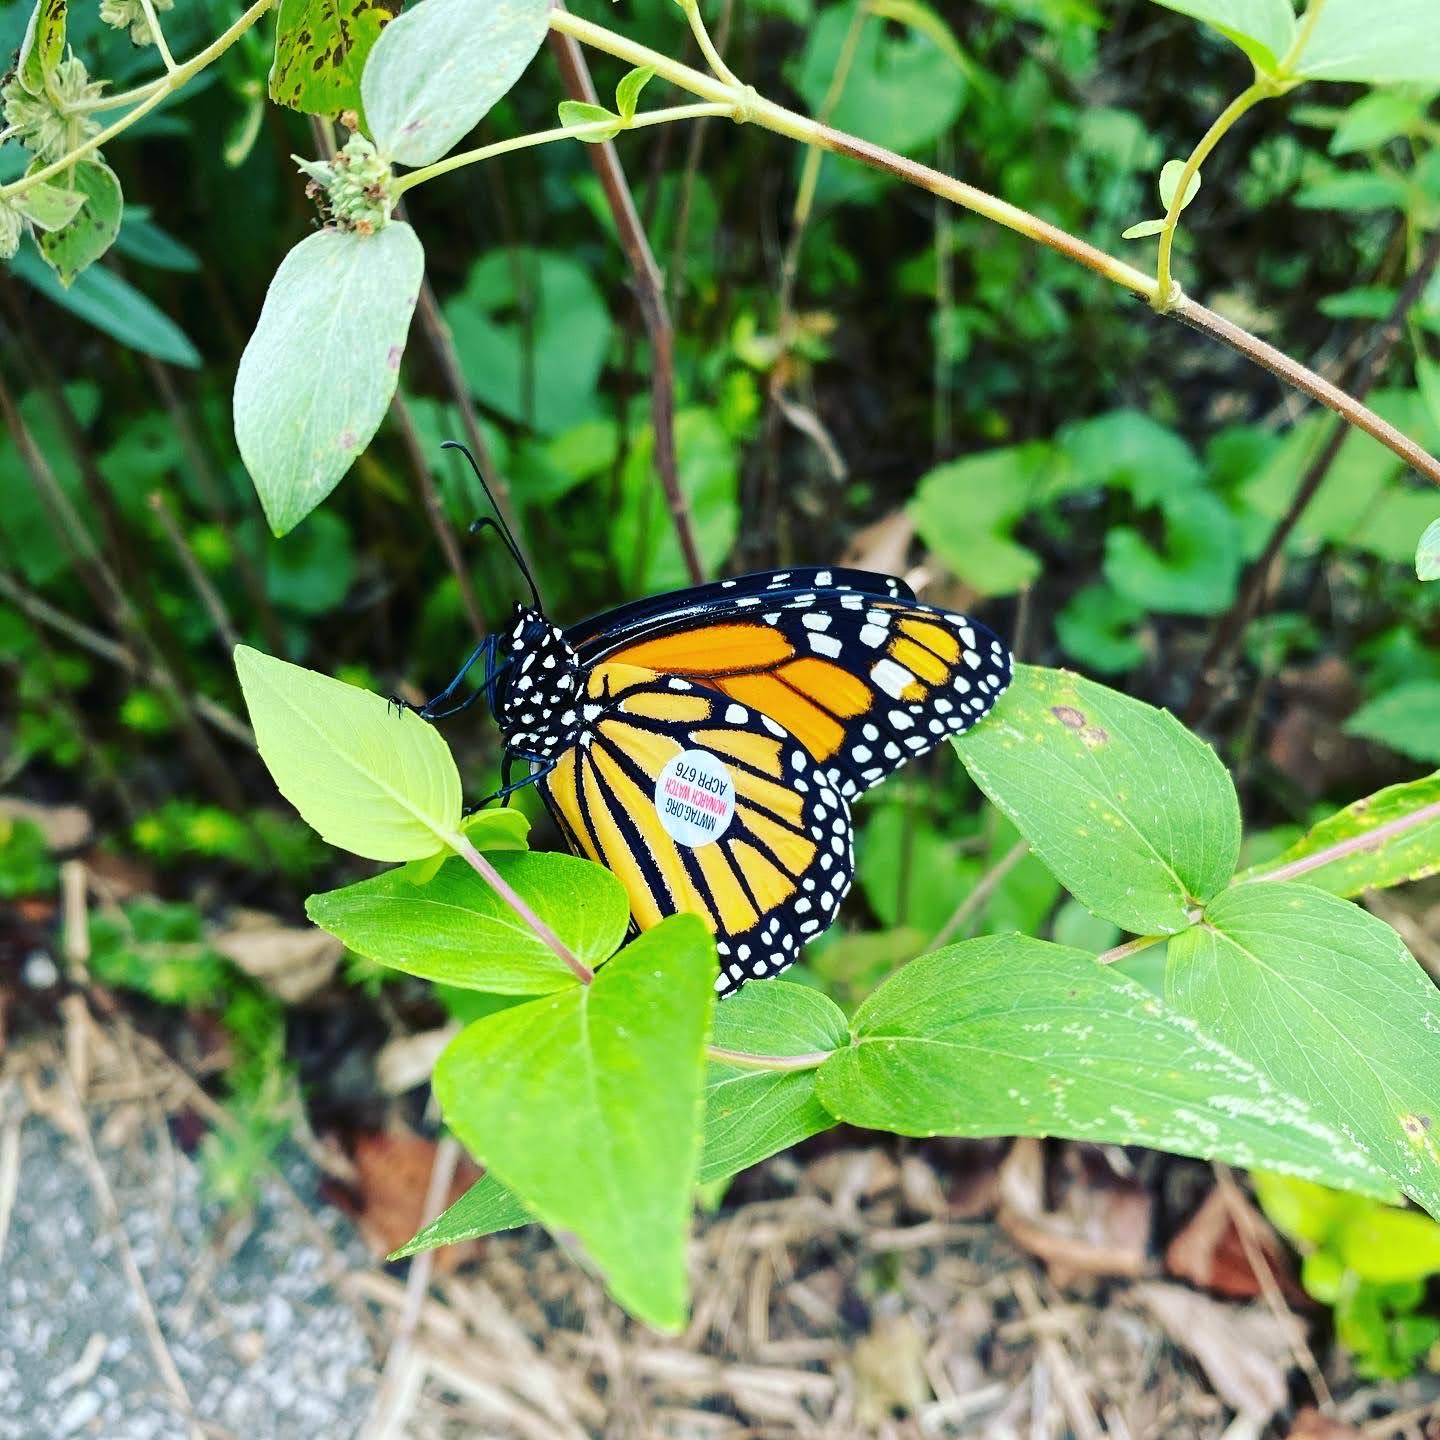
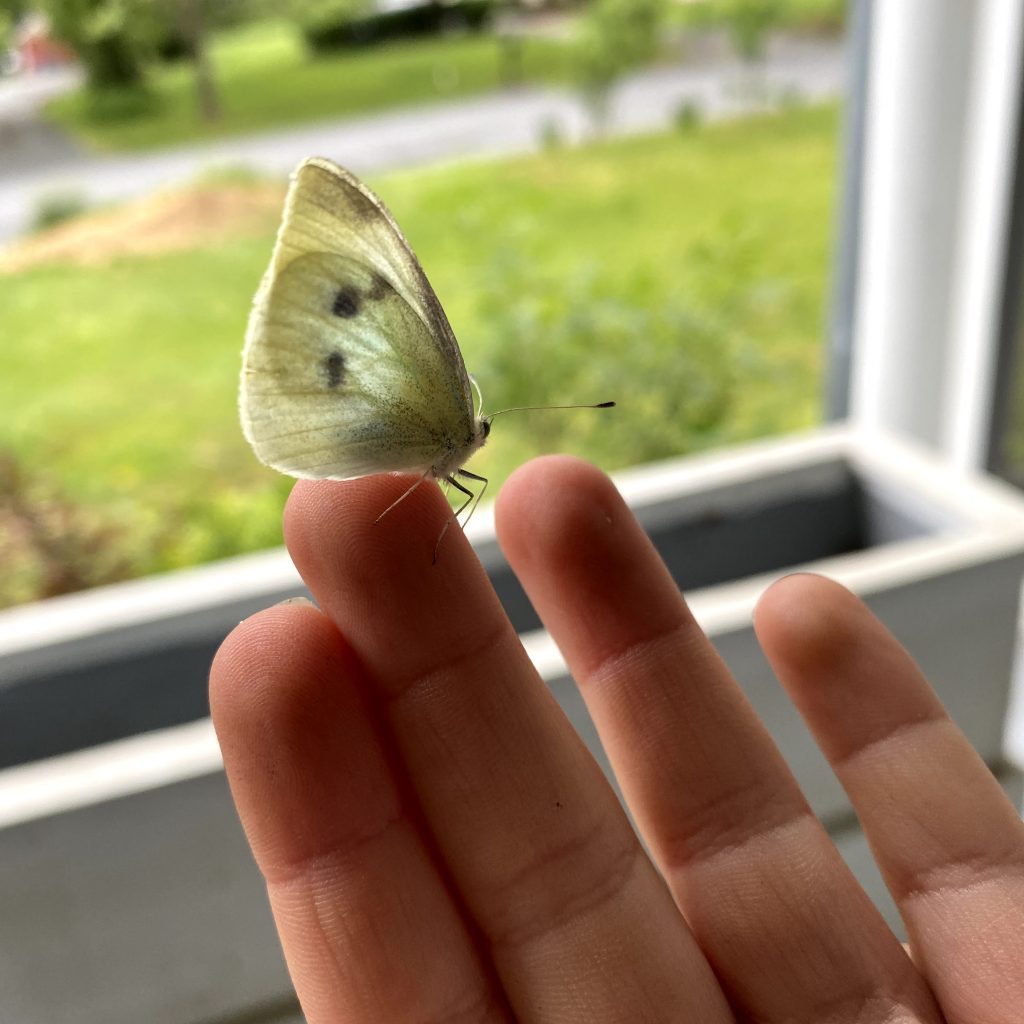
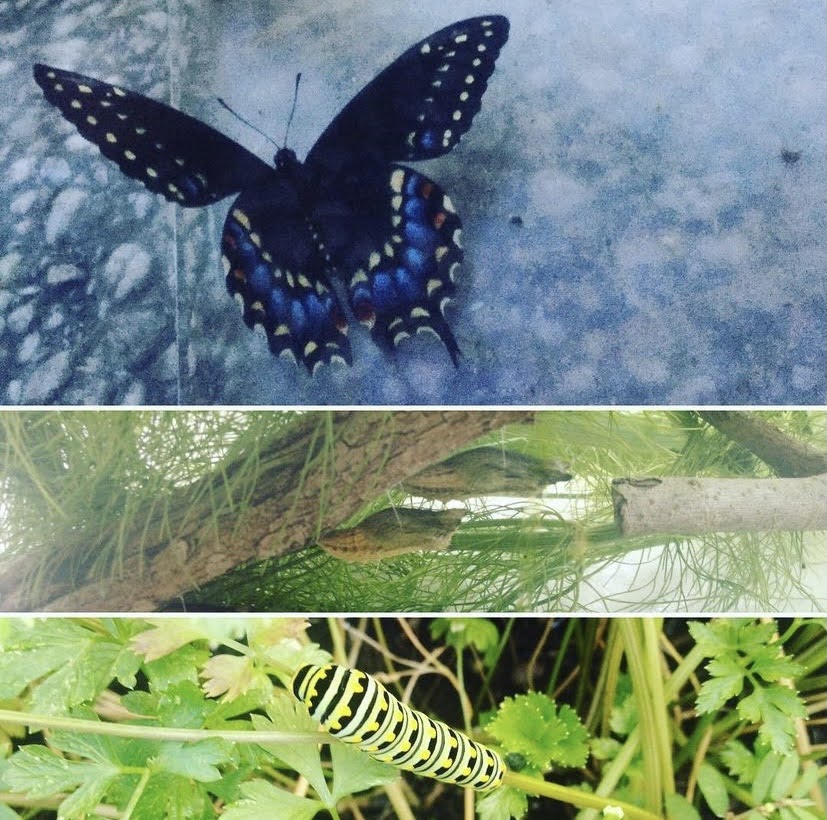
Raising Butterflies
“I’d love the chance to show even more people how amazing butterflies are and how important they are to the ecosystem.” pg 6
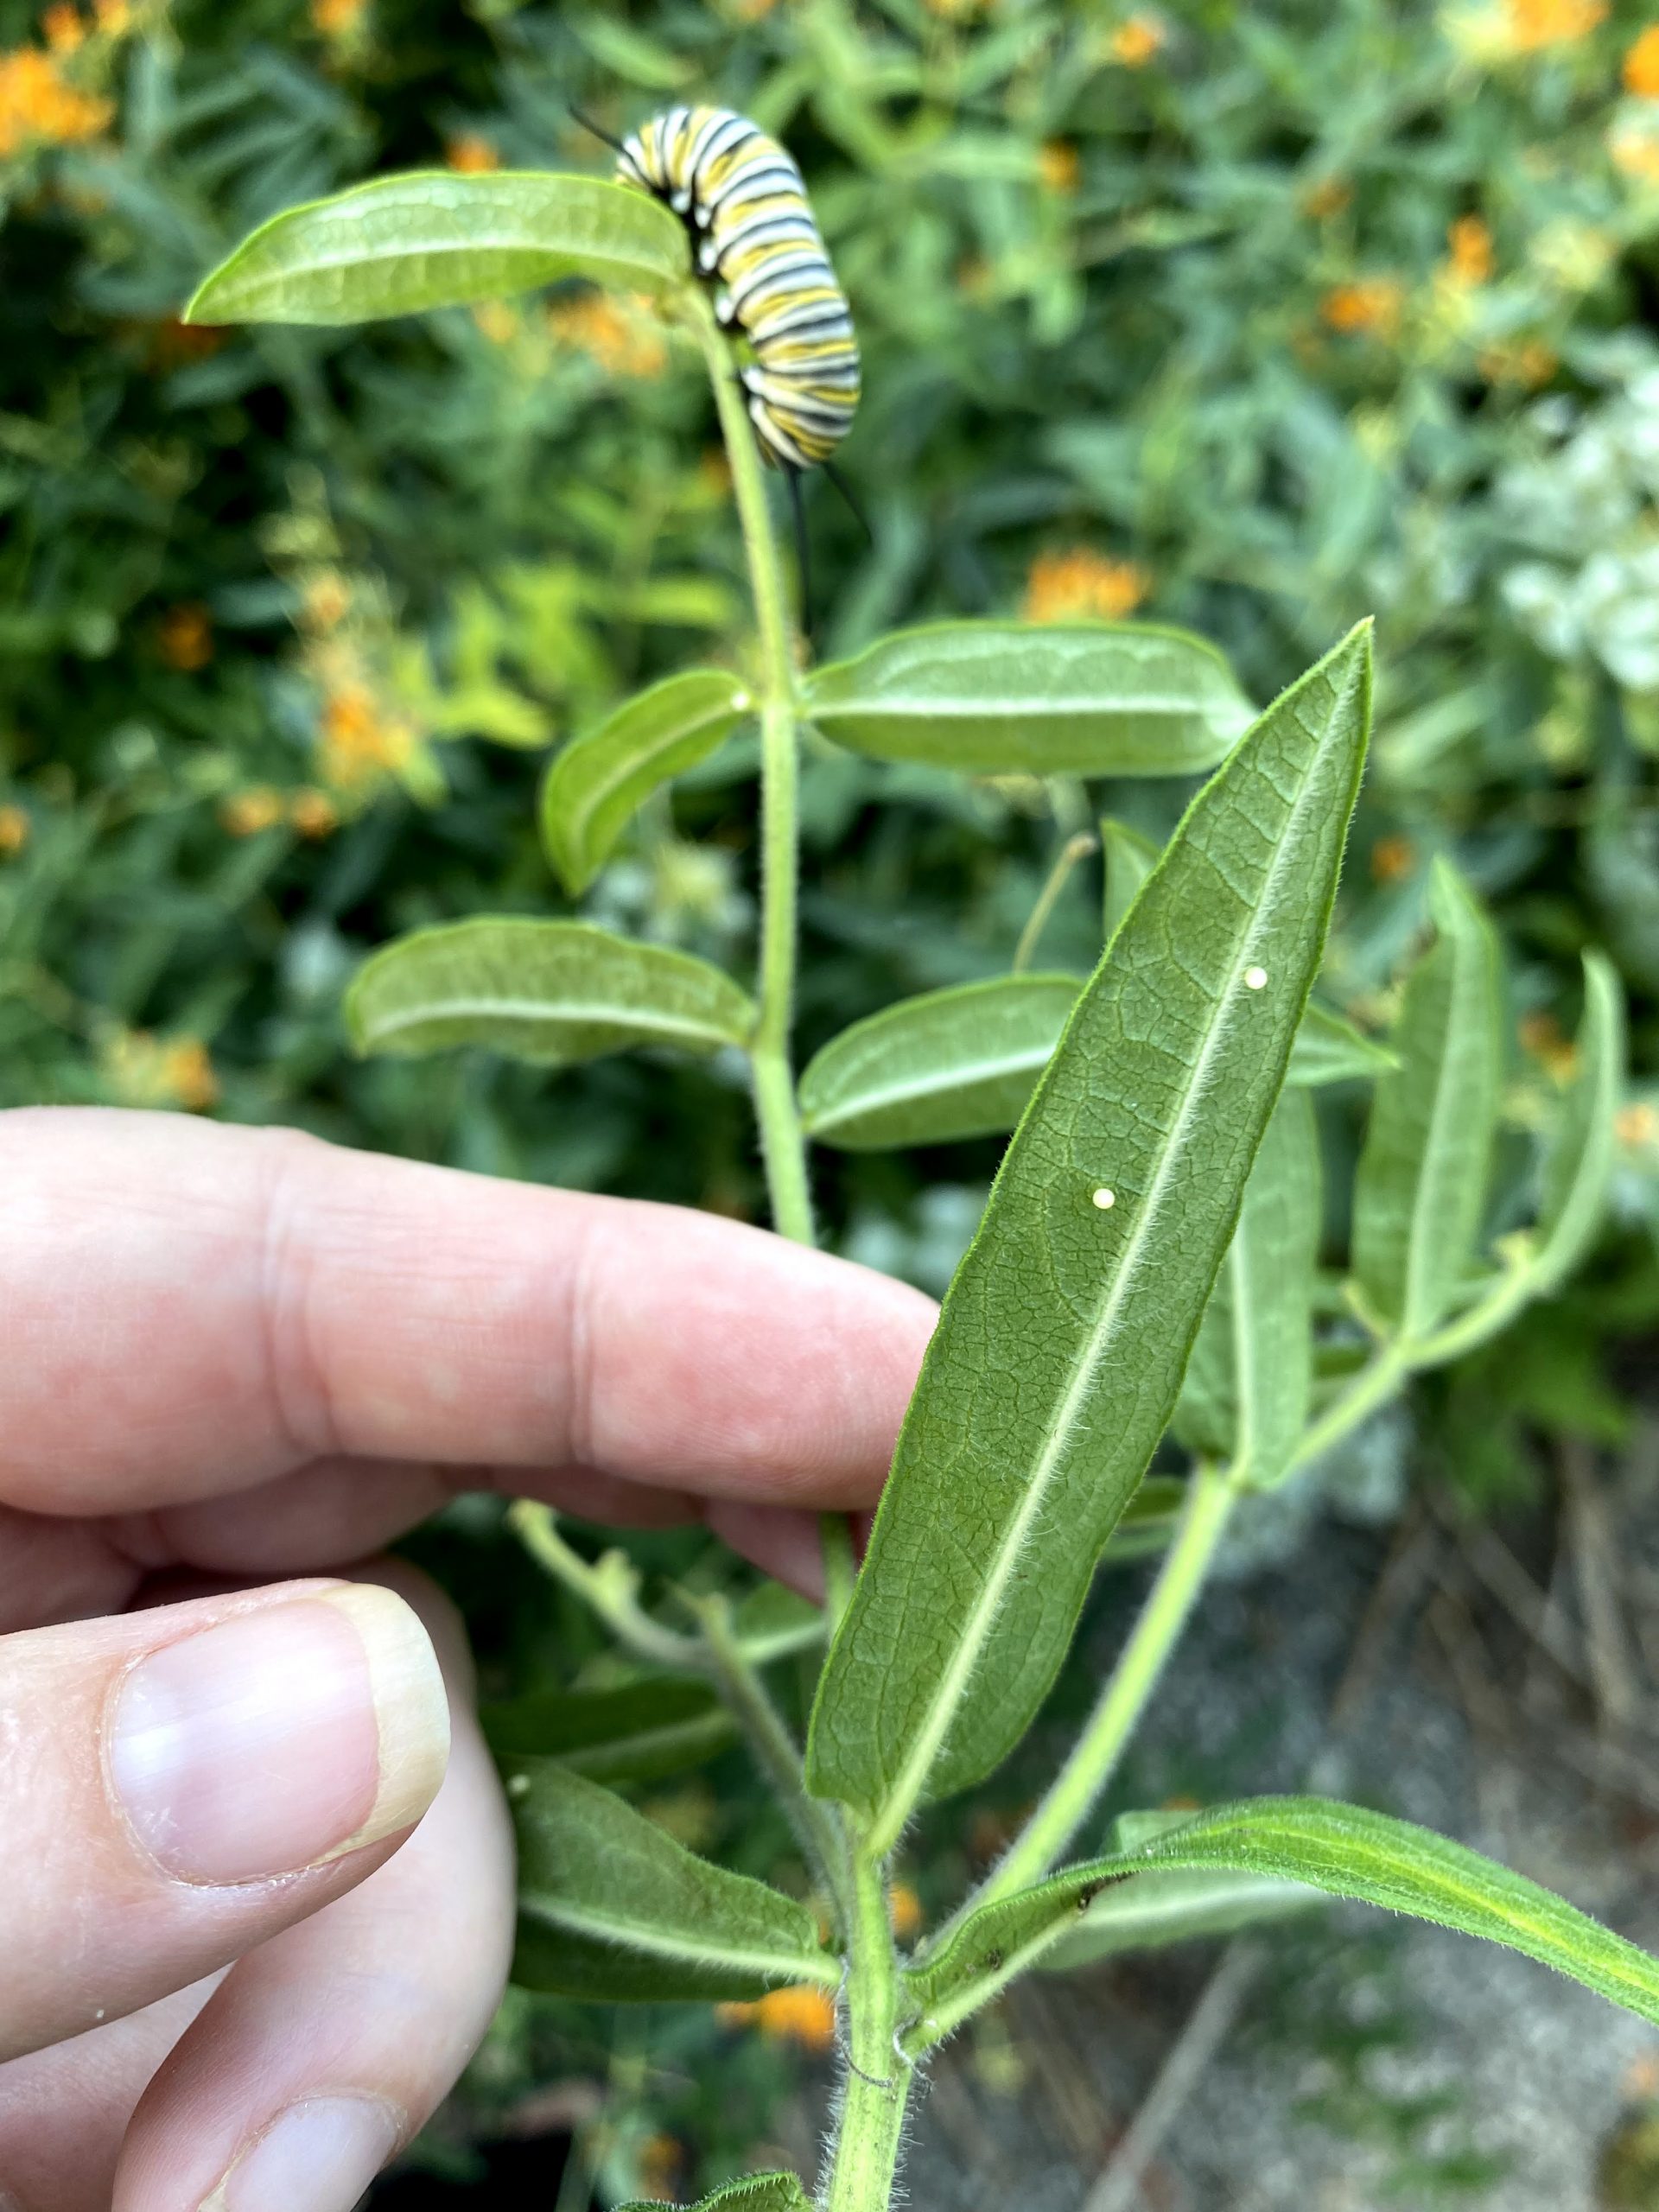
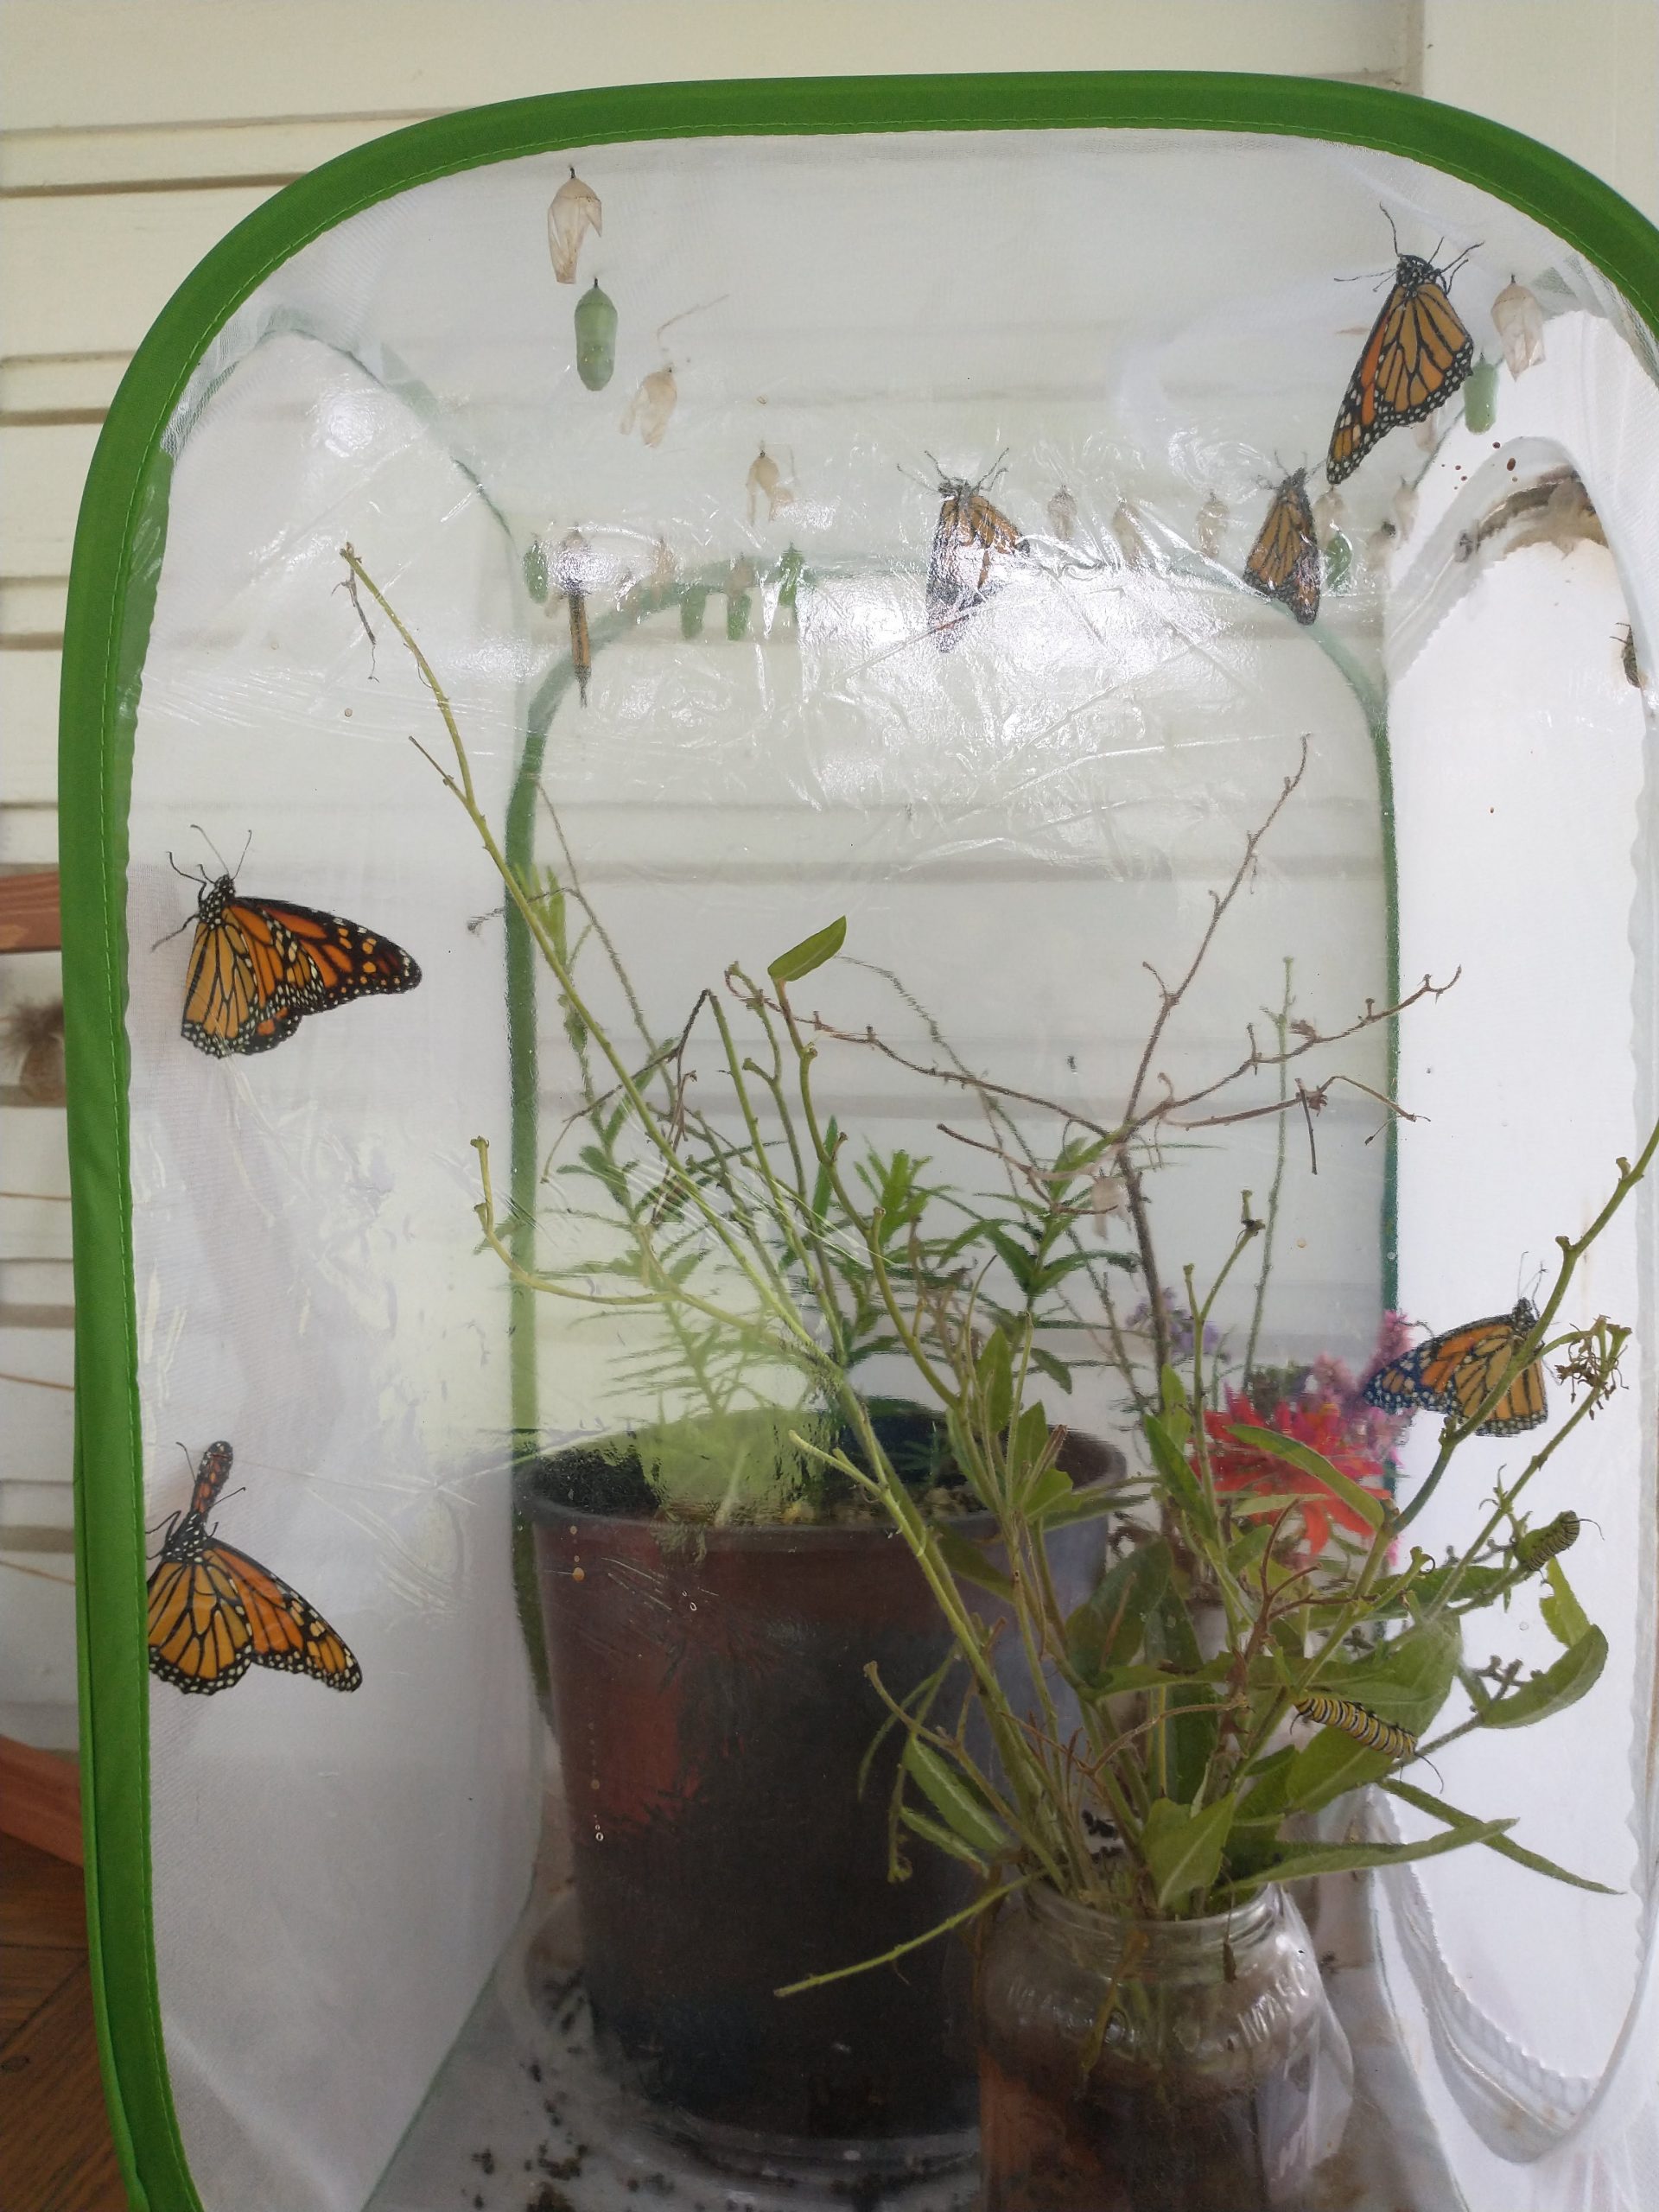
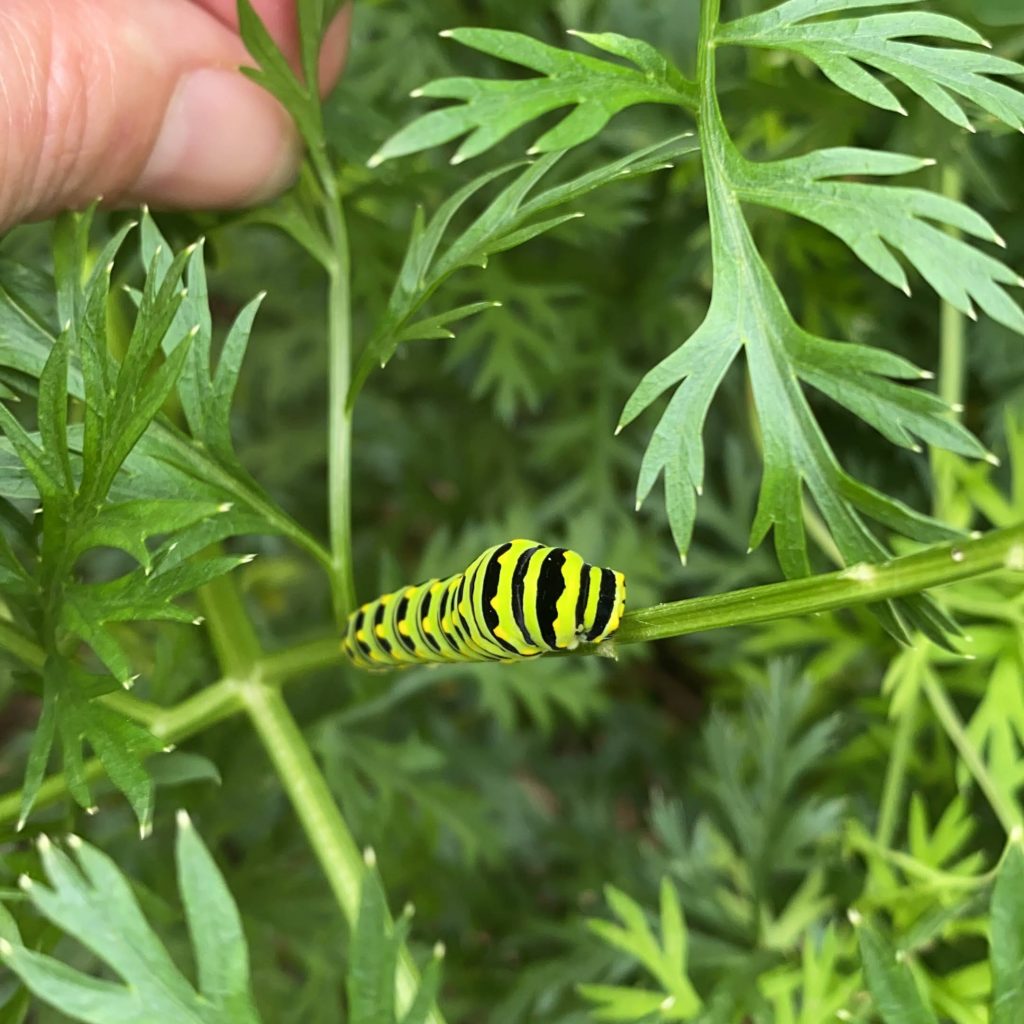
Raising butterflies is one of our most cherished family traditions. There is nothing like seeing your kids run outside to look for caterpillars and squeal with delight at finding them. (And my middle schooler still does, although he’d probably deny it now.) It is such a core experience that I have written it into a number of school curriculums too. I have raised more butterflies with students than I can even keep track of at this point. Do do it in your home or classroom, you’ll first need to figure out what butterflies are local and suitable. I don’t recommend ordering the mail order kits because while it’s easier, they tend to be fairly sickly specimens and especially in the case of monarchs it can be harmful to the wild population. That means you have to plant butterfly habitat in order to attract butterflies and caterpillars. That is more of a long term project and requires at least a little growing space, so alternatively, you can often find butterfly release events and raising classes at local nature centers and parks. We have raised both monarchs and eastern black swallowtails. Monarchs go from caterpillar to butterfly to release quite fast, making them one of the easiest to raise in a classroom setting. You absolutely need a large source of milkweed though because they will eat you out of house and home. I grow some in pots specifically for this purpose. The swallowtails overwinter in the chrysalis, so you have to let them be outside in a sheltered area all winter and then remember to check on them again as soon as it warms up. The most important thing to remember with any type of butterfly is to keep everything clean so you don’t spread disease. Once you determine what type of caterpillar you can find and feed outside, look up more specific instructions for care.
Materials:
- caterpillars (found in your yard and brought in)
- caterpillar food (this depends on the type you are raising)
- and enclosure (This is the one I like, you can fit a potted plant inside)
Method:
Because I’m not talking about a specific type of butterfly these are just general instructions to get you started. You will need to get specific information about the type of butterfly you have chose to raise.
First, you’ll need to plant lots of butterfly habitat and host plants in your yard. You can research what butterflies live in your area and what plants they prefer, you can even try to encourage a specific type by planting it’s favorite food.
Learn a little about the life cycle of your butterfly species so you know when to start looking for caterpillars. Start checking the undersides of leaves and look for plants that have been chomped on.
Once you find a few caterpillars, you can gently move them, and some of their food into the enclosure. Continue to feed them and clean out the frass (that is caterpillar for poop) until they have crawled to the top and made a chrysalis. (Most won’t need water, they will get it from their food)
Once the butterflies hatch, their wings will need to dry out and then they can be carefully released.
Crafts:
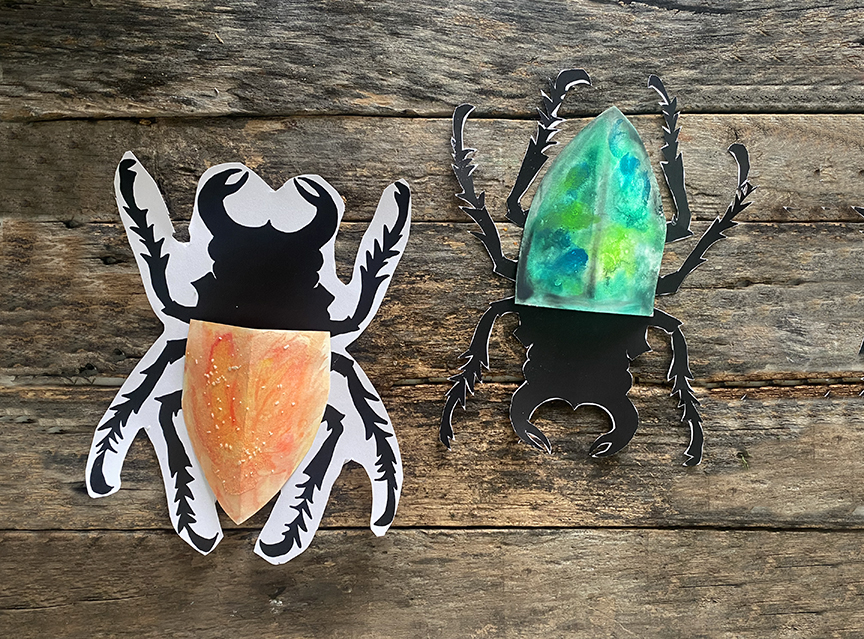
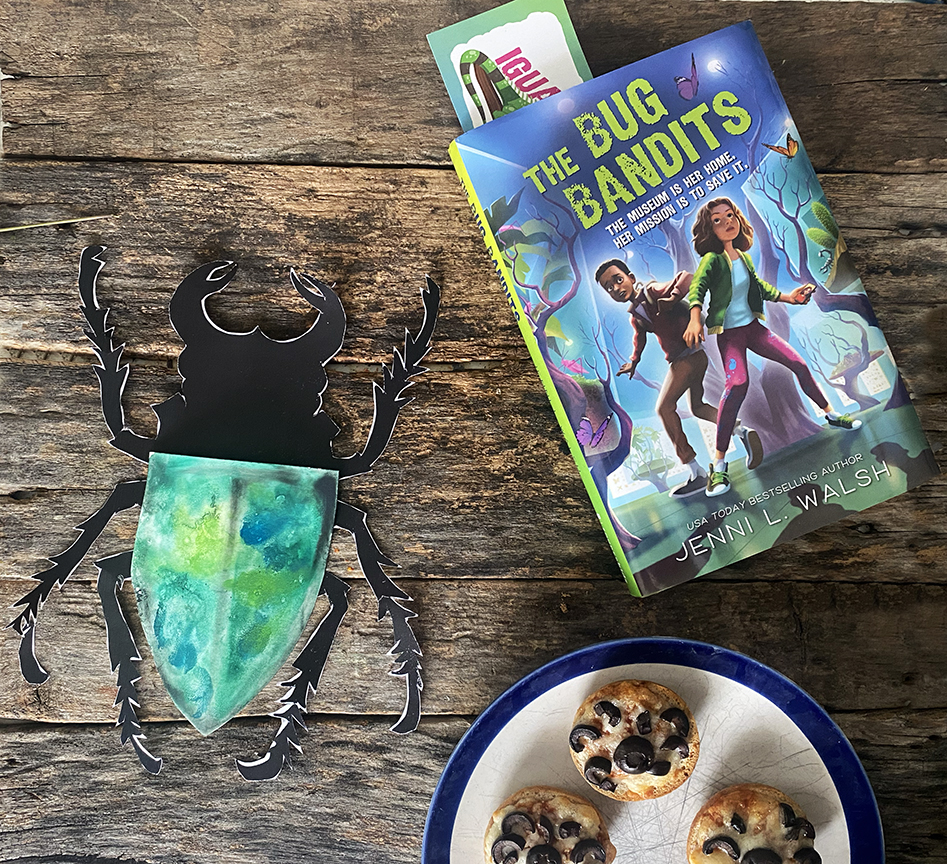
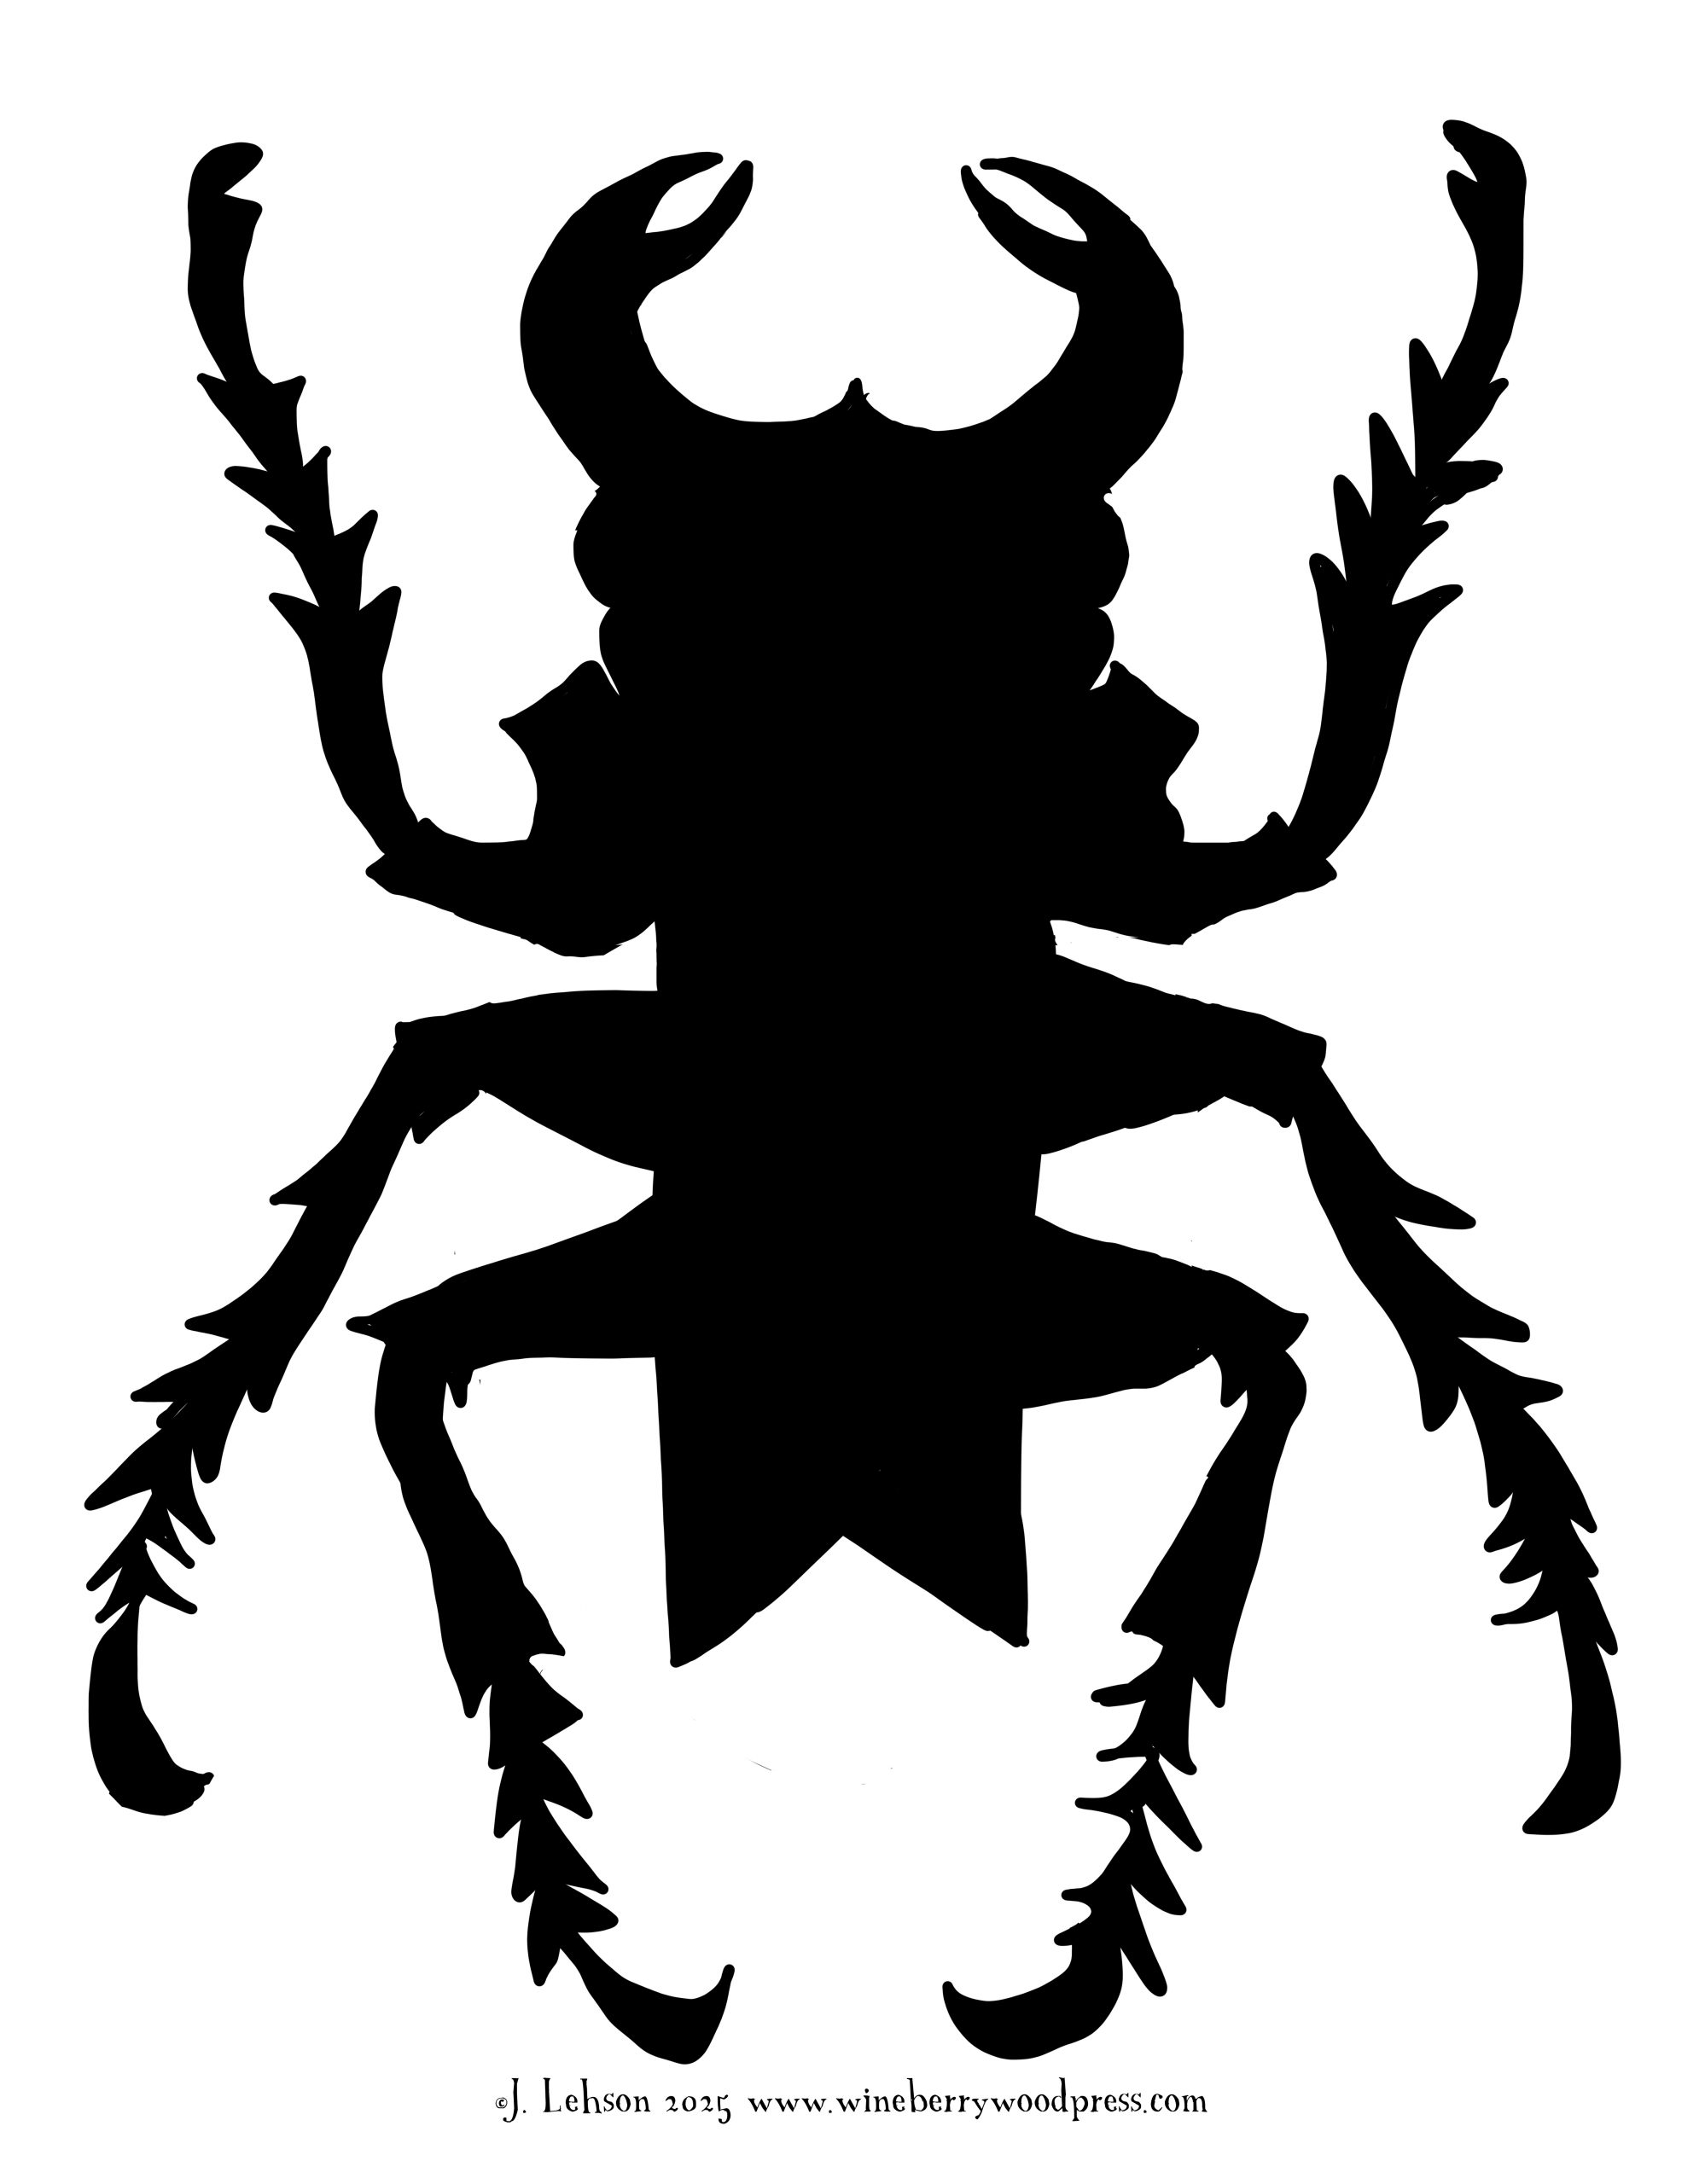
Ink Wash Beetles
“…a few female Hercules beetles. The beetles get to about seven inches long.” pg 30
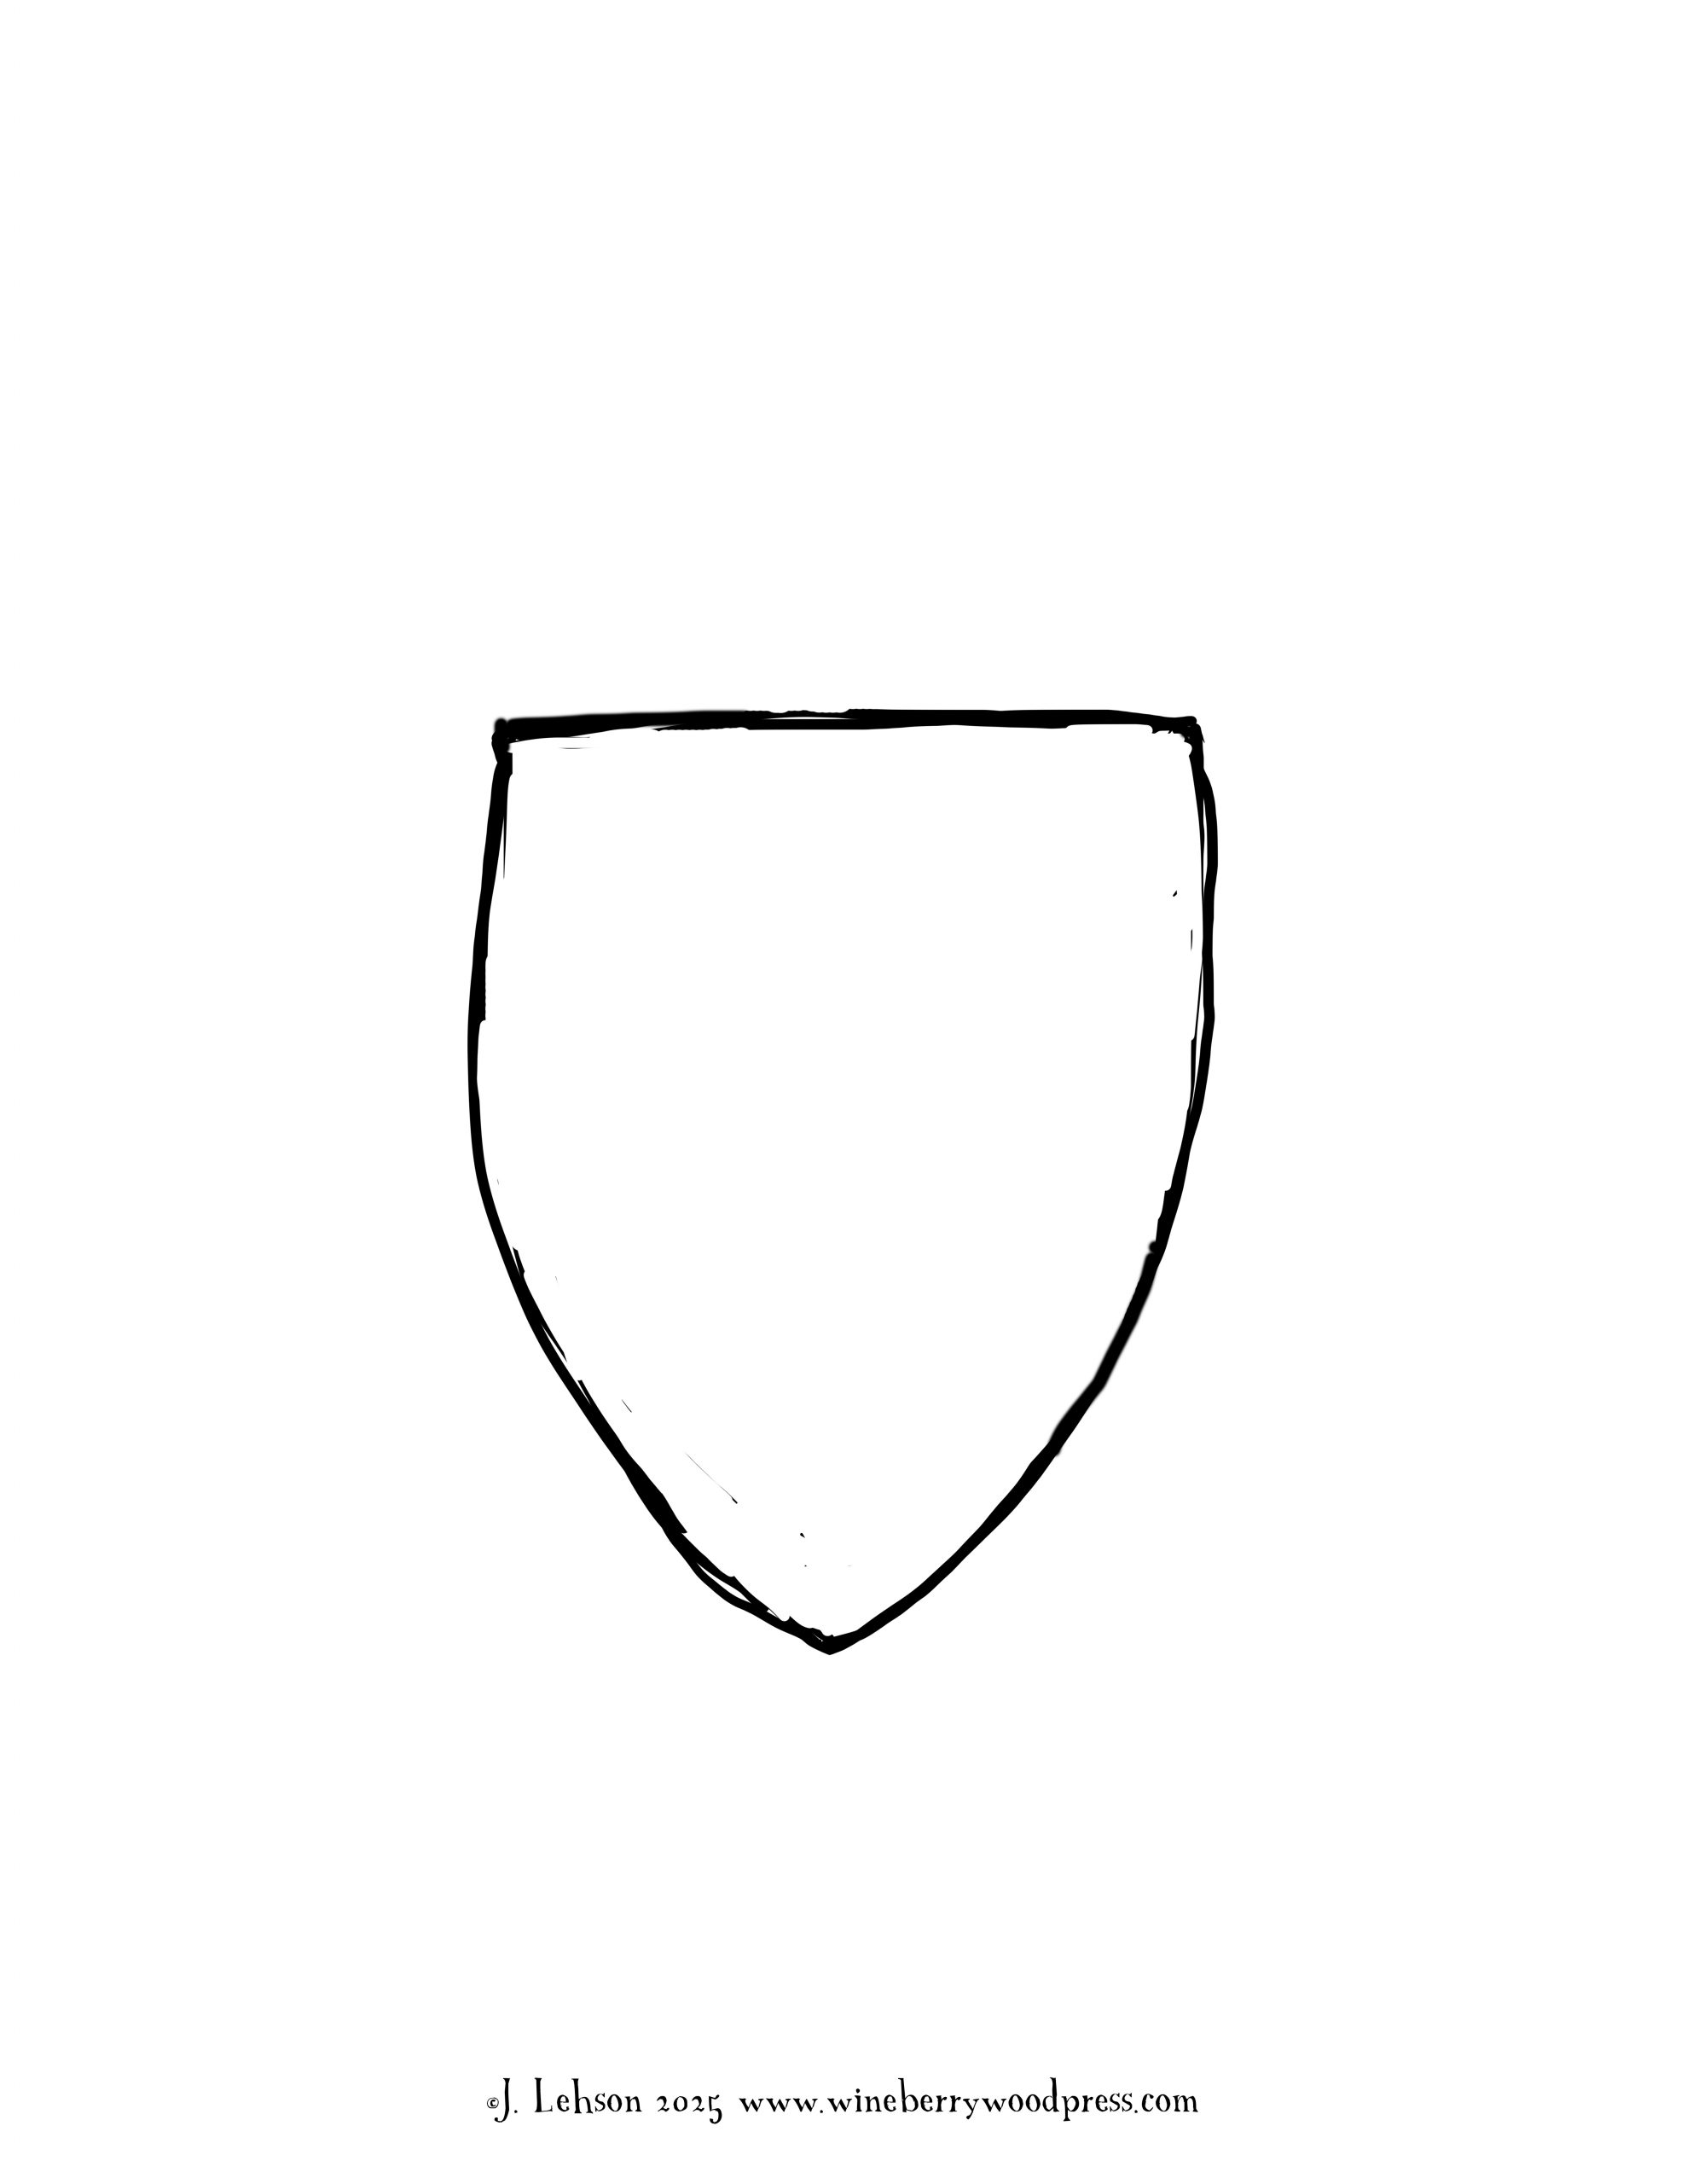
I love drawing beetles. I am always looking for an excuse to make more beetle drawings– they always look awesome. This project makes it super simple and is great for any age, preschool to adult. I have included a body template so that you can focus all your energy on that beautiful beetle shell, but older friends may want to draw their own body instead. If you draw your own body, you can make the beetles bigger- the template is sized to fit on a standard sheet of printer paper. I was originally inspired to make so called “ink beetles” because a common pigment used in red inks, cochineal, is actually made from beetle shells. Of course, there are beetles of just about every color though so let your imagination run wild.
Materials:
- watercolor paper
- shell template
- leg template
- scissors
- water
- watercolor paint (or ink)
- paintbrushes
- coarse salt (optional)
- gluestick
Method:
Use the shell template to cut out a shell (or shells) from watercolor paper.
Draw and cut out a body, or print and cut out the provided leg template.
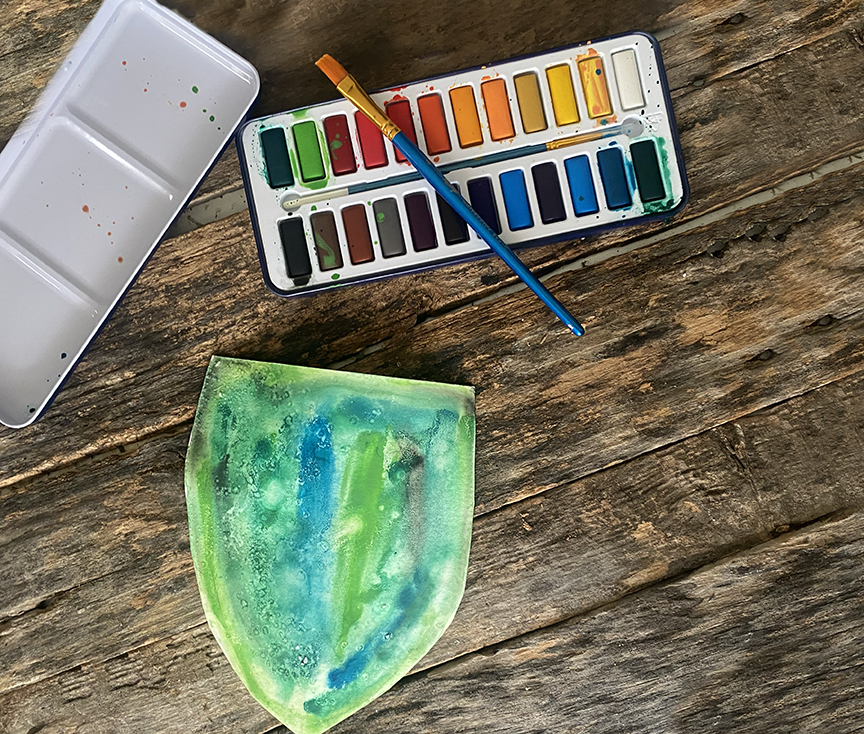
Place the shells on a work surface that can get messy and brush the whole surface of the paper liberally with water.
Use a smaller brush to drip and dab watercolor paint onto the already wet surface. It will bleed and run all over teh already wet surface. You can flick clear water onto spots of color to make them bleed more. Keep painting and dripping until you like the result. Use as many or as few colors as you like. Sprinkle some coarse salt over some areas and it will soak up the pigment to make a gravely texture.
Once you aree happy with your masterpiece, allow it to dry completely. This will probably take several hours to overnight.
Once dry, give the shell a slight crease down the center and then glue onto the body.
Snacks:

Spider Pizzas
“Spiders have a sixth sense. To be specific, they have a special sensory organ called the slit sensilla that allows them to judge the size, weight, and sometimes even the exact type of prey that’s caught in their webs.” pg 90
My kids will eat a nearly infinite quantity of mini bagel pizzas, making this snack a no brainer. It’s cute and looks like a spider, but not so much that it’s gross. Super easy, kids can do it themselves and perfect for a buggy snack.
Ingredients:
- your favorite mini bagel pizzas
- pitted black olives
Method:
Slice the black olives into rings, leaving the domed end as a semi circle. Cut the rings in half so you have sets of legs.
Put one domed end piece in the center of each pizza for the face. Then arrange eight “legs” around it.
Bake according to package instructions!